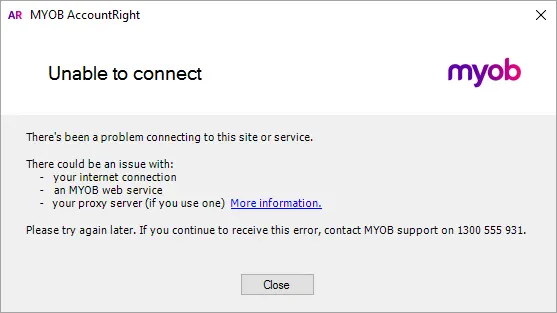
Some clients are currently experiencing issues receiving Bank Feeds in AccountRight and you'll see the 'unable to connect' error shown below. We apologise for the inconvenience, we’re looking into the cause right now and we realise how important it is to resolve it as quickly as possible. Thanks for your patience.
If the error persists, check our community forum to see if there are any system outages.

If you're getting a message like the 'unable to connect' one shown above when accessing bank feeds, your computer might be operating via a proxy server. If so, you'll need to modify a configuration file as described below. If you've done this, or you're not operating through a proxy server, it could mean there's an issue at our end. Try accessing your bank feeds again later. If the issue persists, contact us for help.
If you use a proxy server
If your business operates with a proxy server (if you're not sure, check with your network administrator), you'll need to modify an AccountRight configuration file to use AccountRight's online services, including:
accessing online company files
using Pay Super (Australia only), and
using bank feeds
We'll step you through how to find and update the required configuration file. This is probably best done by someone with an understanding of proxy servers, such as a network administrator or IT professional.
What needs updating?
Each computer that has AccountRight installed will need at least one configuration file updated.
If AccountRight is installed on... | update... |
|---|---|
a single computer connecting through a proxy server | that computer only |
multiple computers accessing a company file on a server | the server and each computer |
Depending on which AccountRight edition is installed (PC Edition or Server Edition), here are the files to be updated.
If using... | update... |
|---|---|
AccountRight PC Edition | Huxley.Application.exe.config |
AccountRight Server Edition | Huxley.Application.exe.config and Huxley.Server.WindowsService.exe.config |
Repeat after updating
After installing an AccountRight update, you'll need to repeat the file modifications as described below.
1. Locate the configuration files
Close AccountRight.
Open File Explorer (press WINDOWS+E).
Navigate to the AccountRight installation folder. This location depends on which AccountRight edition is installed.
If you have AccountRight PC Edition installed, the installation folder is here:
C:\Users<user.name>\AppData\Local\Programs\MYOB\AccountRightCan't see the AppData folder? In the address bar at the top of the window, type %localappdata%\Programs\MYOB and press Enter.
If you have AccountRight Server Edition installed, the installation folder is here:
C:\Program Files (x86)\MYOB\AccountRightServerEdition
Double-click to open the AccountRight installation folder (MYOB AccountRight 20XX.X or SE).
Locate the configuration file(s) to be modified. The PC Edition has one file which needs modifying, and the Server Edition has two.
If using | Locate |
|---|---|
AccountRight PC Edition | Huxley.Application.exe.config |
AccountRight Server Edition | Huxley.Application.exe.config Huxley.Server.WindowsService.exe.config |
2. Update the configuration files
The configuration file(s) identified in the previous task need to be modified to enter your proxy address and port information. Your system administrator will be able to provide these details.
Open the configuration file in Notepad (right-click the file and choose Open With then choose Notepad).
Update the file.
If you're modifying the file Huxley.Application.exe.config
Search for this line:
<defaultProxy useDefaultCredentials="true" />Replace this line with these 3 lines:
<defaultProxy useDefaultCredentials="true">
<proxy proxyaddress=http://PROXY_ADDRESS:PORT bypassonlocal="true" />
</defaultProxy>Save the changes.
Close the file.
If you're modifying the file Huxley.Server.WindowsService.exe.config:
Search for this line:
<proxy proxyaddress="http://PROXY_ADDRESS:PORT" bypassonlocal="True" />Replace PROXY_ADDRESS:PORT with the details of your proxy server.
Save the changes.
Close the file.
Save the configuration file.