If you're new to AccountRight, familiarise yourself with the tools that'll help you get the most out of your software.
A great way to explore features in AccountRight before you start entering your business data is to play with the sample data file, Clearwater. See Using the sample company file (Clearwater).
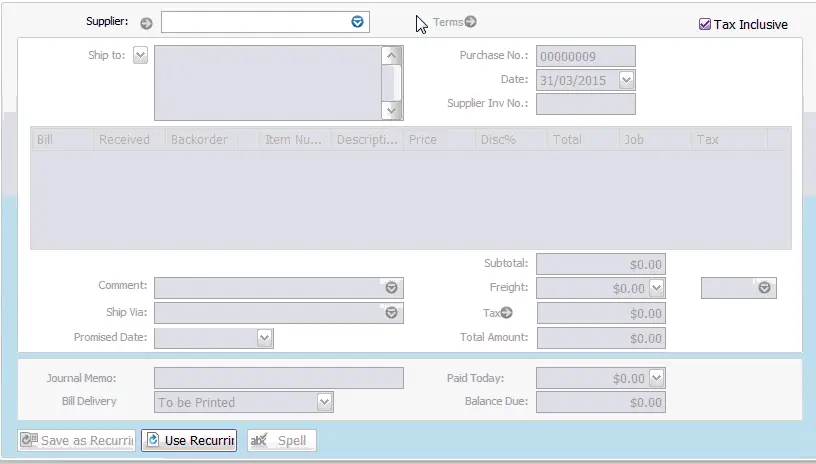
The command centre is your starting point
The command centre is AccountRight’s main window from which you can access most features. For example, here’s the Sales command centre in AccountRight Plus (Australia).

Each command centre contains a row of icons in the top section of the window. These icons allow you to switch between command centres.
The selected icon represents the current command centre, and the flowchart displayed below the icons illustrates the major tasks associated with that command centre. (For example, when the Sales icon is selected, tasks such as Enter Sales and Print/Email Statements—typical tasks you would complete in relation to sales—appear in the command centre’s flowchart.)
Handy options at the bottom of the command centre
There are five options at the bottom of each command centre. The options available from these menus are described below.
Select... | If you want to... |
|---|---|
To Do List | see what requires your attention, such as customers who have overdue payments, or stock that’s running low. |
Find Transactions | search for a transaction by its account, invoice number, card, job, or other details. |
Reports | view a list of the available reports. |
Sent Emails | view emails you've sent using AccountRight (not Outlook) |
Business Insights | view graphs and information about the current financial state of your business. |
There are two ways to select an option:
Click the menu name to display the window relevant to the command centre you are in.
Click the arrow ( ) next to the menu name and select from a list of the available options for all command centres (not just the command centre you are currently in).
How to tell if you're working online or offline
Features described below, such as status bar menu options Work Offline (Check Out) and Sync Company File, have been removed from AccountRight 2020.2 onward. See Important changes in AccountRight 2020.2 for more details.
The status bar menu appears in the AccountRight window just above your system tray. It shows you the state of company file and gives you options for managing the file.

For online files, the states are:
Online—This status appears when you open a file that’s online. All invited users can work with it. Note that if someone else has checked out the online file to work on it exclusively, you can view but not edit the file.
Offline (Checked Out)—This status appears when you have checked out the online file, enabling you to work offline. Other users can’t edit the online file.
Click the menu arrow next to the status to perform a task related to your file (some options are only available if you are an AccountRight Live administrator).

Work Offline (Check Out)—Check out a copy of the online file and lock the online file to prevent anyone entering changes while you have it checked out.
Undo Checkout (Discard Changes)—Discard any changes you have made offline. Other users will be able to work online with the company file.
Work Online (Check In)—Check in the file that you have worked on offline. Other users will be able to work online with the company file.
User Access—launches the User Access window, where you can add and edit company file users, or change online access to your company files.
Sync Company File—copies the online file to your computer, (first time) or updates your existing local copy with your changes since the last sync.
Enable/Disable Auto Sync—When Auto Sync is on, your local copy of the online company file is updated every 20 minutes when you’re working online. Without Auto-sync, you need to manually sync your changes.
For more information about these options, see Working online.
How to enter data faster
Easy ways to enter a date
The calendar simplifies date entry. For example, suppose you’re entering a sale and have promised the goods to the customer on the last Friday of the month. Rather than figuring out the date and entering it manually, you can display the calendar in the Promised Date field of the Sales window and click the date.
To display the calendar, click the arrow next to the date field or put the cursor in a date field and press the Spacebar on your keyboard. Select a date by clicking it. The selected date appears in the date field.
To close the calendar without selecting a date, press Esc.
Don't want to use the calendar?
Tab through to a date field, then use the up/down/left/right keyboard arrows to change the day, month and year. You can also type dates using the keyboard.
Save time by using keyboard shortcuts
You can use keyboard shortcuts instead of your mouse to open windows, select buttons, menus and other options in AccountRight.
Use the Alt key
To select a button, menu or option, press the Alt key and then the shortcut letter that's assigned to the object you want to select. For example, when you press Alt in the Sales window, the Record button label will show the letter o underlined. This means that if you press Alt and the letter o (Alt+o) the sale will be recorded.
Use the Ctrl key
You can open windows, select menu options and access Windows features using the Ctrl key and a shortcut letter. We've listed the more common shortcut key combinations in the table below.
Here's a shortcut you can use when searching for something in a list (such as in the Reconcile Accounts window). Click in the list and then press Ctrl+Shift+F. Type your search term in the search field that appears, and the list will show the rows that have matching text.
File menu
New (Company File) | CTRL+N |
Open | CTRL+O |
Close Window | ESC |
CTRL+P |
Edit menu
Undo | CTRL+Z or ALT+BACKSPACE |
Cut | CTRL+X or SHIFT+DELETE |
Copy | CTRL+C or CTRL+INSERT |
Paste | CTRL+V or SHIFT+INSERT |
Select All | CTRL+A |
Select from List | CTRL+L |
Recap Transaction | CTRL+R |
Delete Line | CTRL+SHIFT+D |
Insert Blank Line | CTRL+SHIFT+L |
Insert Transaction Line | CTRL+SHIFT+I |
Insert Header | CTRL+SHIFT+R |
Insert Subtotal | CTRL+SHIFT+S |
Command Centres (All)
To Do List | CTRL+T |
Find Transactions | CTRL+Y |
Command Centres > Accounts
Command Centre | CTRL+1 |
Record Journal Entry | CTRL+G |
Command Centres > Banking
Command Centre | CTRL+2 |
Bank Register | CTRL+K |
Spend Money | CTRL+H |
Receive Money | CTRL+D |
Command Centres > Sales
Command Centre | CTRL+3 |
Enter Invoices | CTRL+J |
Receive Payments | CTRL+B |
Command Centres > Time Billing (Plus, Premier)
Command Centre | CTRL+4 |
Command Centres > Purchases (Not Basics)
Command Centre | CTRL+5 |
Enter Purchases | CTRL+E |
Pay Bills | CTRL+ M |
Command Centres > Payroll (Australia Plus and Premier only)
Command Centre | CTRL+6 |
Command Centres > Inventory (Not Basics)
Command Centre | CTRL+7 |
Command Centres > Card File
Command Centre | CTRL+8 |
Lists
Cards List | CTRL+F |
Reports
Index to Reports | CTRL+I |
Window
Refresh All | F5 |
Help
AccountRight Help | F1 |
We also support the following shortcut key combinations:
Close Window | CTRL+F4 |
Next Window | CTRL+F6 or CTRL+TAB |
Cycle Task | ALT+TAB or ALT+ESC |
Record transaction | ALT+O |
Use the built-in calculator
A pop-up calculator is available to simplify calculating and entering numeric data, including money amounts, item quantities and units. The calculator is available in every field where you may need to calculate an amount or total figure.
To display the calculator, click the arrow next to the numeric data field or press = (equals) or the Spacebar when the cursor is in a numeric data field. In the calculator, enter your calculation and then press Enter. The result appears in the numeric data field.
Access more features by right-clicking your mouse
You can right-click in a window to open a shortcut menu with options relevant to the window and to the field you're entering data in.
Mouse shortcuts are an easy way to erase a transaction, find transactions, or get help for a window.
If you're entering information in a text field, right-click options include Cut, Copy, Paste, Clear and Spelling.
How to find customers, items and other records
Easily find the customer, item or account you want
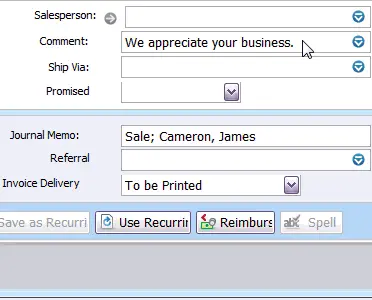
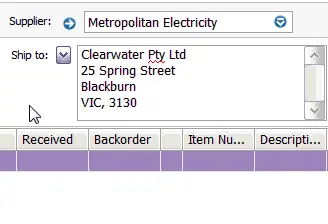
Search icons ( ) displayed next to various fields allow you to open selection lists containing records that you've previously entered, such as customers and shipping methods, or records provided by default.
Zoom arrows indicate which transactions can't be changed
Zoom arrows, displayed next to various fields, allow you to display more detailed information about a specific entry, such as a transaction or customer record.
A blue zoom arrow ( ) indicates that you can display more detailed information about a record and make changes to or delete it.
A grey zoom arrow ( ) allows you to display more detailed information, but the information cannot be changed. If you want to change the information, you can reverse the transaction and re-enter it (see Reversing a transaction). Alternatively, you can change your security preference selection to make all transactions changeable (see Set up preferences).
How to select multiple items from a list
Select columns allow you to select items from a list. There are two select icons: the Select icon for each entry in the list and the Select/Deselect All icon located at the top of the column.
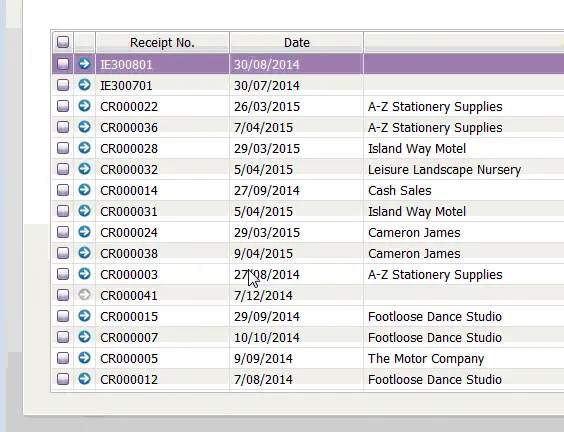
Select an item by clicking the Select icon next to it. You can select all listed items by clicking the Select/Deselect All icon, and deselect them by clicking the Select/Deselect All icon again.
Smarter ways to use AccountRight
Specify which days your business is open
You can use the business calendar to specify which days of the week your business is open, as well as holidays and important business events.
As well as being a handy reference, the business calendar affects the Contact Alert function in the To Do List. If you set a reminder to call a customer on a day that your business is indicated in the business calendar as being closed, the reminder will appear in the To Do List window on the business day before the task is due. For example, if a reminder is scheduled for Saturday but your business is closed on Saturdays, the reminder will appear in the To Do List window on Friday.
To set up your business calendar
Go to the Setup menu and choose Business Calendar. The Business Calendar window appears.
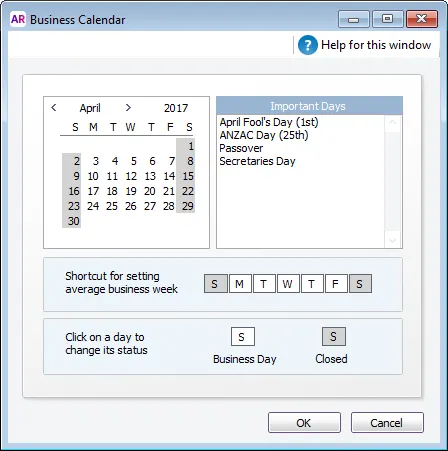
The current month is displayed in the calendar at the top of the window. Days that appear in grey are days when your business is closed.
If you want to mark a specific day as closed, click the date in the calendar.
If your business is always open or closed on a specific day of the week, click that day in the Shortcut for setting average business week section. A message will confirm that you are changing the day’s status.
Add any important events that occur during the month in the Important Days section.
If you want to enter information for other months in the business calendar, click the arrows at the top of the calendar.
Click OK to close the business calendar.

Set up your preferences. You can set AccountRight up to match how you like to work. For example, you can choose to automatically print invoices after recording them, or prevent users from editing transactions as well as many other options. See Set up preferences.