After personalising a form it's time to save it. Forms are saved within your company file and will be available to anyone with access to your file. If you want to use a form layout in another company file, export it and then import it to that file.
Want to preview the form before saving? Click the Print Preview tab to view the form as it will appear printed.
To save a personalised form
When you've finished customising your form, go to the File menu ( ) and click Save As. The Save Form As window appears:
If you created a new customised form, enter a name and a description for the form.
If you modified an existing custom form, do not change the default information in the window.
Click Save. The Form window reappears. The form will appear under the group of forms that the form was based on. For example, if you created a new form based on an existing item sales invoice, your form will appear under the Items group of the Invoices tab.
To close the form, go to the File menu ( ) and choose Exit.
Now that you've saved your personalised form, you can make it the default template to use when printing and emailing. It'll save you time when recording transactions.
To delete a personalised form
Go to the Setup menu and choose Customise Forms. Find the form that you personalised and saved, and then select it. A red X icon appears next to the form. Click the X to delete the form.

A red X won't appear next to the default forms provided with AccountRight, which can't be deleted.
FAQs
How do I set my customised form as the default form?
When you print or email a form, such as an invoice, you can choose which form to use.
If you are printing a form when you record the transaction:
Click Print then choose Select Another Form.
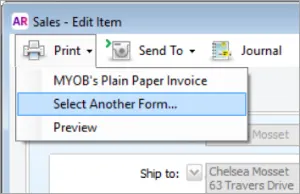
Select your customised form.
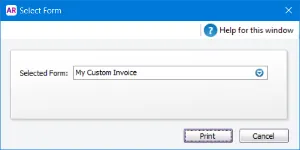
Click Print.


If you are emailing a form when you record the transaction:
Click Send To and choose Email.
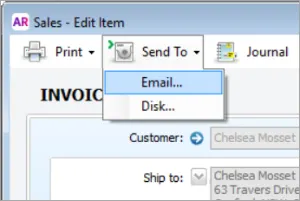
In the Selected Form field, select your customised form.
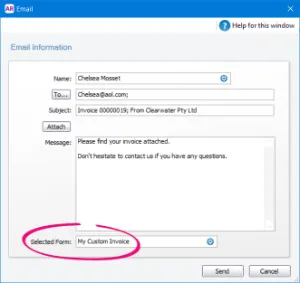
Click Send.


If you are printing or emailing a form after you record it:
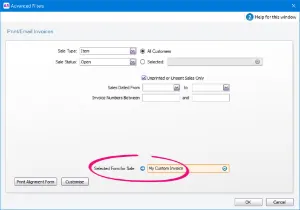
Select the form you want to use via the Advanced Filters on the Print/Email window.
For all the details, see Set the default forms to use when emailing or printing.

How do I rename a form?
To change the name of a form, open the form you want to rename and go to the File menu and click Save As. Enter the new name for the form and click Save.