If people in your office need to access AccountRight from multiple computers, and you’re not ready to store files online, you can host company files on your network server.
Once you set up your network as described below, all AccountRight updates will be downloaded and installed automatically — reducing network downtime.
There are two parts to setting up an AccountRight network:
set up the server (the computer that stores your company files), and
set up the clients (the workstation computers that access the company files).
First, check the system requirements then follow these guidelines below for our recommended setup.
If you need to deploy AccountRight using a group policy, you'll need to administer AccountRight using the AccountRight MSI installer.
Set up your server
The server is where you’ll store the company files you want to share with others on your network. This can be a dedicated computer that just sits in the corner of your office, or a PC that’s used throughout the day.
You can't store or share your company file from a NAS drive.
When nominating a computer as your server:
Your server should have hardware capable of handling lots of simultaneous updates by users on your network. If you’re already running hard disk-intensive processes on the PC, you’re better off choosing a different computer as your server.
The computer you set as the server needs to be on (not in sleep mode or hibernated) whenever someone in your office wants to access the files on it.
Important security information
AccountRight Server Edition will set up Windows Services, Windows Firewall rules and Windows shares that enable PCs on your local network to access company files stored on the server. However, remote access to company files is not supported, and for your security you should not edit the firewall rules that are set up for you by AccountRight. If you require remote access, you should store your company file online, or use a secure VPN service to access your network files.
Add-ons are also unable to connect to company files remotely. If you have issues with an add-on, please contact your add-on provider.
For information about the supported network and security configuration for AccountRight Server Edition and add-ons, see the AccountRight Server Edition technical notes.
1. Install AccountRight Server Edition on the server
AccountRight Server Edition installs networking components that enable other AccountRight computers to connect to it.
Download the latest Server Edition (AccountRight subscription is required). Once you've saved the installer to the server, double-click it to install AccountRight.
Need the AccountRight MSI installer? Grab it from myob.com/downloads. Also see the AccountRight MSI installation instructions.
2. Add company files to the AccountRight library
The company files you want to share with others on your network need to be stored in the AccountRight 'library'. The library is simply a predefined location on the server for storing company files. Learn more about AccountRight libraries.
By default this folder location is found on the server at c:\Public\Documents\MYOB\My AccountRight Files. This location is also referred to as “My Library” in some AccountRight windows.
You can change this location after installing AccountRight – look for the Set Library Location option in the Windows Start menu > MYOB folder.
When creating an AccountRight file on the server, or upgrading a Classic AccountRight file (v19 or earlier), you’ll be prompted to save it in the “My Library” location. Select this option to ensure other computers on your network can access the files.
Automatic updates
Once you've installed the AccountRight Server Edition, all updates will be downloaded and installed automatically.
Set up your client PCs
A client is a computer that doesn’t share its company files with others on the network. It just accesses AccountRight files stored on a server, online or locally.
Once you install the AccountRight PC Edition, all updates will be automatically downloaded and installed.
1. Install AccountRight PC Edition on each client
You need the AccountRight PC Edition on each client so you can access the AccountRight company files stored on your server.
Download the latest AccountRight PC Edition (AccountRight subscription is required). Once you've saved the installer to your computer, double-click it to install the new AccountRight version.
2. Open the file stored on the server
Once you’ve installed AccountRight on each client, you need to open the file stored on the network computer. You do this by adding a network library.
Start AccountRight on a client PC and click Open in the Welcome window.
Click Network Libraries, and then Add a network library.
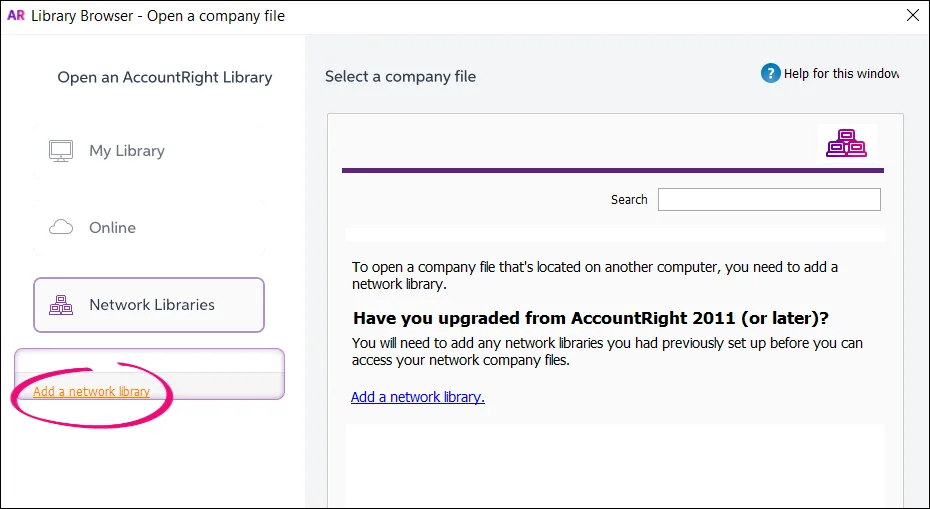
Enter the AccountRight server’s name or IP address, and give the library a nickname (this is handy if you have several servers). If you don’t know the server’s name, go to the Windows control panel on the server and select the System option.

Once the network library is setup, you can see and access all company files that are on the server. Learn more about AccountRight libraries.
Automatic updates
Once you've installed the AccountRight PC Edition on all workstations, all updates will be downloaded and installed automatically.