Once you've created an item, you can easily update any of its details. You can change one item at a time, or multiple.
Let's take you through both scenarios.
To update an item
Go to the Inventory command centre and choose Items List.
Click the zoom arrow to open the item.
Make the required changes.
Click OK.
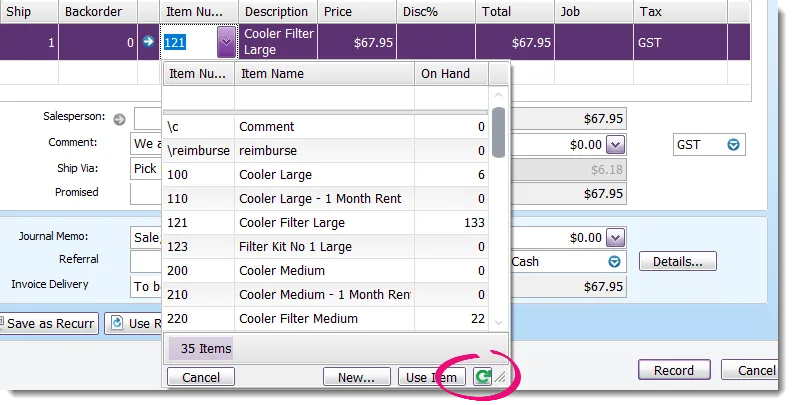
If you make a change to an item while an invoice using the item is open, click the item list and hit Refresh. Any changes you've made to the item will be updated in the invoice.

For details on the specific information which can be recorded in an item, see Creating items.
To update multiple items at once
If you you need to update lots of items, you could open each item...one at a time...and make your changes.
A smarter way is to use AccountRight's import/export function. This is where you bring your item information into Microsoft Excel where you can update it quickly—then import the updated information back into AccountRight.
We'll step you through each task, but first here's a video which explains the process. This example shows how to bulk update item prices, but the same approach can be used for any bulk update.
1. Export your item information
Go to the File menu and choose Import/Export Assistant. The Import and Export Assistant appears.
Select Export data then click Next.
In the Export field, select Items from the drop-down list then click Next. The Format step appears.
Leave the default format options and click Next. The Select Fields step appears. The fields in the left panel are the fields you can export.
Click Add All. This will export all item information. The selected fields are added to the list of fields to be exported in the panel on the right.
If you know which fields you want to update you can export just those by clicking a field in the left panel then clicking Add.
Click Export. The Save As window appear.
Specify where you want to save the file. To keep it simple, save the file to your desktop and leave the default file name (ITEM.TXT).
Click Save.
2. Update the information in Excel
Once you've exported your item information from AccountRight, you're ready to update it in Microsoft Excel.
Here's how to do it:
Open Microsoft Excel and go to File > Open.
In the Files of type field, select All Files(*.*) and then locate and open the exported text file. The Text Import Wizard appears.
In Step 1 of the Text Import Wizard, select the Delimited option, then click Next.
In Step 2 of the Text Import Wizard, select either the Tab or Comma option (depending on whether you selected to export the data as Tab or Comma separated), then click Next.
In Step 3 of the Text Import Wizard, click Next.
Click Finish. The file contents will be displayed and you can now edit the cells as required. Each column in the spreadsheet represents the fields in your export file, such as Item Number, Selling Price, etc.
Update the required information, making sure the information you enter adhere's to the required format. Don't change the column headings (AccountRight needs this information when you import the file in the next task).
Each field has its own format (can the field only contain numbers, letters or a combination of both?). If unsure, check the format of the import and export fields.
When you finish editing, close the file and you'll be prompted to save. Click Yes to the message to save it as Text and continue using this format. This will ensure you can import the file back into your MYOB software as the same type of file it was exported as (tab or comma-separated).

3. Import your changes
You should always backup your company file before importing. That way, it the import doesn't go to plan you can undo the whole thing by restoring the backup.
In your AccountRight company file, go to the File menu and choose Import/Export Assistant. The Import and Export Assistant appears.
Select Import data then click Next.
In the Import field, select Items.
Click Browse, locate the file to import and click Open. This will be the file you updated in Excel.
Click Next. The Format step appears.
Leave the default format options as they are and select the Update existing data option. This will update the existing item records.

Click Next. The Match Fields step appears.
Click Auto Match. AccountRight will automatically match the fields in your import file with the correct fields in AccountRight.
Click Next.
If you haven't already, click Back up to back up your company file. You'll need this if the import doesn't go to plan.
Click Import. Your data is imported and your items will be updated. If you have a large file, this could take some time.
When the import is finished, an import log is created. It's a text file that includes details of any issues with the import data. If you get an error, see the Import error log topic for tips on how to fix issues.
Didn't go to plan? Restore the backup you created before the import.