MYOB comes with a default list of accounts which you can customise to suit your business—often with the help of an accounting advisor. They might also help you import a chart of accounts. If you need information on linked accounts, see Managing linked accounts.
Need to cancel your MYOB account? See Cancelling your MYOB subscription.
Watch this video for information on the chart of accounts and how to add and edit accounts:
Let's step you through how to add, edit, delete and deactivate accounts.
To add an account
Go to the Accounting menu and choose Chart of accounts. The Accounts page appears.
Click Create account. The Create account page appears.
Select whether you're creating a Detail account or Header account. What is this?
Choose the Account type. What is this?
Choose the applicable Parent header. This determines where the account will sit in your accounts list.
If you're accessing an AccountRight file in a web browser, you won't be able to choose the Parent header account. When you enter the Account number, the applicable parent header will be chosen for you based on your accounts list. If you want to choose a different parent header, you'll need to create the account in your AccountRight desktop software.
If you're accessing an AccountRight file in a web browser, you won't be able to choose the Parent header account. When you enter the Account number, the applicable parent header will be chosen for you based on your accounts list. If you want to choose a different parent header, you'll need to create the account in your AccountRight desktop software.
Enter a unique 4-digit Account number after the dash. The prefix (the number before the dash) is based on the Account type and can't be changed.
Enter the Account name.
(Optional) Enter Notes about this account, such as a description of the account and its purpose.
(Header accounts only) If you want to show a subtotal on reports for the accounts under this header, select the option Show a subtotal for this section on reports.
If you're creating a header account, click Save. Otherwise continue with the following steps.
For new detail accounts only(Optional) Enter the account's Opening balance.
Choose the Tax code that you'll use most often with transactions posted to this account. You can choose a different tax code when entering transactions.
If you're creating an asset, liability or equity account (other than the account type of Bank), choose the Classification for statements of cash flow.
Classifying the accounts allows you to generate a statement of cash flows. This report shows how your cash position has changed over time, profit earned and where your cash was spent.
Classifying the accounts allows you to generate a statement of cash flows. This report shows how your cash position has changed over time, profit earned and where your cash was spent.
Classification
Example
Financing
Balance sheet items that are to do with borrowing money or the repayment on borrowings. For example, hire purchase, leases, and bank loans. In some cases, this may also include directors' or shareholders' loans.
Investing
Balance sheet items that are used for the acquisition of fixed assets, plant and equipment, and investments. The sale of these assets or the redemption of investments into cash is also an
investing
activity.
Operating
All other balance sheet items where it is effectively a timing issue that creates the transaction, for example, accruals and prepayments. Accumulated depreciation is classified as
operating
so that it offsets the depreciation expense in the profit and loss report.
If you’re unsure about which classification to use, consult your accountant or an MYOB Certified Consultant/Approved Partner.
(Bank or Credit card account types only) If you'll make electronic payments from this account:
enter the bank account details, and
select the option I create ABA files for this account. For more details see Paying employees into their bank accounts.
When you're done, click Save.
To edit an account
You can edit some account information in detail accounts, for example, the Account name, Account number, the Opening balance, Tax code and banking details. For information on opening balances, see Entering opening balances.
You can't edit the Account type if you have transactions posted to the account. You also can't edit the Account type or Account number of top level header accounts.
If an account's information can't be changed, the field will be locked or you'll see a warning message when trying to save your changes.
Changing the order of accounts
You can edit the Account number of detail accounts to change the order they appear in. Each account is identified by a unique five-digit number. The first digit (the prefix) indicates the account’s classification (for example, accounts starting with 1 are asset accounts). The remaining four digits determine its location within the classification. The lower the number, the higher up in the list it appears. For example, account 1-1100 appears above 1-1200.
You can also move accounts up or down account levels.
To edit accounts
Go to the Accounting menu and choose Chart of accounts to open the Accounts page.
Click Edit accounts.
Make your changes.
Click Save.
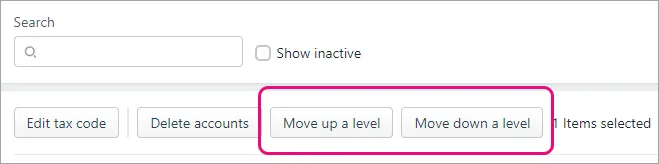
To move accounts up or down
Go to the Accounting menu and choose Chart of accounts to open the Accounts page.
Click the applicable tab for the account you want to move, e.g. Assets, Liabilities, Equity, etc.
Select the account to move.
Move the account. You'll only be able to move an account up or down if it's possible to do so.
If you're accessing an AccountRight file in a web browser, use the buttons above your accounts list to move the account up or down a level.
If you're using MYOB Business, click the Move to dropdown button and choose where to move the account.
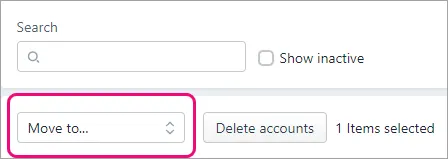
Click Save.


To bulk update account tax codes
You can change the tax code of accounts one at a time (see To edit accounts above). But if you need to change a few accounts to use the same tax code, you can do it in one go.
Go to the Accounting menu and choose Chart of accounts to open the Accounts page.
Select the accounts whose tax codes you want to update.
Click Edit tax code.
Choose the Tax code to apply to the selected accounts.
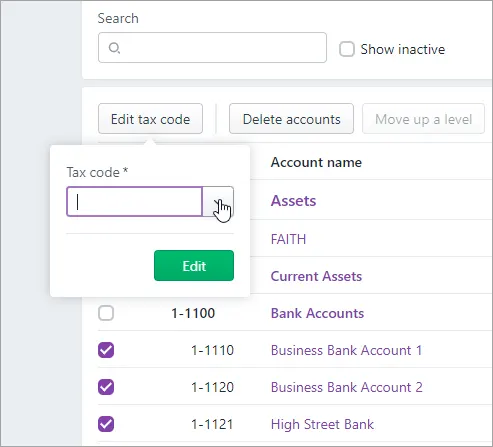
Click Edit. The tax code is applied to the selected accounts.

To delete accounts
Have account you don't need? You'll be able to delete an account if it:
has never been used in a transaction
has no journal entries
has a zero balance
is not a linked account
is not linked to a pay item
is not linked to a tax/GST code (see Tax codes (Australia) or GST codes (New Zealand))
Instead of deleting an account you can deactivate it (see below).
To delete accounts
Go to the Accounting menu and choose Chart of accounts. The Accounts page appears.
Select one or more accounts to be deleted. The Delete accounts button appears.
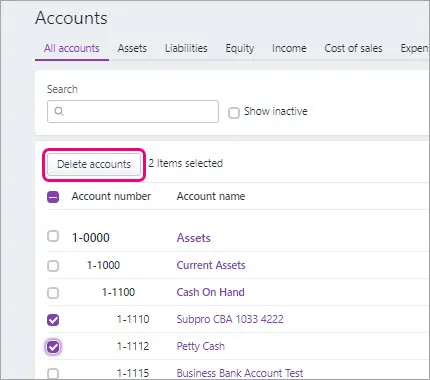
Click Delete accounts.
Click Delete to the confirmation message. If the account can't be deleted, a message will appear explaining why.

To deactivate an account
When you make accounts inactive, they’re removed from some selection lists so they can't be used in transactions. They also won't display in some reports, unless the report has the option to Show inactive accounts.
Inactive accounts retain details you may need some day. This is in contrast to deleted accounts, which are removed along with all their details. For more information see "To delete an account" above.
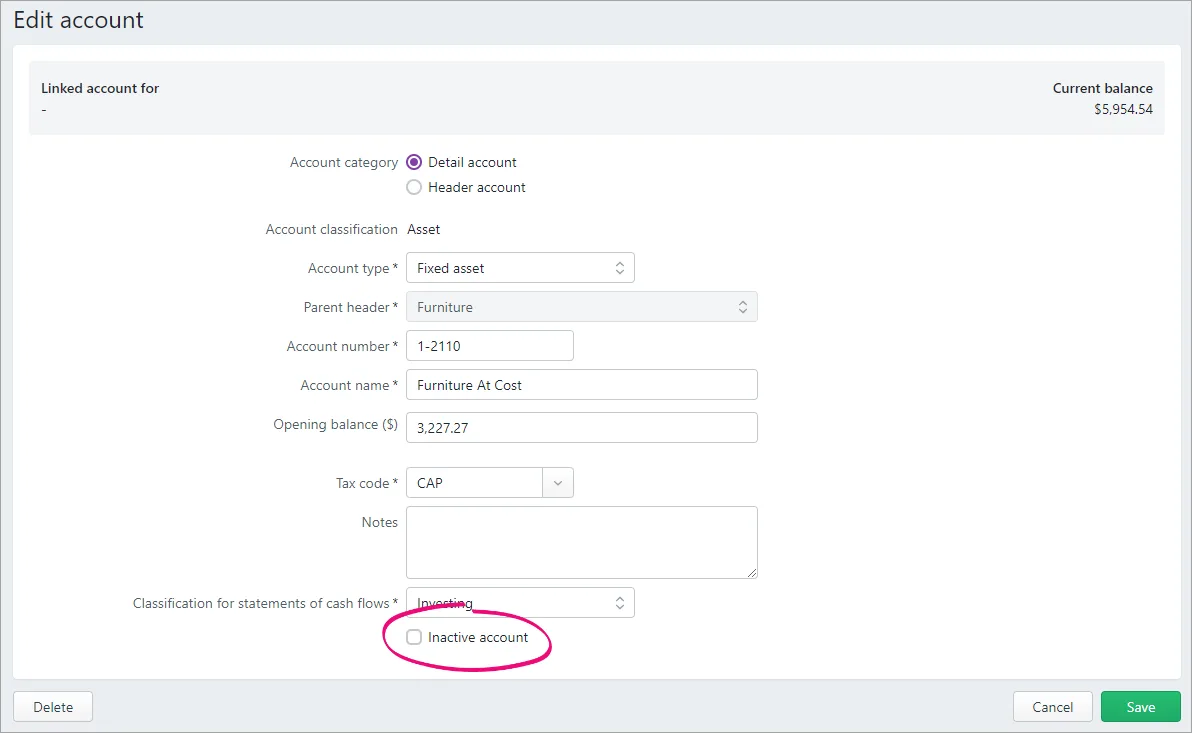
You can reactivate the account at any time by repeating these steps and deselecting the Inactive account option.
Go to the Accounting menu and choose Chart of accounts. The Accounts page appears.
Click the name of the account to be deactivated.
Select the option Inactive account.
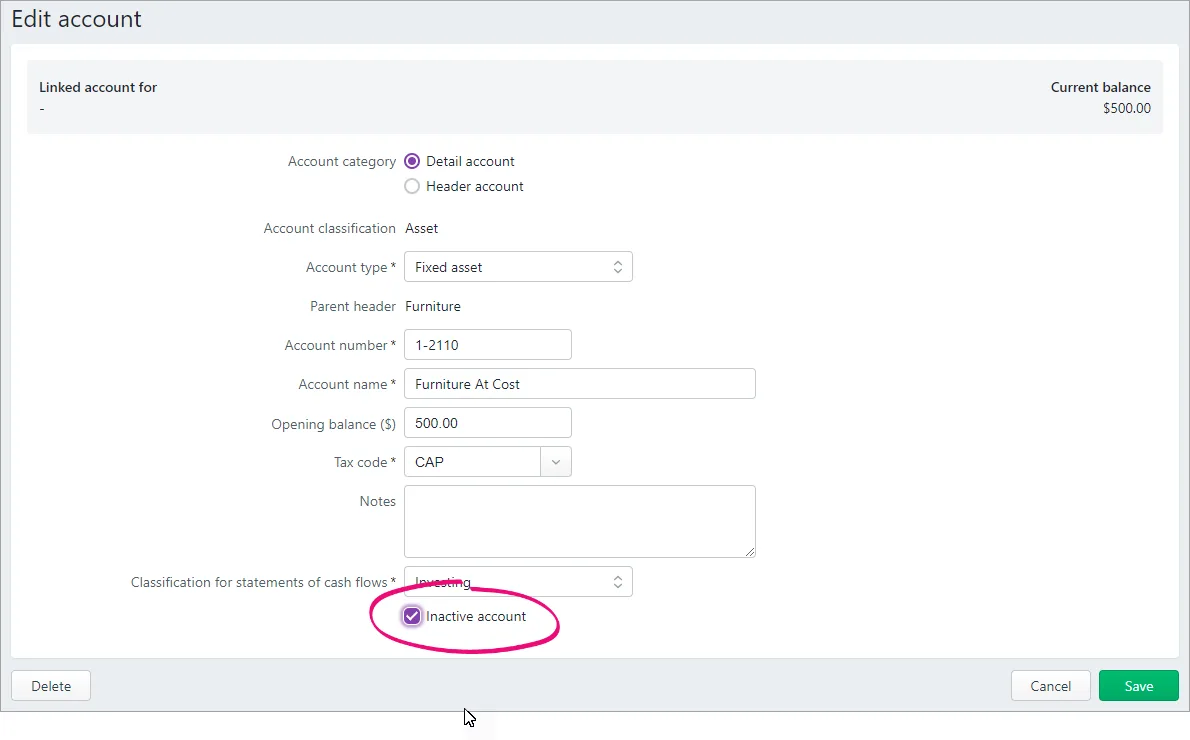
Click Save.

To reactivate an account
Go to the Accounting menu and choose Chart of accounts. The Accounts page appears.
Select the option Show inactive.
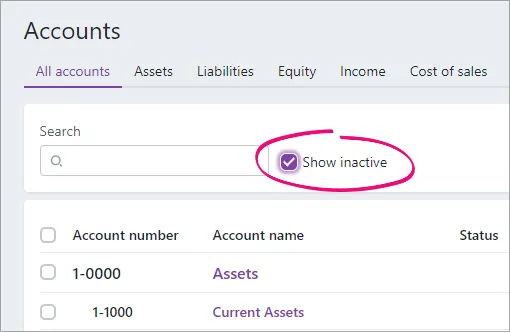
Click the name of the account to be reactivated.
Deselect the option Inactive account.
Click Save.


FAQs
Why can't I choose a Parent header when creating an account?
If you're accessing an AccountRight file in a web browser, you won't be able to choose the Parent header account when creating an account. When you enter the Account number for the new account, the applicable parent header will be chosen for you based on your accounts list.
If you want to choose a different parent header, you'll need to create the account in your AccountRight desktop software.