You can import employees into MYOB instead of setting them up one at a time. This is handy if you have a list of employees you've exported from another program or if they're saved in a spreadsheet.
Your plan may limit the number of employees you can pay each month. Learn about payroll limits and fees.
For the easiest import, we recommend using a sample file. It works like a template and ensures the required information is entered in a format that's accepted by MYOB. We've provided a sample file below which contains all available fields needed for importing employees. All you need to do is download the file, open it in a spreadsheet program like Excel, add your employee information, then import it into MYOB.
Already prepared an import file? Jump straight to task 2 to learn how to import it.
Let's step you through it.
1. Download and modify the sample file
Right-click the sample file and save it to your Desktop: SampleEmployeeFile.txt. If you're warned about the file you're downloading, choose the option in the warning message to Keep the file and it'll download successfully.
Open a blank workbook in Excel.
Click and drag the downloaded sample file onto the the workbook. The file will open in Excel and the contents of the template will be displayed.
When looking at the file in Excel, note the following:
the first cell (A1) contains parentheses (brackets) - these need to remain, as they indicate that the import file is for MYOB.
the second row (beneath the row with the brackets) is labeled so you can work out what type of information is displayed in each column.

Enter your data in each applicable column. See the FAQs below for details about how the columns in the sample file correspond to the fields in MYOB.
Remember:each column in the import file represents a field in MYOB
each row in the import file represents a different employee
leave the brackets on the first row, and the headings on the second row.
When you're done, save the template as a text (.TXT) file. If you like, you can give the file a meaningful name, such as "Employee Import" or similar.


2. Import the file into MYOB
If you're not importing a prepared sample file, make sure your import file:
is a CSV or TXT file
is in tab-separated format
contains a header row for all mandatory fields (see the FAQs below)
contains brackets {} in cell A1
is under 25MB
To import contacts
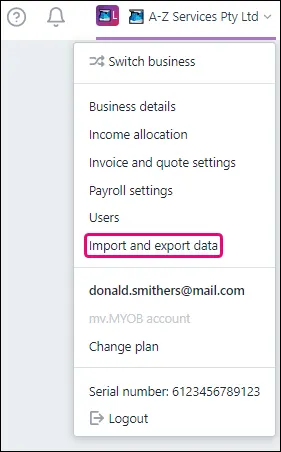
Click your business name and choose Import and export data.
On the Import tab, for the Data type choose Employees.
Click Browse and locate the import file.
Click the import file then click Open.
For the Match contacts using, choose how you'll match imported information with existing employees.
Only choose Record ID if importing data which came from the same MYOB business you're importing into.
If you're importing new employees, choose Company name or last name.
Choose the method for handling duplicate records.
Click Import.

It's a good idea to check each imported employee's details to make sure they're set up correctly and to add anything that's missing. See Adding an employee for details.
FAQs
What are the mandatory fields when importing employees?
First name
Surname/family name/Co./Last name
Address (including city, state, postcode and country)
Date of birth
Pay slip email
Tax file number
If paying directly into the employee's bank account, the following fields are mandatory for each account their pay is going into:
BSB number
Account number
Account name
How do the columns in the sample file correspond to the fields in MYOB?
It might not be clear what some of the fields (column headings) in the sample file relate to, so this table might help.
Column heading in sample file | MYOB field info |
|---|---|
Co./Last Name | Surname or family name |
Card ID | Employee number (this is a unique code or identifier for the employee) |
Card Status | Indicates if this is an inactive employee (Y for yes, N for no) |
Addr 1 | Fields that begin with Addr 1 relate to the employee's address, for example Addr 1 - line 1 is the first line of the employee's address |
Employment Basis | This is a single number that defines the employee's employment basis (0 = Individual, 1 = Labour Hire, 2 = Other) |
Employment Category | This is a single letter that defines if the employee is permanent or temporary (P = Permanent, T = Temporary) |
Employment Status | This is a single letter that defines the employee's status (F = Full Time, P = Part Time, O = Other, C = Casual) |
Pay Slip Delivery | This is a single letter that defines how the employee wants to receive their pay slip (P = To be Printed, E = To be Emailed, B = To be Printed and Emailed, A = Already Printed or Sent) |
Pay Basis | This is a single letter that defines if the employee is paid an annual salary or an hourly rate (S = Salary, H = Hourly) |
Pay Frequency | This is a single letter that defines how often the employee is paid (W = Weekly, F = Fortnightly, T = Twice a Month, M = Monthly) |
Tax Table | Up to 34 characters and must match an existing tax table within MYOB |
Extra Tax | The amount of extra tax to be deducted from each of the employee's pays (up to 13 digits, plus 2 decimal places) |
Number of Bank Accounts | The number of bank accounts an employee wants their pay to be paid into (maximum 3) |
Statement Text | The text to appear on the employee's bank statement for their wage payments |
Bank Value Type | If paying the employee into more than 1 bank account, this defines whether the value to go into an account is a dollar or percentage amount (D = Dollars, P = Percentage) |
Record ID | This is an internal number in your MYOB business. It's only used if you're importing information that's come from the same MYOB business, so generally it's not applicable and should be left blank |