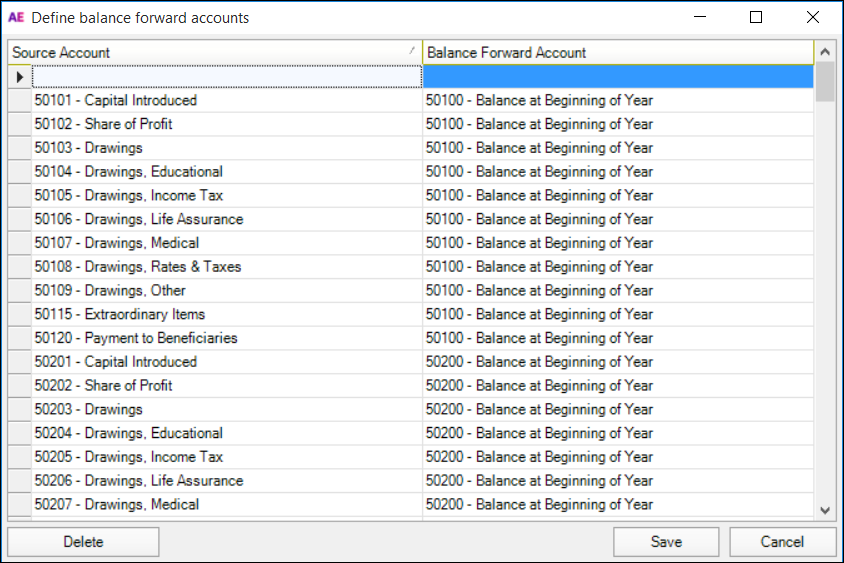
 Now let's carry forward last year's closing balances to this year. What's this about?At the beginning of each year, Client Accounting clears previous income and expense balances to zero, ready for the new year. For example, at the end of the financial year you can balance forward your closing stock to the opening stock for the beginning of the new year. Or you can clear and move beneficiary accounts for Trusts to the respective opening balance accounts. How do I balance forward?To get your previous balances across for the new period, you'll need to set up a balance forward account and generate a journal for the balance forward account. You can specify the source accounts to clear to zero at the end of the financial year and the destination accounts that will receive the transferred balances. So here we'll be be: - defining balance forward accounts
- generating the journal for the balance forward account.
| UI Text Box |
|---|
| | If you've migrated a MAS, Accounts or AO Classic ledger which already had those balance forward codes set, they'll be migrated over. If you've created a new ledger using standard charts, the balance code will also be pre-configured based on the entity and chart style used. For example, if you used the MAS Company, MAS Trust or Partnership templates, they will automatically set up the balance forward codes based on your entity types. |
What you'll see when you're done| UI Expand |
|---|
| The journal effect can be seen in the Trial Balance (Workpapers) table for the period. 
You can also select View all on the TASKS bar to view the Journals window. 
|
Let's bring forward those balances!| UI Expand |
|---|
| title | To set up a Balance Forward account |
|---|
| - Open the Workpapers period. The period table appears.
- In the workpaper, select the accounts to update.
- Right-click the selection, and click Set Balance forward account in the right-click menu. The Balance forward window appears.
- In the To Account field, select the balance forward account. You can select the account in the drop-down list, or you can type in this field to search the list of available accounts.
- Click OK to save your changes.
|
| UI Expand |
|---|
| title | To generate a journal |
|---|
| - Open the Workpapers period. The period table appears.
- In the TASKS bar, click Define balance forward accounts. The Define Balance Forward Accounts window appears.
In the Define Balance Forward Accounts window, click Generate Journal. | UI Text Box |
|---|
| This option is only available from within a workpaper, not from the Workpapers tab. |
A journal with blank descriptions is created based on the first day of the workpaper period and the closing balances of the previous year.
If a Balance Forward journal already exists and hasn’t been posted, Client Accounting asks if you want to delete the existing entry and regenerate a new journal based on the updated account mappings.
|
Other things you can doIf you make a mistake or if your client’s business circumstances change in future years, you can modify and delete Balance Forward accounts. | UI Expand |
|---|
| title | To modify Balance Forward accounts |
|---|
| - Open the Workpapers period. The period table appears.
- On the TASKS bar, click Define Balance Forward Accounts. The Define Balance Forward Accounts window appears.
- To define the source account and balance forward account, click the empty fields and select the account in the drop-down list or type to search available accounts.
A row must have a source account and Balance Forward account. - Click Save.
|
| UI Expand |
|---|
| title | To delete Balance Forward accounts |
|---|
| - In the Define Balance Forward Accounts window, select the account that you want to remove.
- Click Delete. The account's row is removed from the table.
- Click Save.
|
|