ANSWER ID:31759| UI Text Box |
|---|
| AccountEdge and Mac OS "Catalina" AccountEdge currently isn't compatible with the new Mac operating system, called "Catalina". But we're working on an update...Learn more. |
AccountEdge is currently available in 3 product levels: Check the system requirements to see if your Mac can run AccountEdge (Australia | New Zealand). To learn what AccountEdge can do for your business, download a trial version, or purchase a subscription, check our website (Australia | New Zealand). | UI Text Box |
|---|
| Getting the latest version If you have a current support subscription, you can download the latest AccountEdge version from www.myob.com/downloads. |
If you've never installed AccountEdge before or you're upgrading from an older version, the following information will help you get up and running with the latest version. | UI Expand |
|---|
| title | Installing AccountEdge |
|---|
| Using AccountEdge Network Edition? Make sure the same version is installed on each computer in your network. Installing the latest version of AccountEdge is quicker and easier than ever. And you don't need to uninstall your previous AccountEdge version. To start the installation: When complete, AccountEdge will be installed in the Applications folder as shown below. 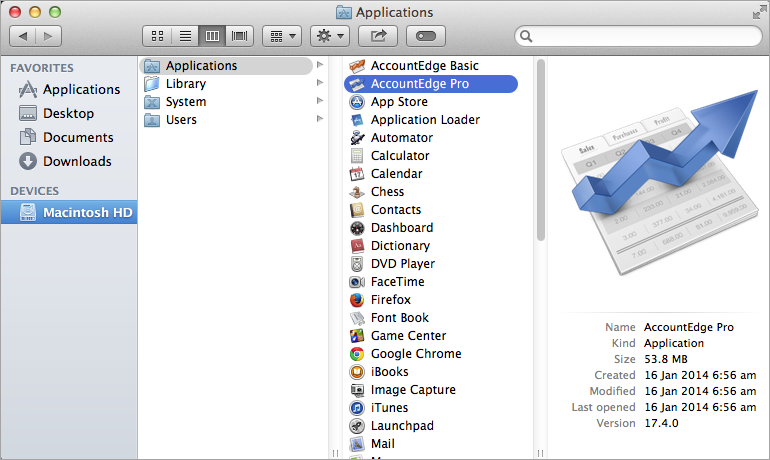
After installing, manually check for additional updates by going to the AccountEdge menu and choosing Check for Updates. |
| UI Expand |
|---|
| title | Upgrading your company file |
|---|
| - Launch the new AccountEdge.
- At the Welcome window, click Sample Company (Explore our Clearwater company file).
- You will see a message informing you that AccountEdge will be creating the folder. It is recommended to let this folder be created in the Documents folder. So just click Choose. If you choose a different folder, it will create the folder inside that directory. Your sample company file will then open.
- Quit AccountEdge and launch it again to get back to the Welcome Window.
- Choose the Company File Maintenance drop down and select Upgrade company file.

This will launch the Upgrade Assistant. Follow the steps to browse for your company file. | UI Text Box |
|---|
| Upgrading from BusinessBasics or FirstEdge? If you can't see your company file when browsing for it, you'll need to use Finder to locate your company file, then change the file extension from ".dat" to ".myo". For example, change the company file name from MyCompanyFile.dat to MyCompanyFile.myo. You can then repeat the above steps to locate and select your BusinessBasics company file. |
If you want to change the name of the company file, type a different name in the Name field. | UI Text Box |
|---|
| Using AccountEdge Network Edition? Because your previous file is stored in the same database location as your upgraded file, you will need to change the name of the upgraded company file. So that each workstation in the network can easily identify the upgraded file, we recommend you rename it with reference to the AccountEdge version number (for example, YourCompanyFile_v14 ). |
The upgraded file should default to your newly created folder in your Documents folder, e.g. AccountEdge Pro vXX AU (or NZ), or AccountEdge Basic vXX AU (or NZ). To save the upgraded company file to a different folder or computer, click Save As and select the location. | UI Text Box |
|---|
| Using AccountEdge Network Edition? Do not move your company file. Your file must be stored in the Macintosh HD/Library/Application Support/AccountEdge NE/Databases folder. |
- Click Next to start the upgrading process. The Complete window appears when the company file is upgraded.
Once you have upgraded your file, copy your custom forms, letters, graphics, spreadsheets and other associated files to the appropriate folder within the Documents folder.
 | UI Text Box |
|---|
| Using AccountEdge Network Edition? When your company file is upgraded, by default the upgraded file will be saved to the Documents > AccountEdge NE vXX folder. You will need to copy and paste the upgraded file to the Macintosh HD > Library > Application Support >AccountEdge NE > Databases folder. This will ensure the company file will be visible to AccountEdge Network Edition. |
Can't open your upgraded file? See Unable to open a company file. |
| UI Expand |
|---|
| title | Upgrading customised templates |
|---|
| If you use BASlink (Australia only), customised reports, forms, letters, graphics, or spreadsheets, you need to upgrade these templates to use with the new AccountEdge version. | UI Text Box |
|---|
| Using AccountEdge Network Edition? You need to repeat the steps below on each workstation. |
In AccountEdge Pro/Network Edition v13 and later, and AccountEdge Basic v2 and later you can automatically upgrade your custom templates using a migration assistant. To automatically upgrade your customised templates- In the Welcome to AccountEdge window, click Company File Maintenance and select Migrate previous version from the menu. The Migration Assistant window appears. The path to the previous application is displayed.
Please select your previous AccountEdge application is displayed if your software was not able to locate a previous version. To display the correct path click Browse and select the location. Select the application file (for example, AccountEdge) and then click Open. - Select Copy Spreadsheets if you have customised spreadsheets in your previous version.
- Click Start. The upgrade process begins.
- When the process is complete, the Finished window appears.
| UI Text Box |
|---|
| Can't see your custom forms in AccountEdge? Using Finder, go to Documents > AccountEdge AU/NZ > Custom Forms and make sure each of the files in this folder ends in ".frm". For example "MyCustomInvoice.frm". |
|
|


