This article takes you through the steps required to add an employee in to Advanced People. | UI Expand |
|---|
| - From the People workspace, click Employee Details to open the Employees screen (screen ID: EP203000).
- Click the plus symbol (
 ) to add a new employee. ) to add a new employee. Enter the new employee's details in the tabs: | UI Text Box |
|---|
| Any fields marked with a red asterisk are compulsory. You have to complete these fields before you can save the record. |
- Click the save icon (
 ). ).
|
| UI Expand |
|---|
| title | To add an employee's pay details |
|---|
| After you've added a new employee, you can add their pay details. - On the Employees screen, click Pay Details.
- On the Pay Details screen, click Actions and select Pay Groups.
- From the Pay Group ID dropdown, select the pay group and complete the fields.
|
Adding pay detailsOnce all employee information has been entered click on Pay Details and this will take you to the details associated with paying the employee such as tax numbers and leave calculations etc.  Image Removed Image Removed
From the pay details screen (MPPP2310), select Pay Groups from the Actions dropdown 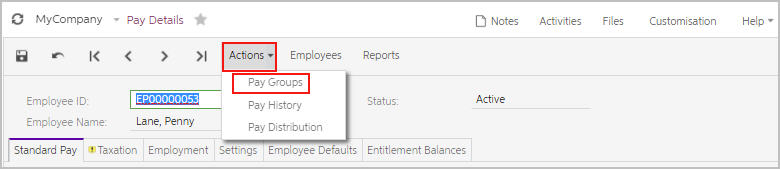 Image Removed Image Removed
Refer to this Knowledgebase Article for information on how to add an employee to a pay group. Go back to the Pay Details screen and add the Standard Pay, Taxation and Employment details required for the employee. Bank account detailThe bank account will show in the Pay Distribution screen and this can be accessed via the Actions dropdown in the same way you accessed Pay Groups for the employee. You will need to add the Reference, Code and Particulars required to appear on the - Enter the employee's salary and hours details.
- Click the plus symbol to add a Pay Item, and select the employee's standard pay.
This example shows the Ordinary Salary pay item. - Complete the Effective Date field. All the other fields will complete automatically with information from the pay group you selected.
- Complete the Taxation, Employment and Employee Defaults tabs with required information for your employee.
On the Pay Distribution tab, add the Reference that's required to appear on your employee's bank statement. This is usually the
|
Company Wages salary, but it can be any detail that
|
your you employee would like to see.
|
Refer to this Knowledgebase Article if | UI Text Box |
|---|
| If you need to add multiple bank accounts for |
|
the employee. Image Removed Image Removedan employee, see this help article to learn how. |
Click Save & Close.
|
| 


