Having a proof of purchase document against transactions isn’t just handy, it’s important for compliance. In MYOB Essentials you can attach files, like receipts and supplier invoices, to your bills as a reference to come back to, whenever you need. You can attach PDF, TIFF, JPEG or PNG file types, and the files must be less than 10MB in size. | UI Expand |
|---|
| title | To attach a document to an existing bill |
|---|
| To attach a document to an existing bill- Go to your In tray
Select your document and click Link to existing bill. | UI Text Box |
|---|
| Need to add a document? You can easily add documents in a number of ways, including emailing them to the address that appears in your In tray. You can even take a picture of a document and upload it to your In tray using the MYOB Capture app. See Working with In tray documents. |
If there's a bill that looks like it matches the information in the document, MYOB Essentials will highlight it for you. Just choose the right bill from the list and click Link to selected bill.
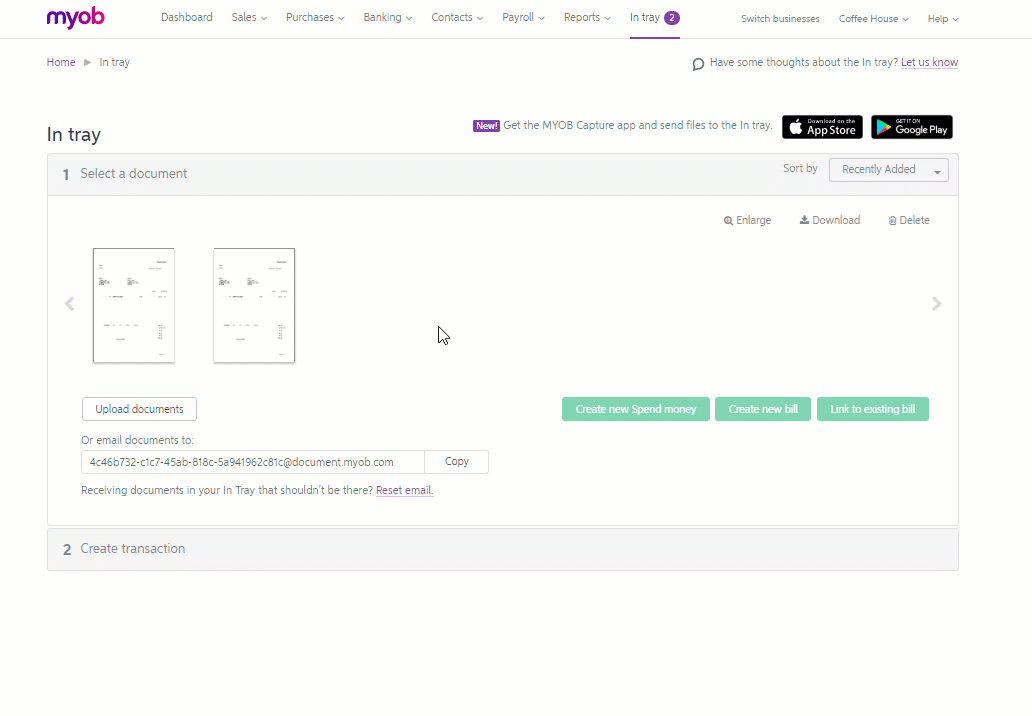
The document is attached to the transaction. To view or delete an attached document, see below. |
| UI Expand |
|---|
| title | To create a bill from a document in your In tray |
|---|
| To create a bill from a document in your In tray- Go to your In tray
Select your document and click Create new bill.
 | UI Text Box |
|---|
| Need to add a document? You can easily add documents in a number of ways, including emailing them to the address that appears in your In tray. You can even take a picture of a document and upload it to your In tray using the MYOB Capture app. See Working with In tray documents. |
- Fill in any missing details (the fields highlighted in yellow).
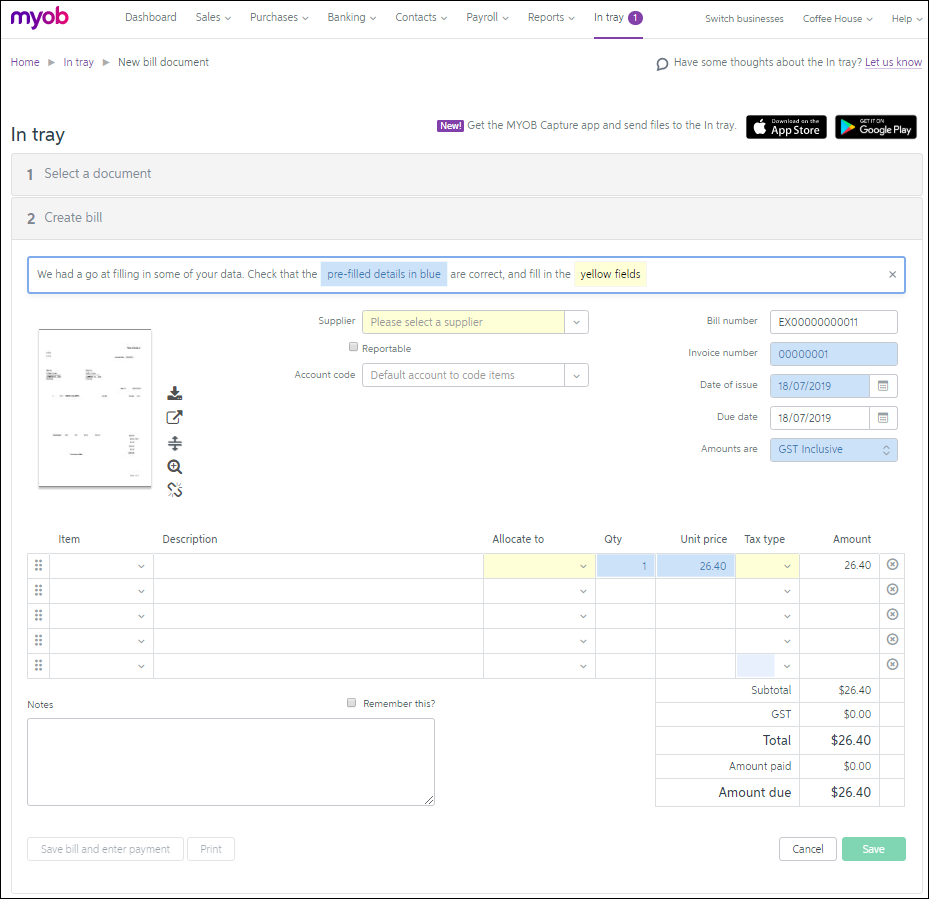 - Click Save
- Your bill will be created and your file will be attached to it

|
| UI Expand |
|---|
| title | To view an attached document |
|---|
| To view an attached documentAfter you've attached a document to a bill, here's how to view it: - From the Purchases menu, choose Purchase history.
- Find the transaction with the attachment (bills have a reference number starting with EX).
- Click the reference number to open the transaction.
Click a viewing option next to the document: | Download the document | | Enlarge the document in a new browser tab | | Split the screen between the bill and the document | | Enlarge the document in the current browser tab |
|
| UI Expand |
|---|
| title | To delete an attached document |
|---|
| To delete an attached document- From the Purchases menu, choose Purchase history.
- Find the transaction with the attachment (bills have a reference number starting with EX).
- Click the reference number to open the transaction.
Click the Un-link icon next to the document. next to the document.
|
| 


 Yes
Yes
 No
No
 Thanks for your feedback.