Not available in AccountRight Basics Just bought something, or received a bill for electricity or another expense? To help you keep track of when it's due, record it in AccountRight. And don't worry, if you make a mistake (like entering the wrong amount or double-entering it), you can edit or delete it later (so long as your security settings allow it). | UI Expand |
|---|
| expanded | true |
|---|
| title | To enter a purchase |
|---|
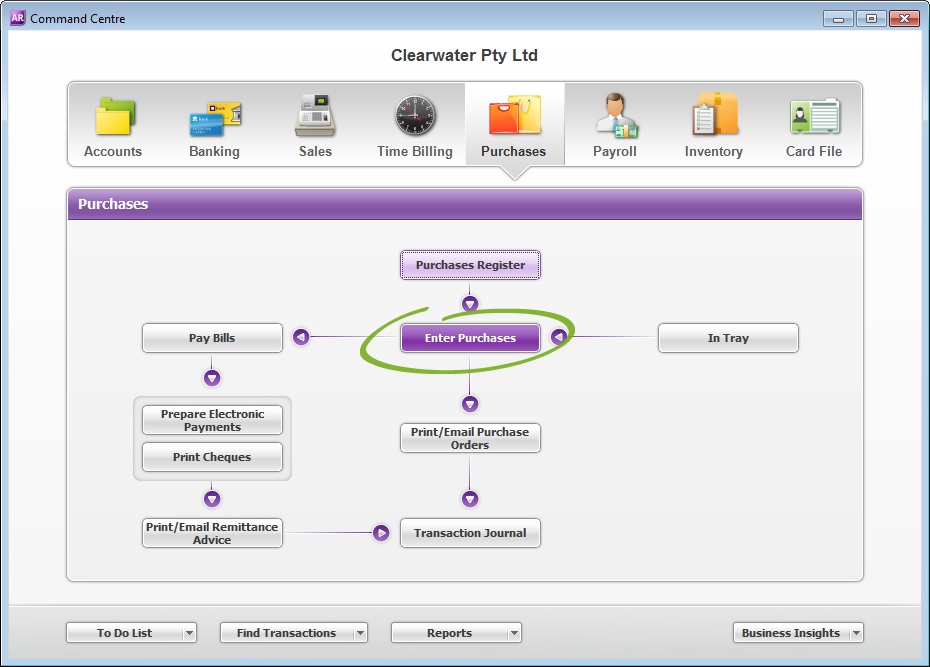
| - Go to the Purchases command centre and click Enter Purchases.
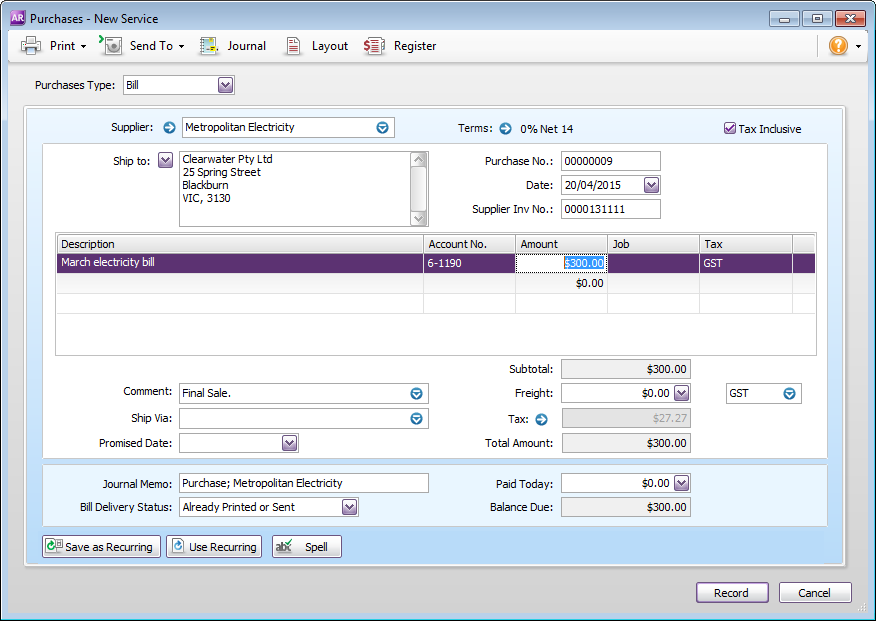
 - Select the supplier, or add a card for them.
 - Are the credit terms right? Click the Terms arrow to change the supplier's default credit terms for this purchase only.
- If you're entering prices that include tax or GST, select the Tax Inclusive (Australia) or GST Inclusive (New Zealand) option. Don't change this setting after you start entering amounts.
- Want to change the purchase layout to suit the type of goods or services you're purchasing? Click Layout.
 - Select whether you're recording a quote, order or Receive Items (Not Basics), or bill from the Purchase Type list in the top-left corner. The Receive Items option only appears for the Item purchase layout. If you record a quote or order, you can change the purchase type later when the status of the purchase changes.
Enter details of what you're buying, as well as headings, subtotals and blank lines. The fields that are available depend on the purchase type and layout you've selected.
| UI Expand |
|---|
| title | Item purchase fields |
|---|
| 
| Field | Description |
|---|
| Order/Quantity/Bill | Enter the quantity to be delivered. The field name depends on whether you’re recording a quote, order or bill. | Received | This field is read-only. It displays the quantity of items received against an order. If you're using the Receive Items layout, a To Date and Receive columns appear instead. | | Item Number | Enter an item from your item list. | | Backorder | Enter the quantity of the item to be placed on backorder. An order for this amount will be created automatically when you click Record. | | Description | A description of the item appears automatically. You can change this if you want. If you want to check spelling in this field, click Spell. | | Price | The price of the item appears automatically. You can change this if you want. | | Disc% | [Optional] If you've been given a discount, type it as a percentage. If you've been given a dollar discount, enter the updated price in the Total column, and the discount percentage will be calculated for you. | | Total | The total price of the items is calculated automatically. If you change the total, the Disc% field is updated to show the discount applicable. | | Job | [Optional] Select a job number here to assign a line item to a specific job. This line item can be reimbursed later. | | Tax/GST | The default tax (Australia) or GST (New Zealand) code for an item appears here. If you want to change it, enter the required tax/GST code. |
|
| UI Expand |
|---|
| title | Service, Professional, and Miscellaneous purchase fields |
|---|
| 
| Field | Description |
|---|
| Description | Enter a description of the goods or services being purchased. If you want to check spelling in this field, click Spell. | | Acct No. or Account Name | Enter the account to which to allocate the purchase. This should be an expense or cost of sales account. You should not select your accounts payable account for supplier purchases.
| | Amount | Enter the amount you've been billed for. | | Job | [Optional] Select a job number here to assign a line item to a specific job. This line item can be reimbursed later. | | Tax/GST | Select a tax code (Australia) or GST code (New Zealand) for the purchase. |
|
Enter any charges for freight, and if required, select the right tax/GST code. Enter an amount in the Paid Today field to record the amount you've paid at the time of the purchase. If you are creating an order, record the amount you gave you as a deposit. Click Record (or Save Quote for quotes) to just save the sale, or click Print to also print a form. If you want to email the purchase or save it as a PDF (not available for Miscellaneous sales), click Send To.
|
| HTML |
|---|
<h2><i class="fa fa-comments"></i> FAQs</h2><br> |
| UI Expand |
|---|
| title | What does Auto# mean in the Purchase No. field? |
|---|
| The default number AccountRight shows is the next available number. When you click in the Purchase No. field, Auto# appears to confirm that the number has been automatically selected for you. You can type a different number into the field if you want. |
| UI Expand |
|---|
| title | What is the Supplier Inv No. field used for? |
|---|
| If the supplier gave you an invoice for this transaction, you can enter that quote, order or invoice number in the Supplier Inv No. field. You can search for purchases by the supplier's invoice number. |
| UI Expand |
|---|
| title | Can I choose a default purchase layout for a supplier? |
|---|
| Yes. The default layout displayed in the Purchase window is determined by the selection you made when setting up purchase details (using the Purchases Easy Setup Assistant). You can override this selection in the Buying Details tab of the supplier’s card. You can also choose the default customised form that you want to use when printing or emailing purchases to the supplier. |
| UI Expand |
|---|
| title | Why can’t I print or email a purchase? |
|---|
| Have you selected the Miscellaneous purchase layout? This layout should only be used for purchases where a form does not need to be printed or emailed. For example, debit notes. |
| UI Expand |
|---|
| title | The Tax/GST amount on the purchase isn’t right. Can I adjust it? |
|---|
| Click the Tax arrow if you want to view or change the tax (Australia) or GST (New Zealand) amounts assigned to the purchase. |
| UI Expand |
|---|
| title | Can I display tax/GST on each line of a purchase? |
|---|
| Yes. You can personalise the purchase form to add the Line Tax field. Then when you email or print the purchase order it will display tax/GST on each line. Here's how: - Go to the Setup menu and choose Customise Forms.
- Select the form to be customised then click Customise.
- Right-click on the form where the transaction lines are displayed and choose Show/Hide Columns.
- In the Available Columns list, click Line Tax then click Show.
- Click OK.
- Click Print Preview to see what the form will look like.
- Make any necessary changes.
- When you're happy with the changes, save the form.
|
| UI Expand |
|---|
| title | I want to record a note about the purchase. Where can I do this? |
|---|
| You can enter a brief description in the Journal Memo field. You can search for purchases using the text you enter in this field. If you don't want this information to appear on printed/emailed purchases, ensure that the Memo field is not included on the form. |
| UI Expand |
|---|
| title | I want to edit the list of comments and shipping methods. How do I do this? |
|---|
| To add, edit or delete the list of comments and shipping methods, go to the Lists menu > Sales and Purchases Information window. |
|