To invite a user to access your website, follow the steps below. Note that you'll need their email address in order to invite them. - Click Users in the Settings toolbar on the left of your homepage.
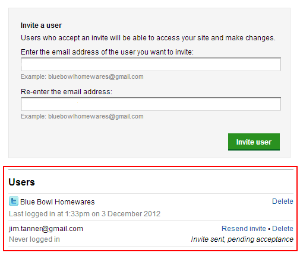
 Image Removed Image Removed Image Added Image Added On the Users page, enter and re-enter the email address of the user you want to invite, then click Invite user.
 Image Removed Image Removed Image Added Image Added
An invitation will be emailed to the address you entered. Note that it's valid for 5 days. And remember, as soon as a user accepts your invite, they'll be able to access your site and make changes. When an invite is accepted, you'll receive a confirmation email with the user's details. To find out how to view a list of users you've invited, resend invites and delete users, see Managing users below. |