Once you've designed and saved a form template, you can make it the default template to use when printing or emailing a batch of forms. You do this in the Advanced Filters window for the type of form that you're sending (such as remittance advice, purchase order or invoice). You can also assign a template to a card or override a template when printing or emailing a sale or purchase. The following example shows how to set a default template for item sales, you can set the default form for other transaction types in the same way. | UI Expand |
|---|
| expanded | true |
|---|
| title | Example: Set the default item sale template |
|---|
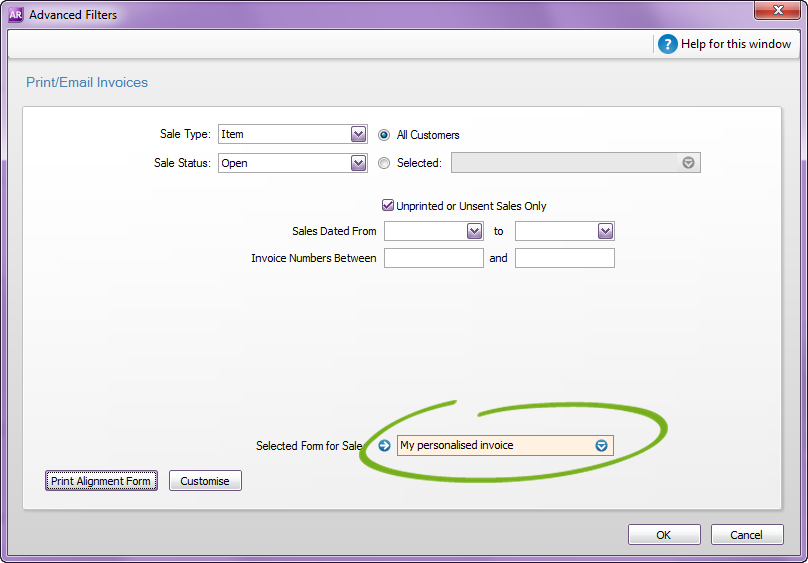
| - Go to the Sales command centre and click Print/Email Invoices.
- Click Advanced Filters.
- Select the sale type. In this example, we've customised an item invoice layout.
 - Select the template you want to use in the Selected Form for Sale field.
To set the default template for other form types, like statements, use the example above as a guide, but go to the Advanced Filters window for the Print/Email... window relevant to your form (e.g. for statements, click Print Statements in the Sales command centre). See also Sending forms in a batch. Cant Can't see your personalised form? Check that you've selected the correct form type. For example, if you've personalised an item invoice, make sure the Sale Type is set to Item. |
You can set a default template for individual customers and suppliers (Not Basics). Go to the customer or supplier card and select the template in the Printed Form field of the Selling Details or Buying Details tab. 
You can also select a different form for an invoice or purchase order, from the transaction window. Click Send to > Email and then select the form to use in the Email Information window. 
If you're printing a form, click Print > Select Another Form... and then select the form you want to use. 

| 
 Yes
Yes
 No
No
 Thanks for your feedback.