| UI Text Box |
|---|
| If you need to enter payments that aren’t associated with your suppliers (for example, for telephone bills and bank charges), enter these as Spend Money payments. For more information see Spend money. |
In MYOB Essentials, the Bills page is used to record your business expenses. Business expenses refer to the purchases you make from your suppliers for business supplies, and the payment of these purchases. When you receive a bill from a supplier for a purchase you’ve made, first you need to create the purchase as a bill in MYOB Essentials (see To enter a bill). Then, you can pay the bill (see Entering payments made to suppliers). To speed things up, you can also upload supplier invoices to your in tray and create your bills from those uploaded documents. | HTML |
|---|
<a href="http://help.myob.com/teachme/essentials/" target="_blank"><img src="http://help.myob.com/wiki/download/attachments/1147324/LEARN%20-%20record%20bills.png?version=1&modificationDate=1491802977000&api=v2" width="60%" height="auto" alt="Link to training"></a> |
| UI Text Box |
|---|
| Setting up suppliers and items You can set up suppliers and items at any time—before you begin entering a bill (using the Contacts menu or the Items list link) or while creating it (using the Add Supplier and Add Item list options). |
| UI Expand |
|---|
| expanded | true |
|---|
| title | To enter a bill |
|---|
| To enter a billOn the Bills page, click Create bill. The Bill page appears. | UI Text Box |
|---|
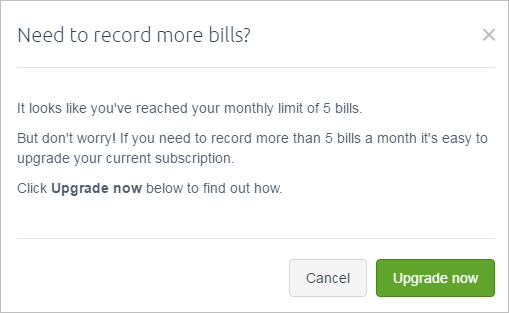
| Working in Essentials Accounting Starter? If you've reached your monthly limit of 5 bills, you'll be prompted to upgrade your subscription if you try to create a new one.  Image Added Image Added
Click the Upgrade now button to be taken to the Subscription details page and view your upgrade options. |
If necessary, change the Bill number. This number is automatically generated, based on the last number used. | UI Text Box |
|---|
| If you change the bill number, you’ll change the automatic numbering. For example, if you change the number to EX000081, the next time you create a bill, MYOB Essentials will display the new bill number as EX000082. |
Enter information about the supplier
In the Supplier contact fieldfield, enter the supplier’s name, or click the dropdown arrow and select the supplier from the list. The supplier’s address details appear in the field below. | UI Text Box |
|---|
| Entering an expense billed to you by a new supplier? In Click the dropdown arrow for the Supplier Contactfield , and select + Add supplier from the list. Enter the supplier’s details in the Add New Supplier window and click Save. |
If you want to link the bill to a document from the supplier, click Link document: Select a previously uploaded document (or upload one and select it) Click Link document to bill.
For more information on linking documents to transactions, see Working with In tray documents. Check the due date, payment terms and tax preference - Check the date in the Date of issue field.
- Check the date in the Payment due date field.
- If you want to record the invoice or bill number as specified by the supplier, enter it in the Supplier invoice number field.
- If you account for tax/GST, choose an option from the Amounts are list.
- If you want the prices to include tax/GST, choose Tax/GST inclusive. Note that this is the default preference.
- If you want the prices to exclude tax/GST, choose Tax/GST exclusive.
Enter the items you’re buying In the Item column of the list, enter the number of the item you’re being billed for, or select it from the list. | UI Text Box |
|---|
| Entering a new item? In Click the dropdown arrow in the Item column of the list, and select + Add Item from the list. Enter the item details in the Add New Item window and click Save. |
The item Description, Account, Unit price and Tax rate/GST type appear, based on the details you entered when you created the item. The Qty and Total also appear. The default quantity is 1. You can change this in the Qty field. | UI Text Box |
|---|
| To remove an item from the list, click the delete icon (  Image Removed Image Removed  Image Added ) to the right of the item line. Image Added ) to the right of the item line. |
Repeat from step 8 for each item on the bill. The totals are calculated at the bottom of the bill: Subtotal—the total for the items added to the bill Tax/GST—the amount of tax/GST applied to the bill Total—the subtotal amount plus the tax/GST amount Amount paid—the total of any bill payments made Amount due—the total minus the amount paid.
If you want to add a note about the bill, enter it the Notes field. Check that all the information in the bill is correct.
Complete the bill If you want to: save the bill, click Save. The bill is saved and the Bills page appears. enter a payment for the bill, click the Enter payment link, and then click Yes to the confirmation message. On the Enter supplier payment page, enter the payment details.For more information, see To enter a payment to a supplier.
|
| HTML |
|---|
<h2><i class="fa fa-comments"></i> FAQs</h2><br> |
| UI Expand |
|---|
| You can click on bills to open them for editing. - In the bills list, find the bill you want to edit and double-click it. The Bill page appears, showing the bill details.
- Make any changes to the bill.
- Click Save. The Bills page reappears.
| | Can I show tax/GST for each line item on my bills? |
| Can I show tax/GST for each line item on my bills?MYOB Essentials can only show the total tax/GST on a bill, not for each line item. |
| UI Expand |
|---|
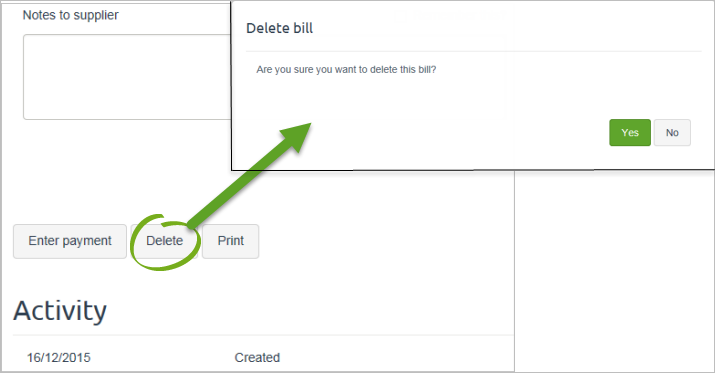
Click Yes to delete the bill. The Bills page reappears. | UI Text Box |
|---|
| Can't delete | In the bills list, find the bill you want to delete and click the Bill Number. The Bill page appears, showing the bill details.Click Delete. A confirmation message appears.
 Image Removed Image Removed| How can I record cash purchases? |
| How can I record cash purchases?If you want to keep track of cash purchases, set up a contact called "Cash Purchases" and choose this contact when making a cash purchase. |
| UI Expand |
|---|
| title | Why can't I click Save when entering a bill? |
|---|
| Why can't I click Save when entering a bill?If the Delete Save button is inactive , it means the bill has a payment against it so can't be deleted. You'll first need to delete the payment (click the payment to view its details then click Delete). |
|