ANSWER ID:9264You can update your item tax codes (GST codes in New Zealand) one at a time, but this can be quite time consuming. If you have lots of items, you can bulk update your item tax codes by exporting your item information, updating the export file in Microsoft Excel then importing the updated information back into AccountRight. | UI Text Box |
|---|
| Don't use Excel? You can modify the export file in any program that can open text files (like Notepad), but it's easier if you use a spreadsheet program. |
OK, let's step you through it. | UI Expand |
|---|
| title | 1. Exporting your item information |
|---|
| - Go to the File menu and choose Export Data then choose Items.
- Select the default options: Tab-delimited export file format and First Record is Header record.
- Click Continue.
- On the Export Data window, click Match All and then click Export. See the example below.
 - Specify where you want to save the export file, such as the desktop.
|
| UI Expand |
|---|
| title | 2. Modify the export file in Excel |
|---|
| - Open Microsoft Excel.
- Go to the File menu and choose Open.
- Locate the export file and click Open. In our example this would be the ITEM.TXT file. To ensure the export file is visible when trying to open it, ensure the File Types is set to All Files (*.*) as shown below.
 - If the Text Import Wizard is displayed, click Finish. The contents of your export file will be displayed. Each column in the spreadsheet represents a field relating to your items, for example Item Number, Item Name, etc.
- Update the Tax Code When Bought and Tax Code When Sold columns for each of your items to their new codes. Make sure you don't add any extra columns as AccountRight will only be able to import the same columns (fields) you exported.
 - Save the export file (File > Save As). Make sure you save the file as a Text (tab delimited) file. This ensures you'll be able to import the file back into AccountRight.
- Close Excel.
|
| UI Expand |
|---|
| title | 3. Import the fiile back into AccountRight |
|---|
| | UI Text Box |
|---|
| Before you begin Create a backup of your company file. If the import doesn't go to plan, you can always "undo" it by restoring the backup. For more information see the AccountRight help (Australia | New Zealand). |
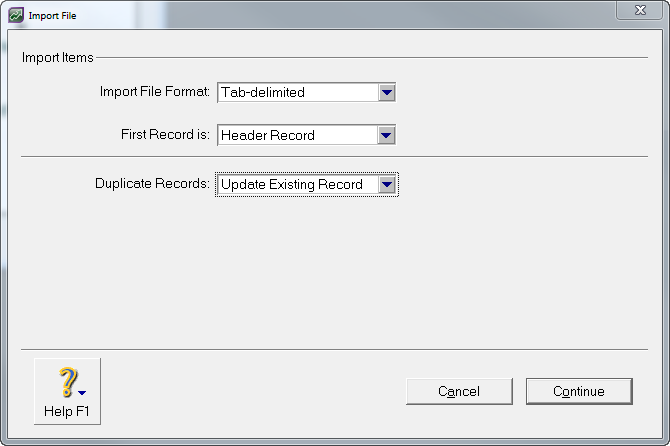
- In AccountRight, go to the File menu and choose Import Data then choose Items.
- Choose the following options: Tab-Delimited; Header Record; Update Existing Record as shown in the following example.
 - Click Continue. You will be asked to choose the file which you saved from Excel.
- Locate the saved file then click Open.
In the Import Data window, click Match All to align all of the imported fields with the records in your company file. See our example below. 
- Click Import and the updated information will be imported.
- At the conclusion of the import, check the details of what was (or wasn't) imported.

If there were errors or warnings, check the details in the import log file located in your AccountRight installation folder. See Import troubleshooting for help.
|
| 