You can create tasks for a client if you: Tasks and documentsNZ only. Coming soon for AU Creating a task lets you send a document straight from MYOB Practice to a client for viewing in their portal. You can attach documents and add some instructions for the client. The client will be notified immediately by email that you have shared something with them, and they’ll sign in their portal to view the document you published. Creating tasks| UI Expand |
|---|
| title | Creating a task for one client |
|---|
| - Click Tasks in the sidebar (if you're using the new navigation, click Tasks in the top menu bar).
On the Tasks page you can create tasks, and view open and completed tasks that were created in MYOB Practice Online, Accountants Office or Accountants Enterprise. - Click Create Tasktask.
- Select the client. Only clients who you’ve already set up a portal for appear in the list.
- Select the full-access users that you want to assign the task to. These users are :
- A full-access user, part of the client’s portal setup. If the user you want to assign the task to doesn’t appear
you’ll need to - , cancel the task and create them first.
You can assign the task to - Optionally, a contributor as well, such as the client’s bookkeeper. If the contributor isn’t listed, you can add them now by clicking Add other contributors.
Select who in your practice should appear to be as the sender of the task to the client.  Image Removed Image Removed Image Added Image Added
If you didn’t specify a default 'Send as' user in the client’s portal settings, your name will be selected by default. If you need to change the selected person, click the X and select a practice user. That way the client will address the correct practice user when replying to the task.
Select who in your practice needs to be notified when a client adds a comment to the task, or approves a document attached to the task.  Image Removed Image Removed Image Added Image Added
If you didn’t specify a default practice user in the client’s portal settings, only your name will appear herein the Notify list section. You can include other users who should be notified for any activity by clicking Add someone to notify. You should include the task sender (the person selected in the Send as section) as a minimum.
- Give the task a title. This title will be the subject of the email that is sent to the users. It will also be the task title displayed on your Tasks page and the Tasks page in your client’s portal.
Enter a description. This will be the body of the email the users receive. Give them more details concerning the task. Click Choose File or Browse to attach a document relevant to the task that - In the Files area, add any documents you want to
share with - include in the
users. The maximum file size for a document that you can attach to a task is 18MB.- task. To include a document saved to your computer, drag and drop the file or click Upload files. To choose from already-uploaded files, click Select.
- Enter or select the due date for the task to be completed. Enter a date in dd/mm/yyyy format or click the calendar icon
 Image Modified to select a due date. Image Modified to select a due date. Click Create task.
A task is created on your Tasks > Open tasks page and on the client's Tasks > Open tasks portal page. An email is sent to the users and collaborators you selected, letting them know that you've assigned them a task.
| UI Text Box |
|---|
| You can also create a general task for one or more clients straight from the Accounting dashboard Transaction processing page. See the procedure below for step-by-step instructions. |
|
| UI Expand |
|---|
| title | Creating a task for multiple clients |
|---|
| You can create a " bulk task " from the Accounting dashboard Transaction processing page when you want to send several clients a generic checklist of information and documents you'll need for their next tax return. The task will be | UI Text Box |
|---|
| When you create a task from the Transaction processing page: |
Click
Accounting in the sidebar (if you're using the new navigation, click Transaction processing Transaction Processing in the top menu bar
). Select all the clients you want to assign the same task to.
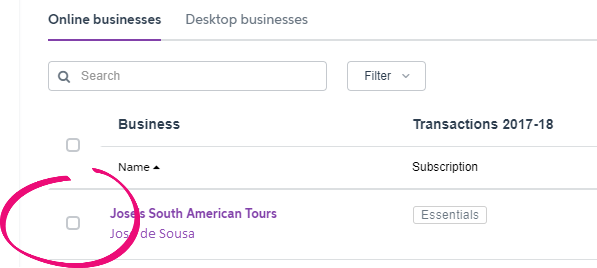 Image Removed Image Removed Image Added Image Added
Remember that the clients must be linked to their files, and already have client portals.
Click Create task.
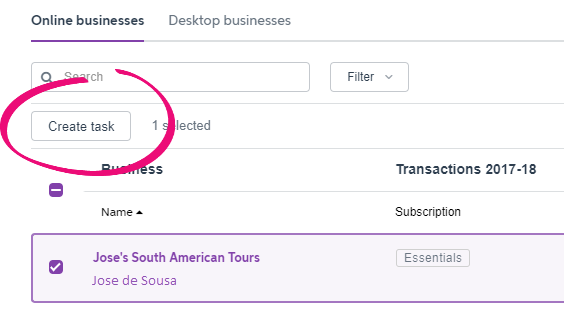 Image Removed Image Removed Image Added Image Added
In the
Create tasks General Task page that appears, enter a
Task name Title.
This will be the subject of the email that is sent to your clients. It will also be the title that appears on your Tasks page and the Tasks page in your clients' portals.
 Image Removed Image Removed
Click Create task.
- Enter a Description. This will be the body of the email to your clients giving them more details concerning the task.
- In the Files area, add any documents you want to include in the task. To include a document saved to your computer, drag and drop the file or click Upload files. To choose from already-uploaded files, click Select.
Enter or select the Due date for the general task to be completed. Enter a date in dd/mm/yyyy format or click the calendar Image Modified icon to select a due date for the general task to be completed.
Attach any supporting documents relevant to the task by clicking Add attachment. | UI Text Box |
|---|
| The maximum file size for a document that you can attach to a task is 18MB. |
- Click Generate. An email will be sent to your clients letting them know that you've assigned them a task. The task will also appear on your Tasks > Open tasks page and your clients can view it in their portal's Tasks > Open Tasks page.
| UI Text Box |
|---|
| Note that when you create a task from the Accounting dashboard, the default "Send as" and "Notify list" options selected in each client's portal will be applied. |
|
| 
 Yes
Yes
 No
No
 Thanks for your feedback.