| UI Text Box |
|---|
| To use this app, you must have an existing MYOB Essentials subscription. |
Is your shoebox overflowing with receipts you’re keeping “just in case”? With MYOB Capture, you can take a quick photo of your receipt and send it to your In tray in a matter of seconds – helping you keep compliant and organised. If you have a compatible Android or iOS device, you’re ready to go—all you need to do is download and install MYOB Capture for Essentials app:  
Once it's installed, here’s how it works: - Take a photo of your receipt.
- Drag the purple rectangle around the edges of your receipt.
- Check your receipt.
- Send your receipt to your In tray!
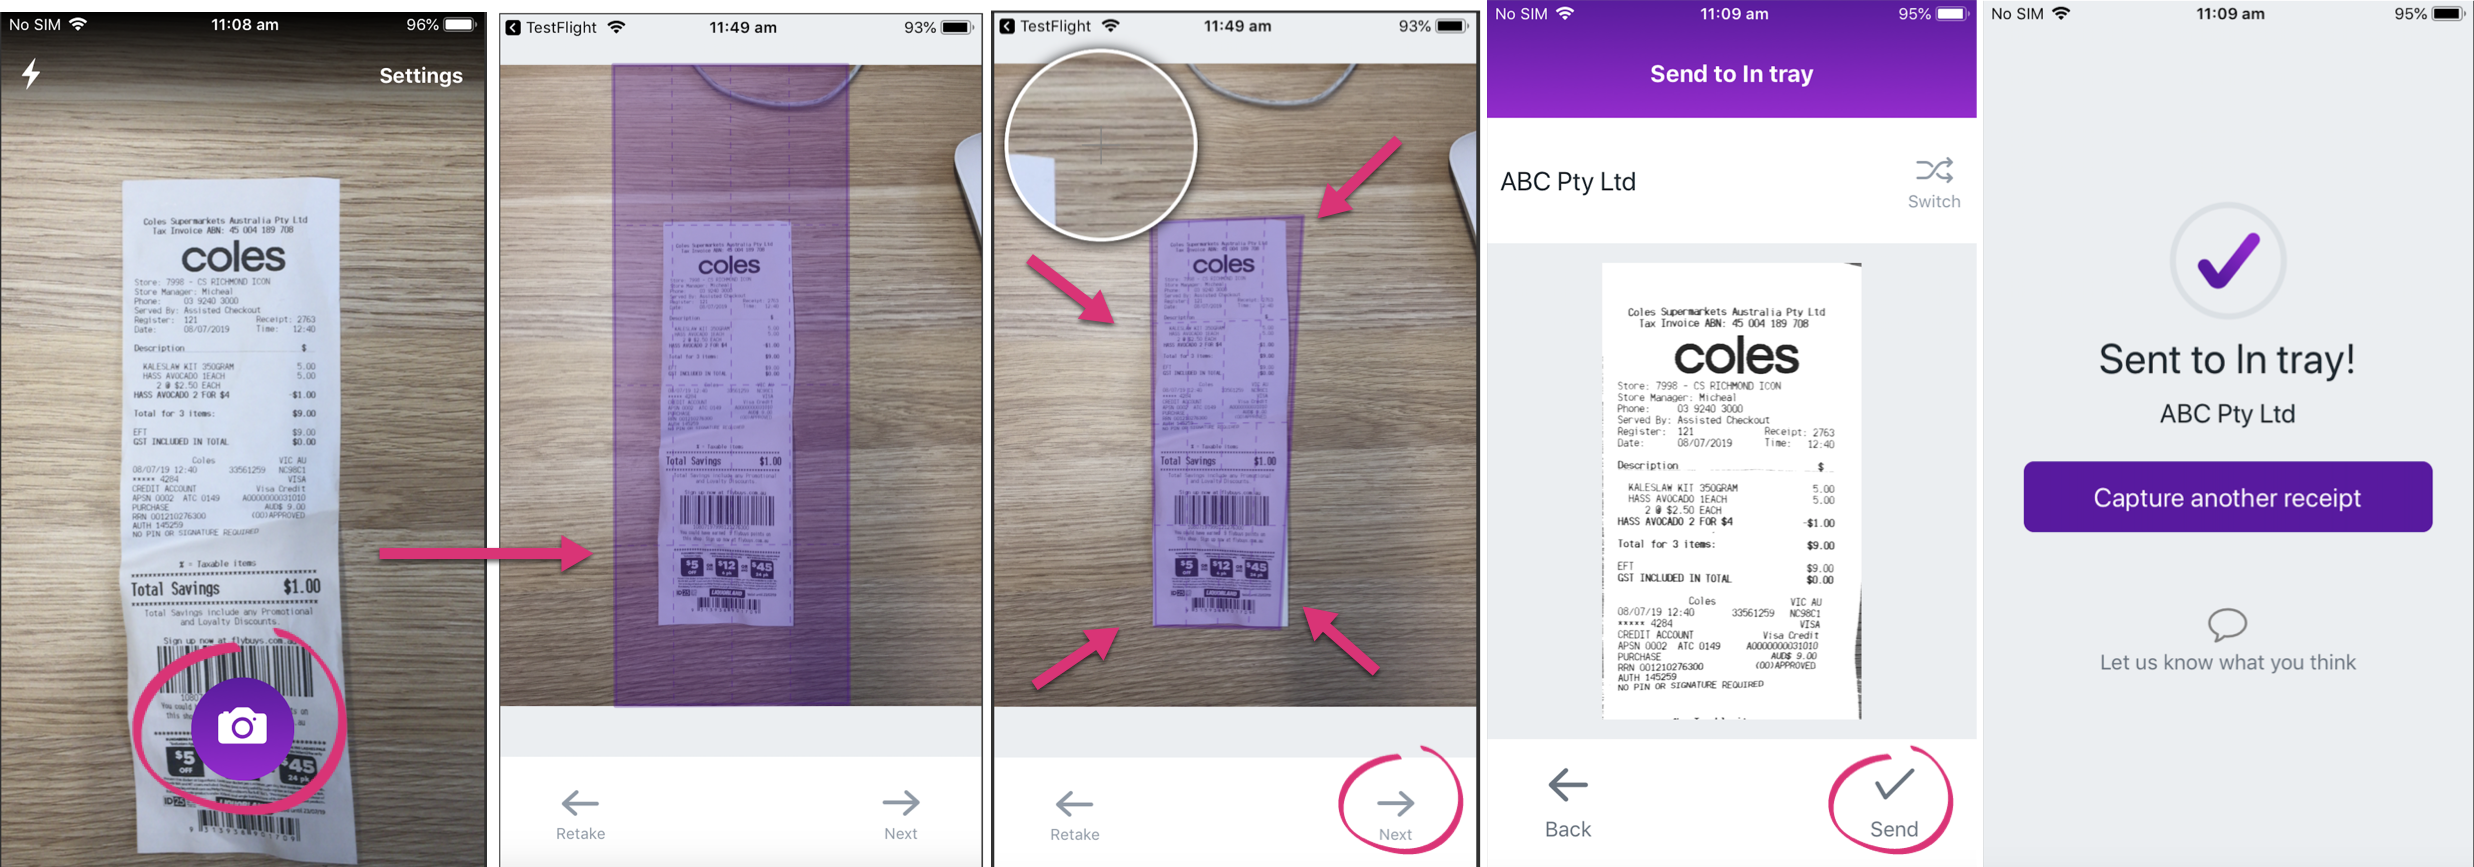
Your receipt will be sent to your In tray and ready for you to use in MYOB Essentials. Plus, if you have multiple MYOB Essentials businesses, you can switch between them. With the documents in your In tray you can then: - Create a new bill
- Link to an existing bill
- Link to a bank transaction
- Create a Spend money transaction
Learn how to work with documents in your In tray | UI Expand |
|---|
| title | How to adjust your image |
|---|
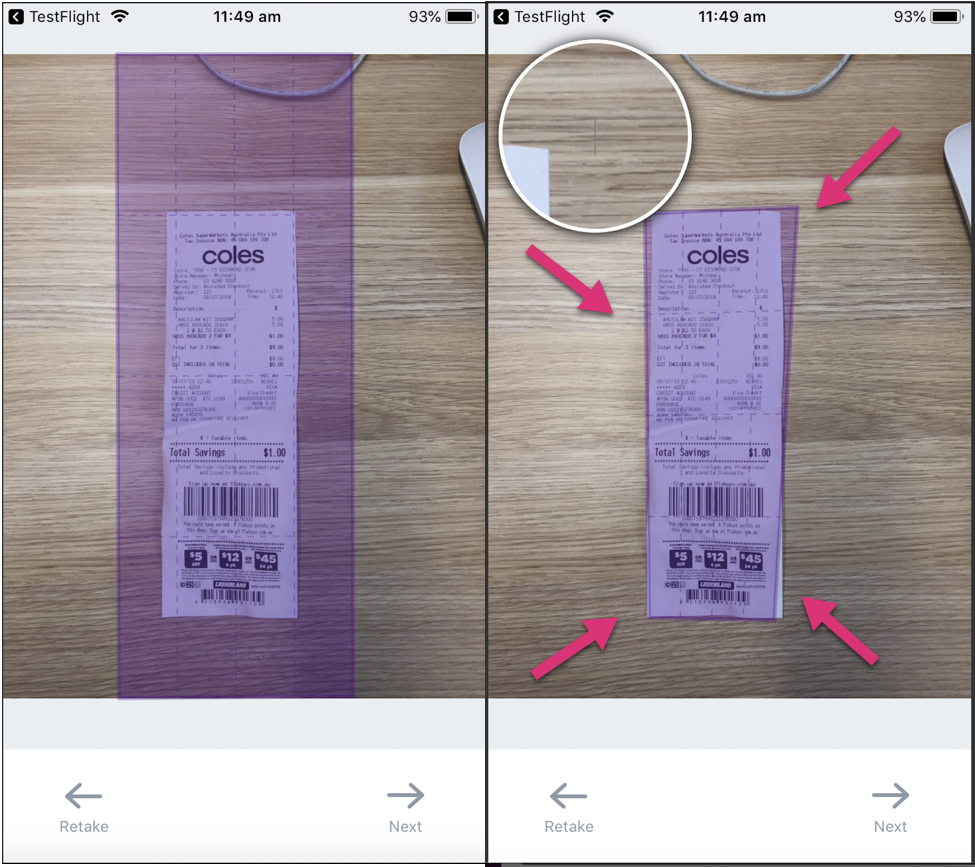
| How to adjust your image- Take a picture of your receipt on the home screen.
- A purple outline will appear over your image.
- Line up the corners of your receipt with the corners of the purple outline – a circle will appear to magnify wherever you place your finger.
- Once you've lined everything up, tap on Next.
- A cropped version of the image will appear.
- If you're happy with the image, tap Send or tap Back to adjust.
|
| UI Expand |
|---|
| title | How to save a copy of your receipts to your iOS device's gallery |
|---|
| How to save a copy of your receipts to your iOS device's galleryTo save photos to your device's gallery, you need to configure your settings. - Go to your device's settings.
- Scroll down to the list of apps on your phone and select Capture.
- Tap Photos.
- Tap Read and WriteOpen the app and tap Settings.
- Tap Save uploads to Photos.
- A pop up asking you to "Give Capture access to you photo album?" will appear.
- Select the Settings option.
- You'll be taken to your Phone settings.
- Select Photos.
- Select Read and write.
- Now every time you send a photo to your In tray using Capture, it'll save to your gallery.
|
| UI Expand |
|---|
| title | How to save a copy of your receipts to your Android device's gallery |
|---|
| How to save a copy of your receipts to your Android device's galleryTo save photos to your Android device's gallery, you need to configure your settings. - Go to your device's settings.
- Select Apps.
- Scroll down to the list of apps on your phone and select Capture.
- Turn on StorageOpen the app and tap Settings.
- A Permission required pop up will appear.
- Tap OK.
- Another pop up will ask you whether you wish to Allow Capture to access photos, media and files on your device?
- Tap Allow.
- Now every time you send a photo to your In tray using Capture, it'll save to your gallery.
|
| UI Expand |
|---|
| title | How to switch businesses |
|---|
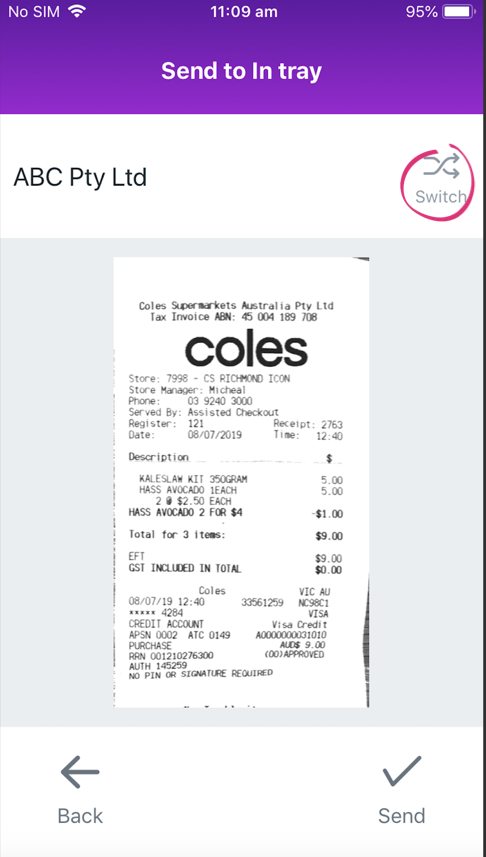
| How to Switch businesses- Take your picture and adjust the purple outline.
- Tap Preview.
- Tap Switch.
- A list of your businesses will appear.
- Select the business you'd like to switch to.
- Now every time your images will be sent to the In tray of that business.
|
| 
 Yes
Yes
 No
No
 Thanks for your feedback.