AccountRight Plus and Premier, Australia only Timesheets are used to record: - all the hours worked by hourly employees,
- extra hours worked by employees (in addition to their standard pay), or
- time-billing activity details (which will also create activity slips).
If your hourly employees work a fixed number of hours per pay and you don’t pay employees for time-billing activities, there’s no need for you to use this feature. However, if you pay employees for additional hours worked, such as overtime, you can record these hours using timesheets. When you record timesheet information for a pay period, you can then include the timesheet details when you process employee pays. | UI Text Box |
|---|
| Speed up your payroll by getting your employees to submit their timesheets via the MYOB Team mobile app. |
Once you have set up your payroll, the timesheet feature is optional. Before using timesheets, you need to set your timesheet preferences. | UI Expand |
|---|
| title | To set up timesheet preferences |
|---|
| To set up timesheet preferences- Go to the Setup menu and choose Preferences. The Preferences window appears.
- In the System tab, select the I Use Timesheets for [...] and My Week Starts on [...] preference.
- If you want to use timesheets to record:
- activity slips as well as payroll information, select Time Billing and Payroll from the I Use Timesheets for [...] list.
- payroll information only, select Payroll from the I Use Timesheets for [...] list.
- Select the first day of your timesheet period from the My Week Starts on [...] list, enter the first day of your timesheet period. Note that if you just use timesheets for payroll and your pay period starts on a different day each period, for example, you pay monthly, you can select any day.
- Click OK.
|
| UI Expand |
|---|
| title | To enter a timesheet |
|---|
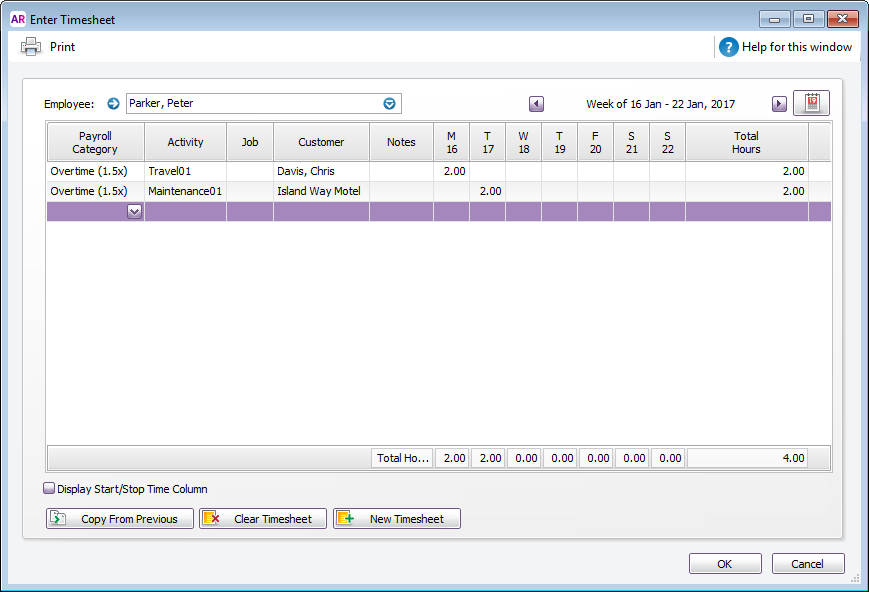
| To enter a timesheetHere's how you can enter a timesheet. You can also create a timesheet entry from the Enter Activity Slip window by selecting the Include Hours on Timesheet option. This allows you to enter greater detail about the activity. See Creating activity slips. - Go to the Payroll command centre and click Enter Timesheet. The Enter Timesheet window appears.
 In the Employee field, type or select the employee’s name. Only employees with hourly type wage categories assigned can be chosen.
The employee’s timesheet, with any previously entered details for the period shown, appears. | UI Text Box |
|---|
| A grey value in an hours column indicates hours already processed in a pay run. |
- If you are recording details for a week other than the current week, select the required week:
- click the back arrow (
 ) to select a previous week ) to select a previous week - click the forward arrow (
 ) to select a future week ) to select a future week - click the calendar icon (
 ) to select a week from the calendar that appears. ) to select a week from the calendar that appears.
Enter timesheet details in one of the following ways: | If you want to... | Do this... |
|---|
| Enter the daily hours for each payroll category worked | For each payroll category, enter an hourly payroll category in the Payroll Category field and enter the daily hours worked in the date fields. Note that minutes should be entered as a decimal % of hours. e.g. 30 minutes is .5 hours. You can also: - record time‑billing details (depending on your selection in the Preferences window)
- type a description in the Notes field
- assign a job number.
| | Use the same details as the previous week | Click Copy From Previous. The employee’s timesheet details for the previous week appear. |
| UI Text Box |
|---|
| If you want to record details of the start and stop times for a payroll category, select the Display Start/Stop Time Column option. You can now record any information you like in the Start/Stop column. The Start/Stop column accepts letters and/or numbers so use whatever time format you like. For example, you could enter "Worked 9-5" or "Monday 9-12, 2-4" or "Sick leave Mon 1pm-5pm". The start and stop times you enter are for your records and won't affect the calculated Total Hours value. |
- If you want to enter another timesheet for the same employee, but for another week, repeat from step 3.
To record a timesheet for another employee, click New Timesheet. When you've finished entering all timesheets, click OK. | UI Text Box |
|---|
| If you recorded time-billing activity details on this timesheet, an activity slip is created when you record the timesheet. You can review or modify the activity slip information in the Enter Activity Slip window or the Enter Timesheet window. |
|
| UI Expand |
|---|
| title | To delete a line on a timesheet |
|---|
| To delete a line on a timesheetWhen editing a timesheet you may want to remove an incorrect line entry. Click to highlight the line you want to delete. Go to the Edit menu and choose Delete Line.

|
| UI Expand |
|---|
| title | To delete a timesheet |
|---|
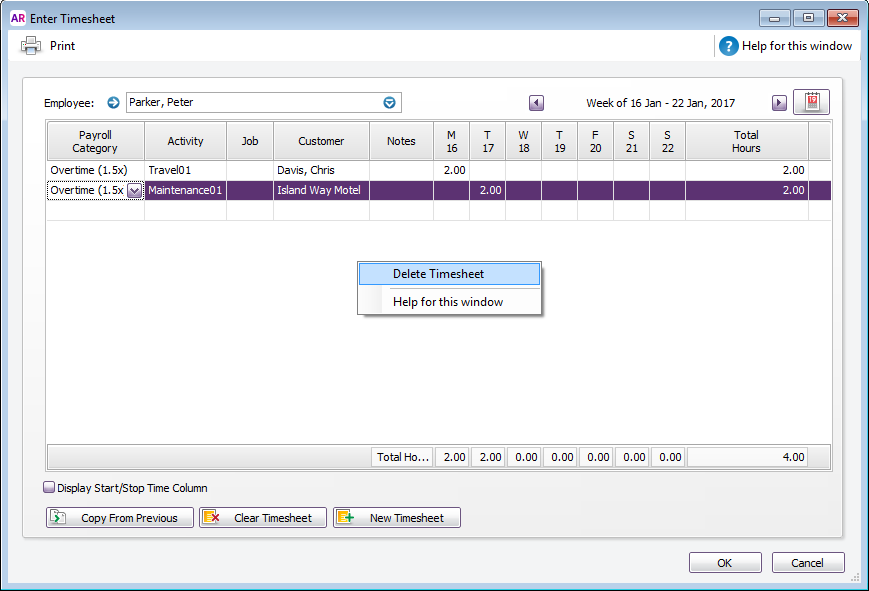
| To delete a timesheetOpen the timesheet you want to delete. Right-click on the timesheet window and choose Delete Timesheet. If the timesheet has already been used to process payroll you'll not be able to delete the timesheet.
|
| UI Expand |
|---|
| To print timesheetsYou can display and print your entered timesheets by running a report. Go to the Reports menu (at the top of the AccountRight window) and choose Index to Reports. The Index to Reports window appears. - Click the Payroll tab.
Click the Timesheets report. Enter a date and display the report. - You can use the report customisation options to set the report up the way you want. For example, to show Notes in the report, click the Insert/Modify tab, select Notes and click Show:

|
| UI Expand |
|---|
| title | To turn off timesheets |
|---|
| To turn off timesheets- Go to the Setup menu and choose Preferences. The Preferences window appears.
Click the System tab. Deselect the option I Use Timesheets for [...] and My Week Starts on [...]. - Click OK.
|
| HTML |
|---|
<h2><i class="fa fa-comments"></i> FAQs</h2><br> |
| UI Expand |
|---|
| title | Why are my timesheet hours not included when processing payroll? |
|---|
| Why are my timesheet hours not included when processing payroll?If your timesheet hours are not appearing when you process payroll this can be caused by the following. - The pay period dates when processing payroll don't match the timesheet dates.
- Part or all of the timesheet has been included in a previous pay run. To check this open the current timesheet and check if any of the days are uneditable (greyed out).
|
| UI Expand |
|---|
| title | Why are more hours showing on my pays than are on my timesheet? |
|---|
| Most likely this is due to hours being entered in the employee's standard pay. The quantity of hours shown on a pay take into account hours entered in the timesheet as well as hours entered in the standard pay. If you only want to use timesheets to enter the hours an employee worked, zero out any hours from the standard pay in their employee card. 
|
| HTML |
|---|
<p><a href="https://academy.myob.com/" alt="Start learning now" target="_blank"><img src="http://help.myob.com.au/images/trainingad/classroom3.png" width="50%" height="auto" align="left"></a>
</a></p> |
| 
 Yes
Yes
 No
No
 Thanks for your feedback.