When you customise a report, you can modify or add report elements (shapes, text boxes and pictures) using the options in the Insert/Modify tab. Some of these options are described below. | UI Text Box |
|---|
| Before printing or exporting the report, click the Print Preview tab to apply the changes. |
| UI Expand |
|---|
| title | Arrange (bring forward, send back) |
|---|
| Arrange (bring forward, send back)Click the element once to select it. - Click Arrange and then choose an option.

|
| UI Expand |
|---|
| title | Align (left, right, top, bottom) |
|---|
| Align (left, right, top, bottom)Select the elements you want to align. To do this, hold down the Ctrl key on your keyboard and click each element. - Click Align and then choose an alignment option.
|
| UI Expand |
|---|
| Cut, copy and pasteSelect the element and do one of the following to copy or cut: - Use the clipboard buttons in the Insert/Modify tab to cut and copy.
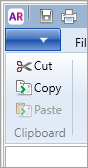 - Right mouse-click and choose Cut or Copy.
- Click on the area of the report where you want to paste the element, then either:
- Use the clipboard buttons in the Insert/Modify tab to paste.
- Right mouse-click and choose Paste.
|
| UI Expand |
|---|
| UndoTo undo the last change you made to the current report, click the undo button (  ). ). |
| UI Expand |
|---|
| DeleteSelect the element and do one of the following: - press
Delete on your keyboard. - right mouse-click and choose Delete.
|
| HTML |
|---|
<h2><i class="fa fa-comments"></i> Editing report elements FAQs</h2><br> |
| UI Expand |
|---|
| title | Can I change the font in a report? |
|---|
| Can I change the font in a report?You can change the font style, size and colour for text displayed in the report header and footer (not the body). Click the text to be modified and use the text options on the Insert/Modify tab. 
If you'd like the ability to change the font in the body of a report to be added to AccountRight, vote for this feature on the AccountRight Idea Exchange. |
| UI Expand |
|---|
| title | How do I change the number format in my reports? |
|---|
| The way numbers are shown in your reports is controlled by your Windows PC settings. For example, you might want your negative numbers to show with a minus symbol or in brackets (parenthesis). Be aware that changing these settings may impact the number format in other programs on your computer. To change the number format settings: Open the Control Panel. | If using... | Do this... |
|---|
| Windows 10 | Click the Windows Start button and type Control panel, then click Control Panel in the list of results. | | Windows 8 | Right-click the Start button and choose Control Panel. | | Windows 7 | Click the Start button and choose Control Panel. |
- Click Change date, time or number formats. If this option isn't displayed, click Region.
- On the Format tab, ensure English (Australia) or English (New Zealand) is selected.
- Click Additional settings.
- Click the Currency tab.
- Set your desired currency and number settings.
- Click OK then click OK again.
- You need to close and then reopen AccountRight for the change to take effect.
|
| UI Expand |
|---|
| title | How do I change the currency symbol in my reports? |
|---|
| How do I change the currency symbol in my reports?The way currency symbols are shown in your reports is controlled by your Windows PC settings. Be aware that changing these settings may impact the curreny symbol in other programs on your computer. To change the currency symbol settings: Open the Control Panel. | If using... | Do this... |
|---|
| Windows 10 | Click the Windows Start button and type Control panel, then click Control Panel in the list of results. | | Windows 8 | Right-click the Start button and choose Control Panel. | | Windows 7 | Click the Start button and choose Control Panel. |
- Click Change date, time or number formats. If this option isn't displayed, click Region.
- On the Format tab, ensure English (Australia) or English (New Zealand) is selected.
- Click Additional settings.
- Click the Currency tab.
- In the Currency symbol field, select or enter your preferred currency symbol. To remove the currency symbol, enter a space in this field.
- Click OK then click OK again.
- You need to close and then reopen AccountRight for the change to take effect.
|
Saving your changesIf you like how your customised report looks, save it for future use. | UI Expand |
|---|
| title | To save custom reports |
|---|
| To save custom reports- With the report displayed, click the save icon (
 ) at the top of the window. The Save report as window appears. ) at the top of the window. The Save report as window appears. - Enter a name and a brief description of the custom report.
- Click Save.
To run the report later, select it from the My Custom Reports tab in the Index to Reports window. 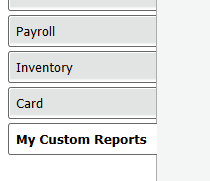
|
|

 Yes
Yes
 No
No
 Thanks for your feedback.