The JobMaker Hiring Credit scheme is a government incentive that encourages businesses to employ job seekers aged 16–35. Eligible businesses can access the JobMaker Hiring Credit for each eligible employee hired between 7 October 2020 and 6 October 2021. For all the details, visit the ATO website. | Checklist |
|---|
| - DO NOT manually create payroll categories for JobMaker
- Nominate and declare eligible employees via Single Touch Payroll reporting
- Pay eligible employees as normal and claim a credit from the ATO for each JobMaker period
- Credits are $200/week for eligible additional employees aged 16–29, and $100/week for those aged 30–35
- You cannot claim JobKeeper and JobMaker at the same time.
|
Let's dive right in. | UI Expand |
|---|
| title | 1. Check if your business is eligible |
|---|
| Visit the ATO website to check if your business is eligible for JobMaker. If eligible, you'll need to register for JobMaker with the ATO. You only need to register once. Make sure you register before the due date for the first JobMaker period you're claiming for. See all JobMaker key dates. You don't need to be registered before you hire eligible employees. |
| UI Expand |
|---|
| title | 2. Check if an employee is eligible |
|---|
| You can only claim JobMaker payments for eligible employees. According to the ATO, employees are eligible if they: - are an employee of your business during the JobMaker period
- are aged 16–35 years old when they started employment
- started employment between 7 October 2020 and 7 October 2021
- worked or have been paid for an average of at least 20 hours per week they were employed in the JobMaker period
- have completed a JobMaker Hiring Credit employee notice for the employer
- have not already provided a JobMaker Hiring Credit employee notice to another current employer
- received one of these payments for at least 28 consecutive days (or 2 fortnights) in the 84 days (or 6 fortnights) prior to starting employment
- JobSeeker Payment
- Parenting Payment
- Youth Allowance (except if they were receiving the allowance because they were undertaking full-time study or are a new apprentice).
|
| UI Expand |
|---|
| title | 3. Nominate eligible employees |
|---|
| You need to nominate your eligible employees to let the ATO know they're part of the JobMaker scheme. You'll do this only once for each employee. To be able to claim JobMaker payments for an employee, nominate them before the due date for their first JobMaker period. JobMaker period | JobMaker period dates | Due date for nominating employees |
|---|
1 | 7 Oct 2020 – 6 Jan 2021 | 27 Apr 2021 | 2 | 7 Jan 2021 – 6 Apr 2021 | 28 Jul 2021 | 3 | 7 Apr 2021 – 6 Jul 2021 | 28 Oct 2021 | 4 | 7 Jul 2021 – 6 Oct 2021 | 28 Jan 2022 | 5 | 7 Oct 2021 – 6 Jan 2022 | 27 Apr 2022 | 6 | 7 Jan 2022 – 6 Apr 2022 | 28 Jul 2022 | 7 | 7 Apr 2022 – 6 July 2022 | 28 Oct 2022 | 8 | 7 Jul 2022 – 6 Oct 2022 | 28 Jan 2023 |
| UI Expand |
|---|
| title | To nominate an employee |
|---|
| - In AccountRight, go to the Payroll command centre and click Payroll Reporting.
- Click Payroll Reporting Centre.
Click the JobMaker tab. | UI Text Box |
|---|
| Employee missing? Make sure they have a valid Date of Birth and Start Date in their employee card and you've paid them during the JobMaker period. |
- For each eligible employee:
- Click the ellipsis and choose Nominate employee.
 - If the employee had previously been nominated for JobMaker but left your business, but has now returned and you're renominating them, select this option.
 - Click Nominate.
- Enter the name of the Authorised sender and click Send.
- Repeat for each eligible employee.
You'll see the date each employee was nominated. 
|
| UI Expand |
|---|
| title | To remove a nomination |
|---|
| If you accidentally nominated an employee, you can remove their nomination. This removes the employee from the JobMaker scheme. If an employee stops working for you, you don't need to remove their nomination—just stop declaring their eligibility. - In AccountRight, go to the Payroll command centre and click Payroll Reporting.
- Click Payroll Reporting Centre.
Click the JobMaker tab. - Click the ellipsis for the employee and choose Remove nomination.
 - If the employee had been re-nominated, select this option.
 - Click Remove.
- Enter the name of the Authorised sender and click Send.
You'll see the date the employee's nomination was removed. 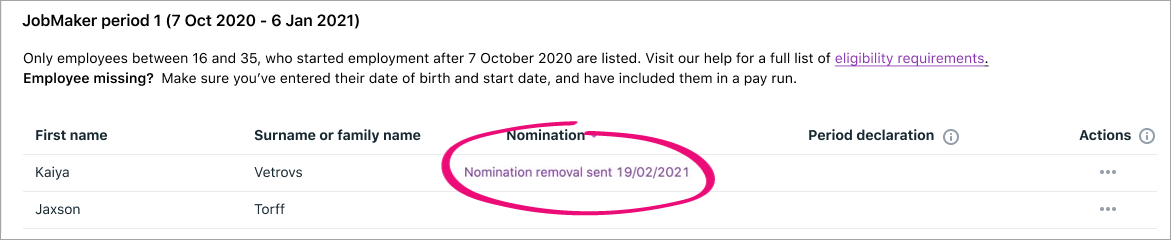
|
| UI Expand |
|---|
| title | To renominate a returning employee |
|---|
| If an employee who was previously nominated for JobMaker left your business and has now returned, you can renominate them. - In AccountRight, go to the Payroll command centre and click Payroll Reporting.
- Click Payroll Reporting Centre.
Click the JobMaker tab. - Click the ellipsis and choose Nominate employee.
- Select this option.
- Click Nominate.
- Enter the name of the Authorised sender and click Send.
|
|
| UI Expand |
|---|
| title | 4. Declare employee eligibility for a claim period |
|---|
| If a nominated employee has completed a minimum average of 20 hours of work per week across a JobMaker period, you can declare this to the ATO each JobMaker period. You can work out an employee's average hours (either worked or paid) by dividing the total hours worked by the number of weeks in the JobMaker period. To learn more about eligible employees and the minimum hours requirement, visit the ATO website. | UI Text Box |
|---|
| For hourly-based employees, run the Payroll Advice report for the JobMaker period to see their paid hours (Reports menu > Index to Reports > Payroll tab > Payroll Advice). For salaried employees, check the Hours in Pay Period in their card (Card File > Cards List > Employees > open the card > Payroll details tab > Wages). |
Here are the due dates for declaring employee eligibility for each JobMaker period. JobMaker period | JobMaker period dates | Due date for declaring employee eligibility |
|---|
1 | 7 Oct 2020 – 6 Jan 2021 | 27 Apr 2021 | 2 | 7 Jan 2021 – 6 Apr 2021 | 28 Jul 2021 | 3 | 7 Apr 2021 – 6 Jul 2021 | 28 Oct 2021 | 4 | 7 Jul 2021 – 6 Oct 2021 | 28 Jan 2022 | 5 | 7 Oct 2021 – 6 Jan 2022 | 27 Apr 2022 | 6 | 7 Jan 2022 – 6 Apr 2022 | 28 Jul 2022 | 7 | 7 Apr 2022 – 6 July 2022 | 28 Oct 2022 | 8 | 7 Jul 2022 – 6 Oct 2022 | 28 Jan 2023 |
| UI Expand |
|---|
| title | To declare an employee's eligibility |
|---|
| - In AccountRight, go to the Payroll command centre and click Payroll Reporting.
- Click Payroll Reporting Centre.
Click the JobMaker tab. - For each eligible employee:
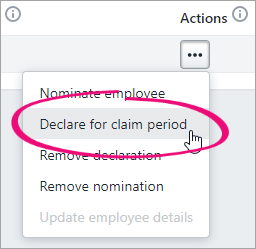
- Click the ellipsis and choose Declare for claim period.
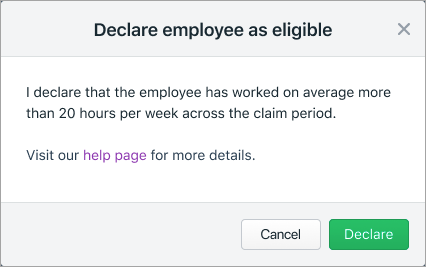
 - Click Declare.
 - Enter the name of the Authorised sender and click Send.
- Repeat for each eligible employee you need to declare.
You'll see the date each employee's declaration was sent. |
| UI Expand |
|---|
| title | To remove an employee's declaration |
|---|
| If you accidentally sent a declaration to the ATO for an ineligible employee, you can remove the declaration. - In AccountRight, go to the Payroll command centre and click Payroll Reporting.
- Click Payroll Reporting Centre.
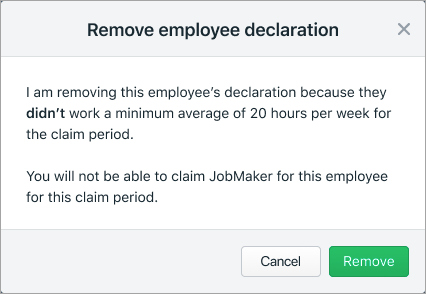
Click the JobMaker tab. - Click the ellipsis for the employee and choose Remove declaration.
 - Click Remove.
 - Enter the name of the Authorised sender and click Send.
|
|
| UI Expand |
|---|
| title | 5. Claim JobMaker payments |
|---|
| You can make your JobMaker claims online with the ATO via either: Your registered tax or BAS agent can also submit your claim for you. Here are the dates you can submit your claim for each JobMaker period: Period | JobMaker period | STP reporting due date | Claim period |
|---|
1 | 7 October 2020 – 6 January 2021 | 27 April 2021 | 1 February 2021 – 30 April 2021 | 2 | 7 January 2021 – 6 April 2021 | 28 July 2021 | 1 May 2021 – 31 July 2021 | 3 | 7 April 2021 – 6 July 2021 | 28 October 2021 | 1 August 2021 – 31 October 2021 | 4 | 7 July 2021 – 6 October 2021 | 28 January 2022 | 1 November 2021 – 31 January 2022 | 5 | 7 October 2021 – 6 January 2022 | 27 April 2022 | 1 February 2022 – 30 April 2022 | 6 | 7 January 2022 – 6 April 2022 | 28 July 2022 | 1 May 2022 – 31 July 2022 | 7 | 7 April 2022 – 6 July 2022 | 28 October 2022 | 1 August 2022 – 31 October 2022 | 8 | 7 July 2022 – 6 October 2022 | 28 January 2023 | 1 November 2022 – 31 January 2023 |
Learn all about the claims process on the ATO website. |
| UI Expand |
|---|
| title | 6. Set up an account to receive JobMaker payments |
|---|
| To keep track of the JobMaker payments you receive from the ATO, you'll need a new income account. Remember—you'll pay your eligible employees as normal under JobMaker, then you'll claim a credit from the ATO each quarter. You can set up this account as an "other income" type account (8-xxxx), but you could also set it up as an income account type (4-xxxx). If you're not sure which account type best suits your business, check with an accounting advisor. - Go to the Accounts command centre and click Accounts List.
- Click the Other Income tab.
- Click New. The Account Information window appears.
- Enter an Account Number which suits your accounts list.
- Enter the Account Name as JOBMAKER CLAIMS RECEIVED.
Here's our example:
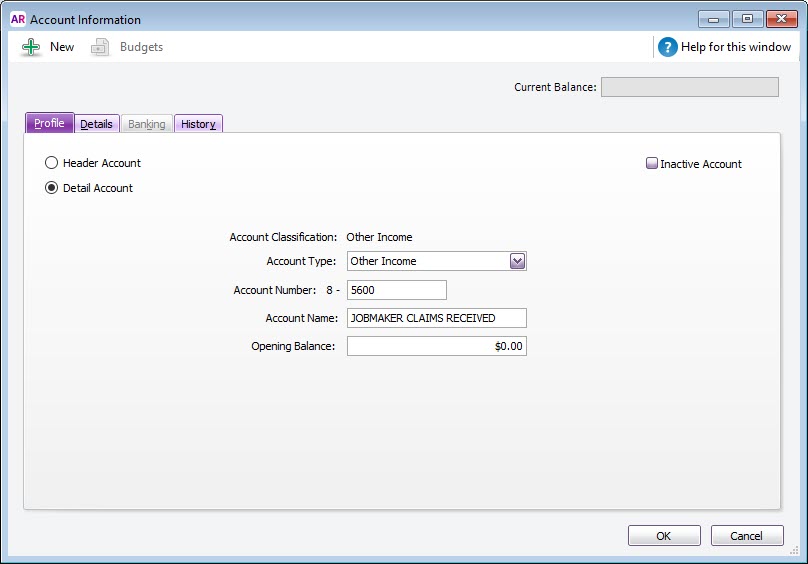 - Click the Details tab and choose N-T as the Tax Code.
- Click OK.
|
| UI Expand |
|---|
| title | 7. Receive JobMaker payments from the ATO |
|---|
| The JobMaker payments you receive from the ATO will be deposited into your nominated bank account. How you record these payments in AccountRight depends on whether or not you have a bank feed set up on that account. | UI Expand |
|---|
| title | If you use bank feeds |
|---|
| The payments from the ATO will appear in AccountRight when your bank feed transactions appear. - If you've already recorded a receive money transaction for the deposit (as described below), you can match the bank feed transaction to it.
- If you haven't already recorded a receive money transaction for the deposit, you can do so straight from the Bank Feeds window. When creating the receive money transaction, allocate the deposit to the income account we set up earlier (the steps below will show you what this means).
For details about how to work with bank feed transactions, see Approving a bank feed. |
| UI Expand |
|---|
| title | If you don't use bank feeds |
|---|
| You'll need to manually record a receive money transaction, like this: - Go to the Banking command centre and click Receive Money to open the Receive Money window.
- In the Deposit to Account field, choose the bank account the payment went into.
- If you've set up a card for the ATO or Australian Government (for example), choose this card in the Payor field.
- In the Amount field, enter the payment amount.
- Enter a Memo to describe this transaction. This'll make it easier to identify the transaction later.
- In the Acct No. field on the first line, choose the income account we created earlier. The Name and Amount will appear.
Here's our example:
 - The Tax code will be based on the one you specified when creating the income account (N-T), so you shouldn't need to change this.
- Click Record.
|
|
|

 Yes
Yes
 No
No
 Thanks for your feedback.