
- Created by BrianQ, last modified by JohnW on Aug 24, 2015
You are viewing an old version of this page. View the current version.
Compare with Current View Page History
« Previous Version 16 Next »
https://help.myob.com/wiki/x/mwSc
How satisfied are you with our online help?*
Just these help pages, not phone support or the product itself
Why did you give this rating?
Anything else you want to tell us about the help?
Before you can record a sale, you need to create a card for your customer.
- Go to the Card File command centre and click Cards List. The Cards List window appears.
- Click New. The Card Information window appears.

- Select Customer from the Card Type list.
- Select the designation of the card: company or individual.
- Type the customer name.
- If you use codes to identify customers, type the code for the customer in the Card ID field. For more information, see Card identification codes.
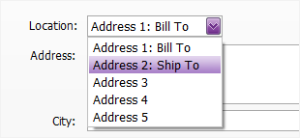
Enter contact details for the customer. If you want to enter more contact information, select Address 2 from the Locations list and enter the additional details. You can enter contact details for five locations or people at the same business.
Got multiple email address or contact details for one business? If you've got more than one contact at a business, enter their details as a different location. You can enter the details for up to five contacts, this includes multiple email addresses and phone numbers. You can select the different contacts when sending emails.
Click the Card Details tab. You can enter notes about the customer, insert a picture and assign attributes.
If you want to... See insert a picture Card pictures assign identifiers to the card Card identification codes assign an attribute from a custom list Custom lists enter additional information in a custom field Custom card fields Click the Selling Details tab and enter your selling details.

A Selling information The selections you make here will be used, by default, on new sales that you create for this customer. You can override these selections when recording a sale.
If you want to learn about each option, hover your mouse over the field to display the field help (you'll need field help turned on, go to Help > Show Field Help).

B
Tax/GST information The customer’s tax or GST information is entered here. If the customer’s tax/GST status takes precedence over that of the item or service being sold, select the Use Customer’s Tax Code (Australia) or Use Customer’s GST Code (New Zealand) option. C
Credit terms The credit terms entered here are used as the default terms for all sales to the customer, but can be changed at any time. - Click the Payment Details tab and select the method of payment your customer will use to pay you.
- [Optional] Click the Jobs tab and enter the details of each job you have started or are about to start for the customer. For more information about jobs, see Jobs.
- [Optional] Click the History tab and type the dollar value of the sales made prior to your conversion month. You can also enter the date that the contact became a customer.
Click OK to save the card.
 Yes
Yes
 No
No
 Thanks for your feedback.