
- Created by admin, last modified by ErikV on May 17, 2016
You are viewing an old version of this page. View the current version.
Compare with Current View Page History
« Previous Version 12 Next »
https://help.myob.com/wiki/x/Tgmy
How satisfied are you with our online help?*
Just these help pages, not phone support or the product itself
Why did you give this rating?
Anything else you want to tell us about the help?
You can manage your contacts from the Contacts page. On this page, you can add, edit and delete contacts, mark contacts as reportable (if applicable) and search for contacts.
On this page:
- Adding a contact
- Editing a contact
- Deleting a contact
- Inactivating and activating a contact
- Importing contacts
- Emailing a contact
Adding a contact
From the dashboard, the quickest way to access the Create contact page is from the Contacts drop down menu.

To add a contact from the Contacts page, click the Create contact button.

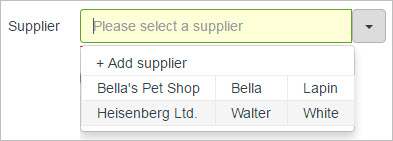
You can also add contacts quickly when you create sales or purchases. Simply choose the Add option from the drop down menu that appears when you enter your customer or supplier. For more information, see Using contacts in transactions.
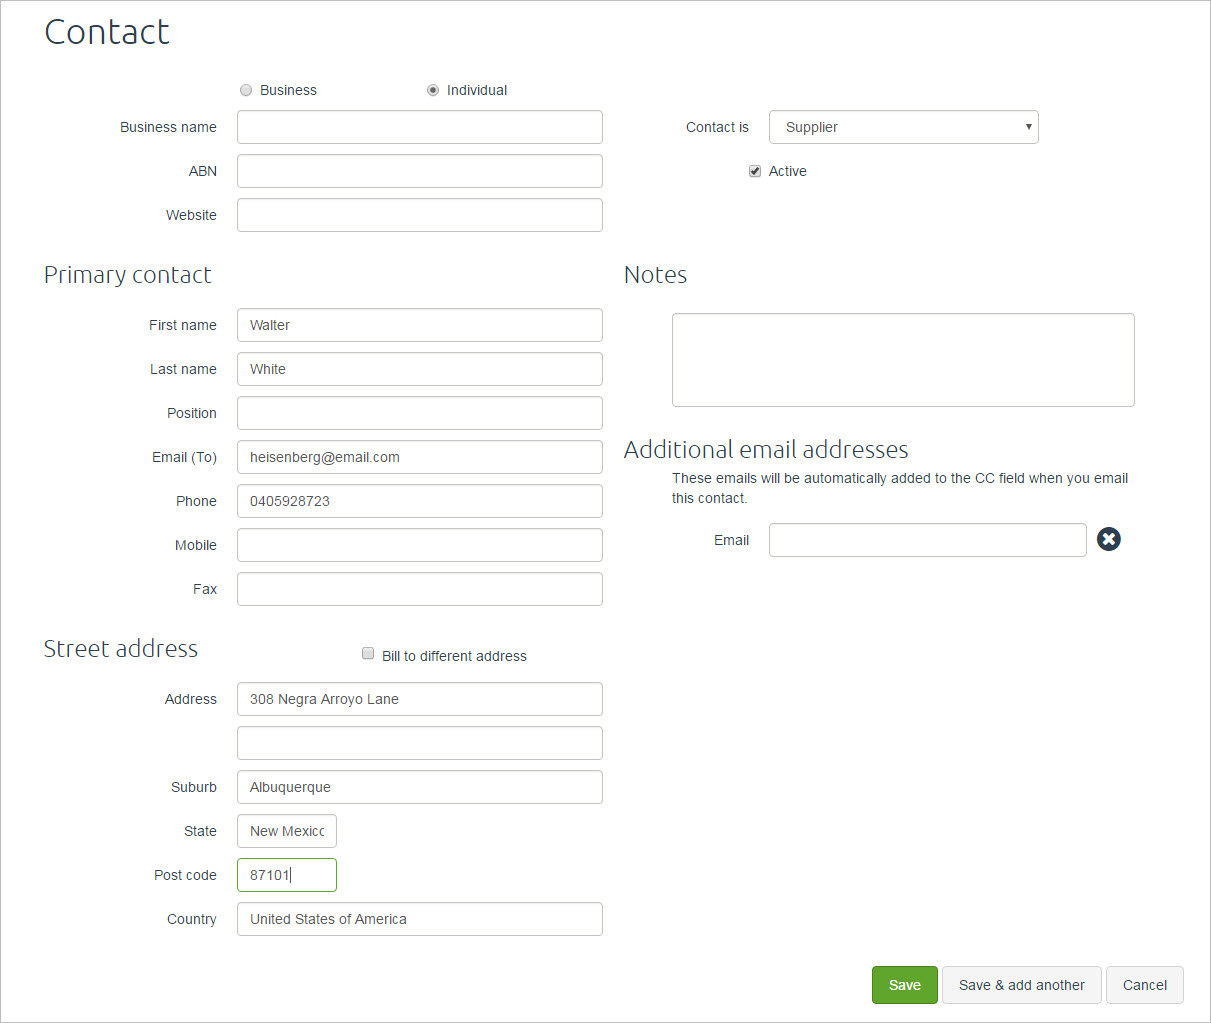
However you access the Contact page, you'll be able to record the contact details using as much or as little details as you like. The only required information is the type of contact, whether they are a business or an individual person, and their name. For more information about the information you can store for a contact, see Viewing and entering contact information.
Editing a contact
To edit a contact, click their name in the list of contacts. The Contact page appears, where you can edit the contact’s details. You can change any of the details shown on this page, including their name and the contact type. When you’re done, click Save.
For more information about the information you can store for a contact, see Viewing and entering contact information.
Deleting a contact
When you delete a contact, it is removed along with all the information stored in the contact record. Instead of deleting contacts, it’s usually better to make them inactive. This removes them from reports and some selection lists, but you’ll be able to recover the information later if you need it.
You can’t delete a contact if it has ever been used in a transaction. If you no longer want to use a contact, you can make it inactive instead. See Inactivating and activating a contact.
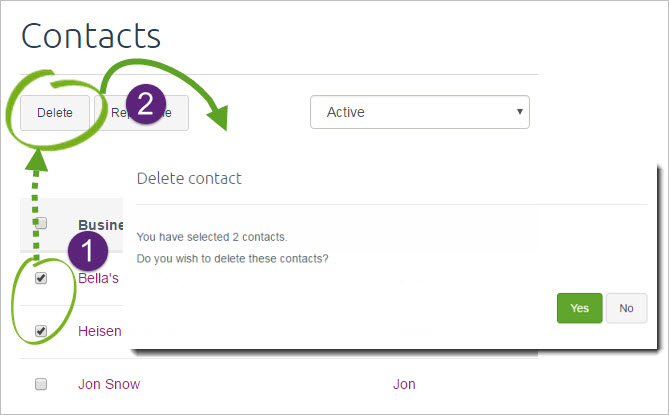
To delete a contact, select it by clicking the box next to its name in the list, then click Delete. If you want, you can select more than one contact at a time and delete them all at once.
You can also delete a contact you’re currently viewing by clicking the Delete button on the Contact page.

Inactivating and activating a contact
If you no longer want to use a contact, but are unable to delete it (because you have used it in a transaction, for example), you can make it inactive.
Inactive contacts are removed from reports and some selection lists, but the contact’s details are stored in case you need them in the future. Inactivating a contact is usually a better option than deleting them, which permanently removes their details. See Deleting a contact.
To inactivate a contact, deselect the Active checkbox on the Contact page. You can reactivate a contact at any time in the future by selecting this checkbox again.

Inactivated contacts won’t appear in lists of available contacts when you enter transactions. By showing only the most relevant contacts, this makes it easier for you to find the contact you’re looking for.
By default, inactivated contacts will not be shown in your contacts list. To include inactivated contacts, select All contacts from the dropdown. If you only want to see inactive contacts, select Inactive.

Note that inactivating and activating contacts doesn’t affect any transactions involving the contact. You’ll still be able to view transactions and reports for an inactive contact.
Importing contacts
If you’ve previously used MYOB BusinessBasics or MYOB AccountRight, you can export your contacts from your company file and mport them into MYOB Essentials. For more information, see Import/Export.
Emailing a contact
It’s easy to send an email to your contacts, directly from your contacts list. If you’ve entered their email address, an icon appears in the email column. You can hover over the icon to view their email address.

You can also click the email icon to open your default email software and create a new email to send to them.

 Yes
Yes
 No
No
 Thanks for your feedback.