
- Created by StevenR, last modified by AdrianC on Aug 30, 2016
You are viewing an old version of this page. View the current version.
Compare with Current View Page History
« Previous Version 47 Next »
https://help.myob.com/wiki/x/OwDq
How satisfied are you with our online help?*
Just these help pages, not phone support or the product itself
Why did you give this rating?
Anything else you want to tell us about the help?
Not available in AccountRight Basics
When suppliers email you their invoices, store them securely online and link them to your AccountRight bills using the In Tray. Once they’re in, AccountRight will use advanced Optical Character Recognition (OCR) technology to identify key information in each document, speeding up transaction entry by filling in what it can for you.
![]()
And if you’re a bookkeeper or accountant, the source documents you need to review for each bill transaction are now just a click away. You no longer need to chase up clients to get copies of their supplier invoices for verification, and it’s easier to check that all their tax allocations are correct (making BAS and GST returns easier to prepare).
Watch this video to learn how it works:
- You need to be working online to start adding documents to AccountRight.
- Go to the Purchases command centre and click In Tray.
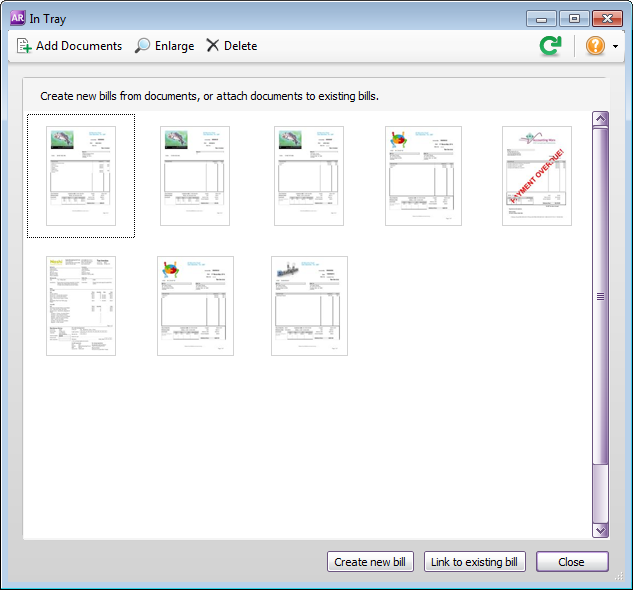
- Drag documents that are already on your computer directly into the In Tray window. Or, if a supplier emails you a bill, forward it using the email address that you log into my.MYOB with. Send the email to the following address and the bill will automatically appear in your In Tray:
- (Australia) bills@accountright.myob.com.au or
- (New Zealand) bills@accountright.myob.co.nz
If you haven’t had a chance to enter a bill transaction for a supplier invoice you’ve received, let AccountRight do the work for you.
- Ensure your file is online, and checked in (look for the green status bar at the bottom of your AccountRight window).
- Go to the Purchases window and click In Tray.
- If you haven’t already, add the document to the In Tray:
- If you drag the document to the In Tray, or click Add Documents, you’ll see the upload status, and a blue icon to indicate we’re working on getting it ready for you.
- If you email the document, it will appear in the In Tray after a minute or two.
- Select a document that’s ready to use (there’s no blue icon on the thumbnail), and click Create New Bill.
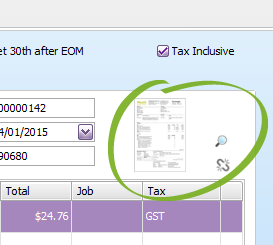
- A purchase window appears with a thumbnail of the document in the right corner of the window.
AccountRight will use the information that it is able to extract from the document to prepare a bill for you.
For example, if the supplier has been identified (based on ABN in Australia, or GST Registration ID in New Zealand), it will be selected for you. Other details, like the bill date, the total amount and supplier’s invoice number, can all be filled in for you if we’ve been able to extract that information from the document. If the supplier’s ABN (Australia) / GST Registration ID (New Zealand) is identified, it will be added to the supplier’s card for you if it’s not already there. For ABNs, we’ll also check to see if it’s a valid number. Check, and if necessary correct, the details that have been filled in for you. They’re highlighted in blue.
Click the Enlarge button to see the document details. This might help you fill in any missing details.- Record the purchase.
The In Tray shows you which documents haven’t been linked to a transaction yet. If you’ve already recorded a bill that relates to a supplier invoice, or converted an order into a bill, you can link them together.
- Ensure your file is online, and checked in (look for the green status bar at the bottom of your AccountRight window).
- Go to the Purchases window and click In Tray.
- If you haven’t already, add the document to the In Tray:
- If you drag the document to the In Tray, or click Add Documents, you’ll see the upload status, and a blue icon to indicate we’re working on getting it ready for you.
- If you email the document, it will appear in the In Tray after a minute or two.
Select a document that’s ready to use (there’s no blue icon on the thumbnail), and click Link to Existing Bill. The Link to existing bill window appears.

If information was able to be extracted from the document, it will appear in the Invoice details section of the window. Click the magnifying glass icon next to the thumbnail to see a full version of the document.- Select the supplier that the bill relates to in the Search Criteria section.
Select the bill that you want to link the document to, and then click Link.
You can't link a document to a bill within a locked period. You'll need to either turn off the locked period preference (Setup > Preferences > Security tab), or change the locked period to an earlier date.- The document is now linked to the bill, and the thumbnail disappears from the In Tray window.
While you’re working online, you can view the full details of documents you’ve added to AccountRight. Just click the Enlarge button (the magnifying glass) in the In Tray or in a purchase that has a linked document. The Enlarged window appears.
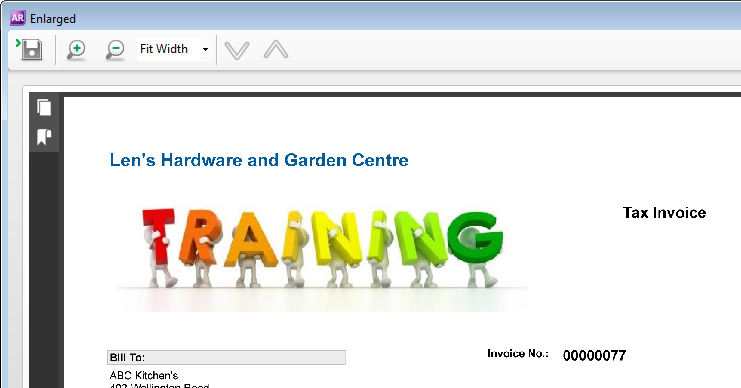
Use the Zoom In  and Zoom Out
  icons to change the magnification of the document, or select a zoom percentage from the dropdown list.
If you want to download the document, click the Save icon in the Enlarged window, and give the file you’re about to download a name (it will be a PDF file, even if you uploaded it as an image file).
Once downloaded, you can print them using any PDF viewer.
FAQs
Ensure that the text print on your documents is clear and sharp. If you’re adding scanned documents, try increasing the scan resolution or the darkness if it’s too light. We’re continuing to tweak the OCR feature so that it can recognise more characters and fonts, so you can expect it to get better over time.
Make sure the In Tray document is ready for use (there isn't a blue icon on it) before linking it to an existing bill or creating a new bill.
We use the “From:” email address that you use to send bills to determine which company file the document should be added to. So ensure you send bills using the email address that you use when logging into AccountRight to access your online file.
If you have access to more than one company file (whether you own the file, or have accepted an invitation to access someone else’s file) you won’t be able to email documents.
 in the bill you’re viewing and save the bill. The document will return to the In Tray so you can link it again.
No, you can't link more than one supplier invoice to a bill.
If you have more than one document you want to link to a bill, you could scan all the associated documents together to create a single PDF, then link it to the associated bill.
|
Deleting from In Tray
Hey Brains Trust! I'm new to Myob and it's functions and just wondering, once I've linked a source document from the in tray, can I delete it from the in tray and have it stay on the bill?
Thanks! |
|
Re: Credit Card Expense Allocation APP
Hi @Sinead679 and @grahamrodrigue,
Thank you for your post.
Welcome aboard to our newest members in the Community Forum! Just wanted to share a handy tool we have called the MYOB Capture app. It lets you snap photos of your receipts and send them straight to your MYOB In Tray helping you keep compliant and organised. For more information, please refer to this Help article: Using the MYOB Capture app.
Also, don't forget to browse through our MYOB App Marketplace! You'll find a variety of third-party applications that could enhance your experience even further.
I'd also like to thank you @grahamrodrigue for sharing your insights.
Feel free to post again if you need further help.
If my response has answered your inquiry, please click "Accept as Solution" to help other users find this information.
Cheers, Princess |
|
Re: Purchases report - list of purchases without or with documents
There is no option to filter if a supplier purchase has a document or documents attatched to a purchase. |
|
Re: Am I doing this the hard way?
Thanks for your response. Sorry, you're still not getting what I mean.
Let's go back - all the way back to when you first get an invoice that you need to pay.
You enter the details of this invoice in the Purcahses Window under "Enter Purchases". If you're like me, you drag and drop the bill into your In Tray and check that MYOB has done all the data entry for you.
Then, when you come to pay that bill, you have to click on Pay Bills in the Purcahses Command Centre, select the supplier, then type in all the same information that was provided on the invoice you entered.
Your suggestion just moves entering all that information manually from the Pay Bills window to the Payment Details window. Surely there's something in MYOB that can import the supplier invoice number and other information from the Purcahses Register?
How do large businesses get on when they have thousands of bills to pay (I only have about a hundred and fifty and that's enough of a pain).
Regards,
Eric. |
|
Re: Intray
Hi @Razor99,
Thanks for your post, and welcome to the MYOB Community Forum.
To troubleshoot issue you're experiencing with In Tray, we recommend trying the following steps:
Feel free to post again anytime if you require further assistance.
Best regards, Doreen |
 Yes
Yes
 No
No
 Thanks for your feedback.