- Created by KylieN, last modified by AdrianC on Mar 03, 2017
You are viewing an old version of this page. View the current version.
Compare with Current View Page History
« Previous Version 31 Next »
https://help.myob.com/wiki/x/JoYHAQ
How satisfied are you with our online help?*
Just these help pages, not phone support or the product itself
Why did you give this rating?
Anything else you want to tell us about the help?
On the Styling and themes tab of the Invoice and quote settings page, you can customise the look of your invoices and quotes by adding a logo or header image and choosing a theme and colours.
- From the Settings
 menu, choose Invoice and quote settings. The Invoice and quote settings page appears.
 - Click the Styling and themes tab.
Having trouble sending invoices after uploading a header? Try choosing the Logo and business details option, then click the Reset to default link in the Theme options section of the page (this will remove any custom colours you've added to your invoice theme, so make sure you take note of them first). Once you've done that, choose the Full width header image option, then click Reset to default again.
Set up your header
The header section of your invoices and quotes gives you a space to communicate your brand to your customers.
First, choose whether you'll be posting your invoices and quotes and want the address to be visible through a windowed envelope by selecting or deselecting the Position address for windowed envelope option.
Next, choose a visual style for your header. There are two styles available:
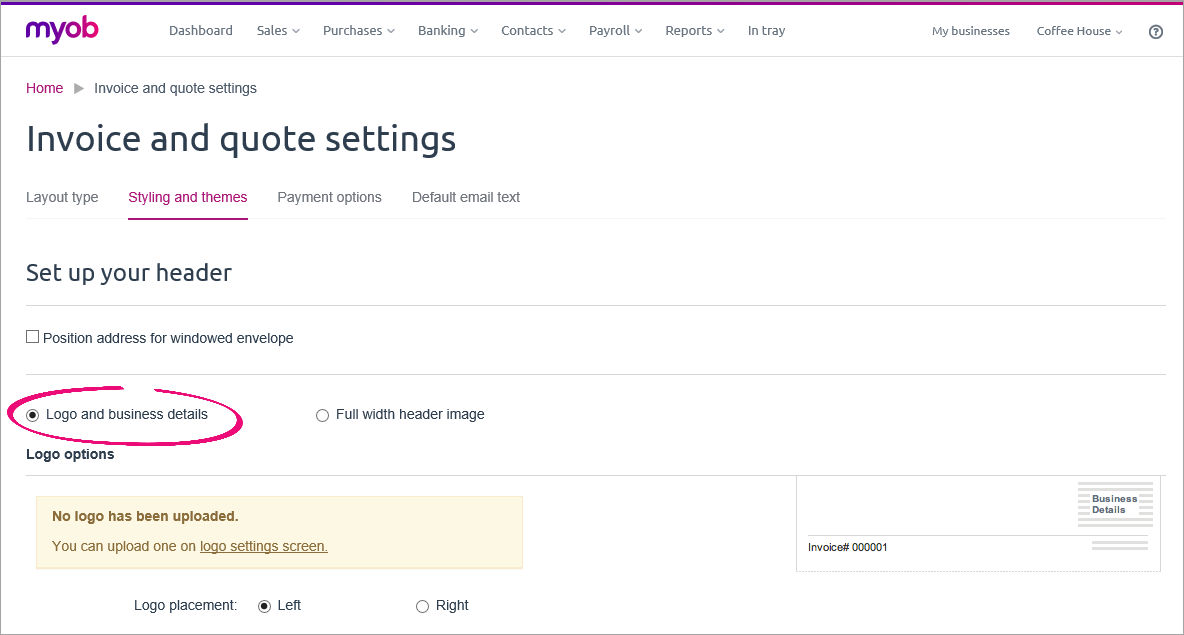
Logo and business details
Choose Logo and business details if you want to upload a logo and allow MYOB Essentials to automatically show the business details you entered on your Business details page. You can select the business details you want to appear.


If you don't want these business details to show, try adding a full width header image instead.
If you haven't uploaded your logo yet, click the Logo link and upload it. See Uploading or deleting your company logo.
You can choose which side the logo appears on, and adjust its size using the slider. Use the Preview button to see how your changes will look on the finished invoice.
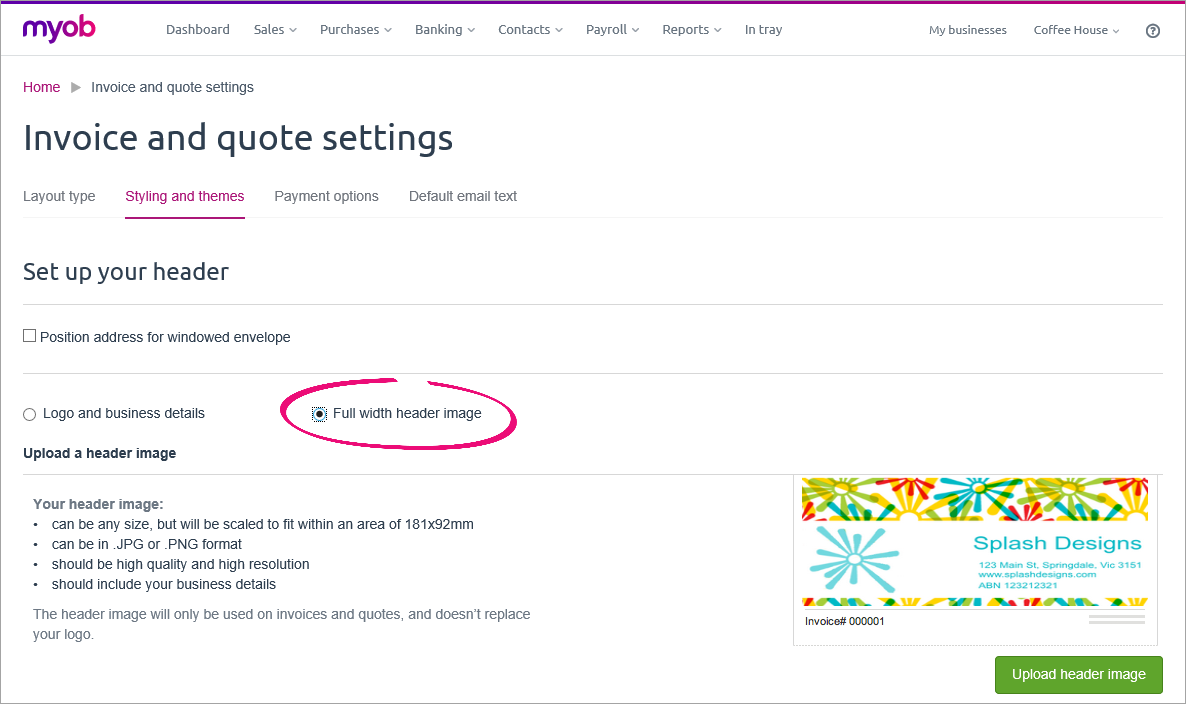
Full width header image
Choose Full width header image if you want to upload a branded header that spans the full width of your invoices and quotes. You'll need to make sure your business details (including your ABN or GST/IRD number) are included within the image, otherwise they won't show up on your invoices and quotes at all. A full width header image also allows you to display any other business-specific information which you can't otherwise record in Essentials.

Click Upload header image to upload your image. A preview appears on the right side of the window. If you'd like to see a preview of how the header will look with the theme and colours you've selected, use the Preview button at the bottom of the page.
Note that the maximum size of your header image will change depending on whether you've selected the Position address for windowed envelope option.If this option is selected, less vertical space is available for your custom header, and images will be scaled to fit within an area of 181x30mm. Otherwise, your header will be scaled to fit within an area of 181x92mm.
It's best to use a header image with the same proportions as those listed on the page, as it will be scaled to fit within these dimensions. If the proportions are off, you might end up with unwanted white space at the sides or top and bottom of your header.
Choose a theme and colours
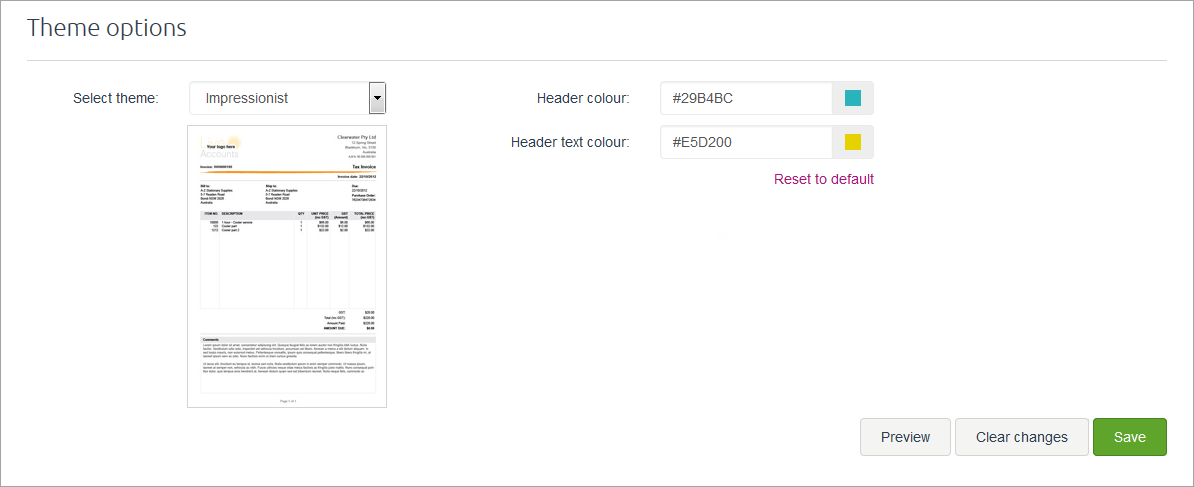
In the Theme options section, choose from one of the available themes to set the style of your invoices and quotes. A small preview appears below your selection.

In the Header colour field, click the coloured square to choose which colour to use for the graphical elements on your invoice style's header. In the Header text colour field, click the coloured square to choose a colour for the invoice or quote number and invoice type. If you know the hex codes for these colours, you can type them in the text fields instead.
For a professional touch, it can be good to use colours from your header image or logo.
Notes displayed when previewing
The text shown in the Notes box when previewing your invoice is only for display purposes. This text will not appear on your actual invoices. If you want text to display in the Notes box on your invoices you'll need to enter it in the Notes to customer box when creating an invoice.
When you're done, click Save.
FAQs
How do I add a note to my invoices or quotes?
You can add a note to an invoice or quote using the Notes to customer box when entering the invoice. If you want the same note to appear on all your invoices, select the Remember this option.

To remove the note from the invoice or quote you're viewing, delete the text from the Notes to customer box. To remove the note from all future invoices or quotes, also select the Remember this option.
How do I change the notes I see when previewing my invoice?
When you preview your invoices, the Notes you see are just sample text. The "warranty" text will not appear on your invoices.

If you want a note to display on your invoices, you'll need to enter the note text in the Notes to customer box when creating an invoice.

 Yes
Yes
 No
No
 Thanks for your feedback.