Page tree

You are viewing an old version of this page. View the current version.

Compare with Current View Page History

« Previous Version 20 Next »


Close

How satisfied are you with our online help?*

Just these help pages, not phone support or the product itself

0
1
2
3
4
5
Very dissatisfied
Very satisfied

Why did you give this rating?

Anything else you want to tell us about the help?

OK, let's get started personalising a form by opening the form you want to work with.

  1. Go to the Setup menu and choose Customise Forms. The Customise Forms window appears.
  2. Click the tab corresponding to the type of form you want to customise.
  3. Select a form group from the list to display a list of forms associated with that group. For example, select the Item group in the Invoices tab.
  4. Click the form, then click Customise. The selected Form window appears.

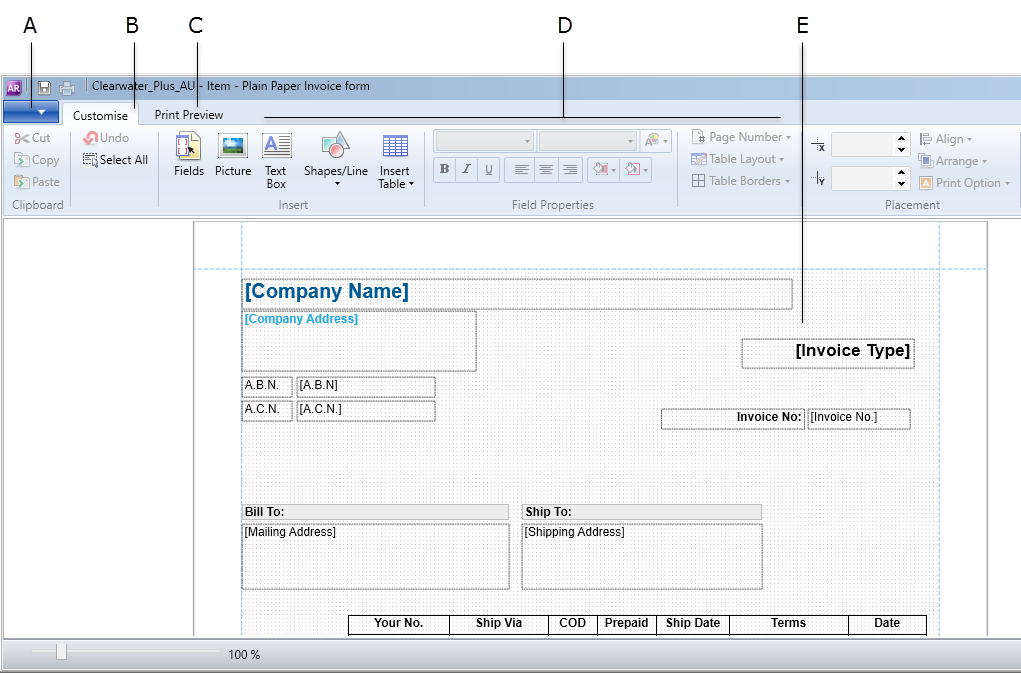
    AFile menuView printing and saving options.
    BCustomise tabThis is the main tab for customising your form. You can add fields, format text and select table layouts.
    CPrint PreviewView your form as it will appear printed. Your form is instantly updated in this tab as you customise.
    DCustomise optionsThis area of the window is where you make selections for customising your form.
    EForm bodySelect and modify form elements in this section of the window. Select an element, then view the properties in the Customise tab.
Cheques have two parts A cheque form has two parts: the cheque itself and the stub. You customise the cheque and the stub separately. For more information, see Personalising cheques.

What next?

After displaying the form, you can:

  Personalising forms FAQs


Can I create a new form from scratch?

Can I create a new form from scratch?

No, you'll need to personalise an existing form.