- Created by admin, last modified by AdrianC on May 11, 2018
You are viewing an old version of this page. View the current version.
Compare with Current View Page History
« Previous Version 50 Next »
https://help.myob.com/wiki/x/kKGyAQ
How satisfied are you with our online help?*
Just these help pages, not phone support or the product itself
Why did you give this rating?
Anything else you want to tell us about the help?
Ready to process your payroll? If you've added your employees and set up your payroll details, you're good to go.
Completing a pay run in MYOB Essentials is really easy. Just choose the pay dates and which employees are being paid, then confirm what they're being paid.
You can print or email payslips and, if you're set up for electronic payments, create a bank file to pay your employees electronically.
Save time by allowing your employees to submit their timesheet hours. Learn more about YourPay.
OK, let's step you through it.
If you can't finish a pay run in one go, that's fine. Click Save at any time and resume the pay whenever you're ready.
- From the Payroll menu, choose Enter pay. The Pay centre page appears.
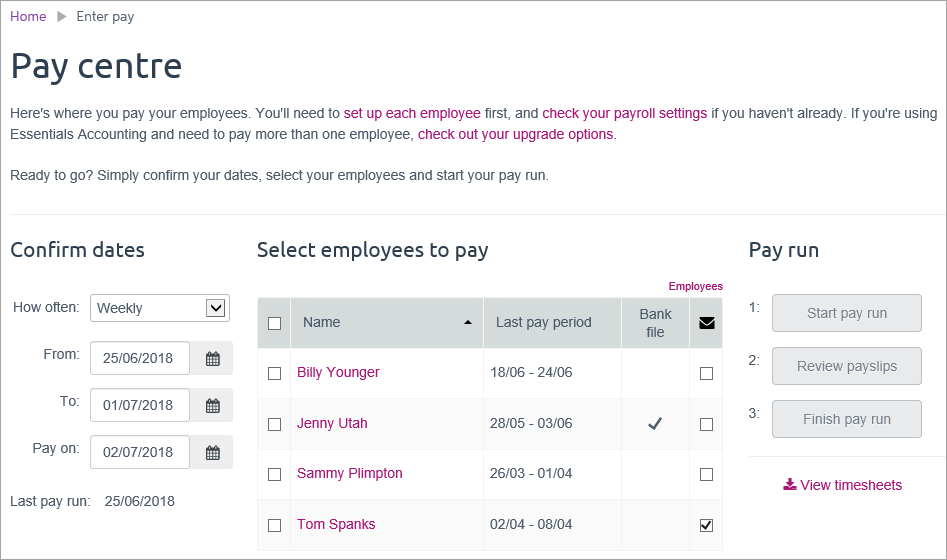
- If you're resuming a saved pay, click Resume pay run (under Pay run on the right) then skip to task 2 below to review the pay details.
- Under Confirm dates:
- In the How often field, choose the pay frequency. For example, if it's a weekly pay, choose Weekly.
- In the From and To fields, chose the first and last day of the pay period. Dates must be within the current or previous payroll year.
- Choose the Pay on date. This is typically the day you're processing the pay run.
- Under Select employees to pay:
- Select the employees you're paying.
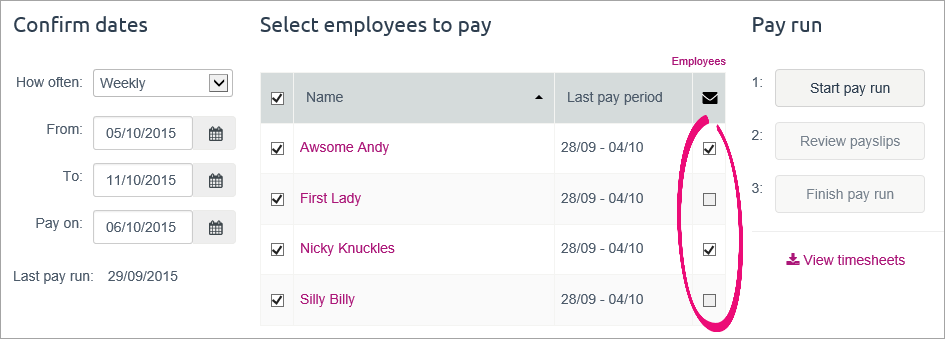
- Click in the Email
 column to select which employees you want to email payslips to. You'll need to have entered their email addresses on the Employee details tab of their employee record to be able to email their payslip.
A tick shows in the Bank File column if the employee is being paid electronically.
- Under Pay run, click Start pay run. The Pay run page appears.
Continue below for details about reviewing the pay details.
Pay details can be reviewed and updated on the Pay run page. The pay items listed for an employee are based on their employee setup. If a pay type is not shown, make sure you’ve set it up and selected it on the Pay items - earnings & deductions tab of the employee’s record. See Set up pay items (earnings and deductions).
- If required, enter or change the Hours or Amount for each pay item. For example, if an employee worked fewer hours than normal, change the Normal hours.
If the employee has taken leave:
If you're in... do this... Australia Enter the Hours of leave they've taken on the relevant line. Their available leave balance for each type is shown in the Hours column. Note that if an employee has taken leave, you might need to adjust the normal hours worked to make sure the total number of hours is correct. For more information about managing employees’ leave, see Managing your employees’ leave . New Zealand If the employee has taken leave or has worked on a public holiday and you want to include this in their pay, click Add holidays or leave, then select the type of leave and make any required changes to the calculations. For more information, see Entering leave on the pay run . 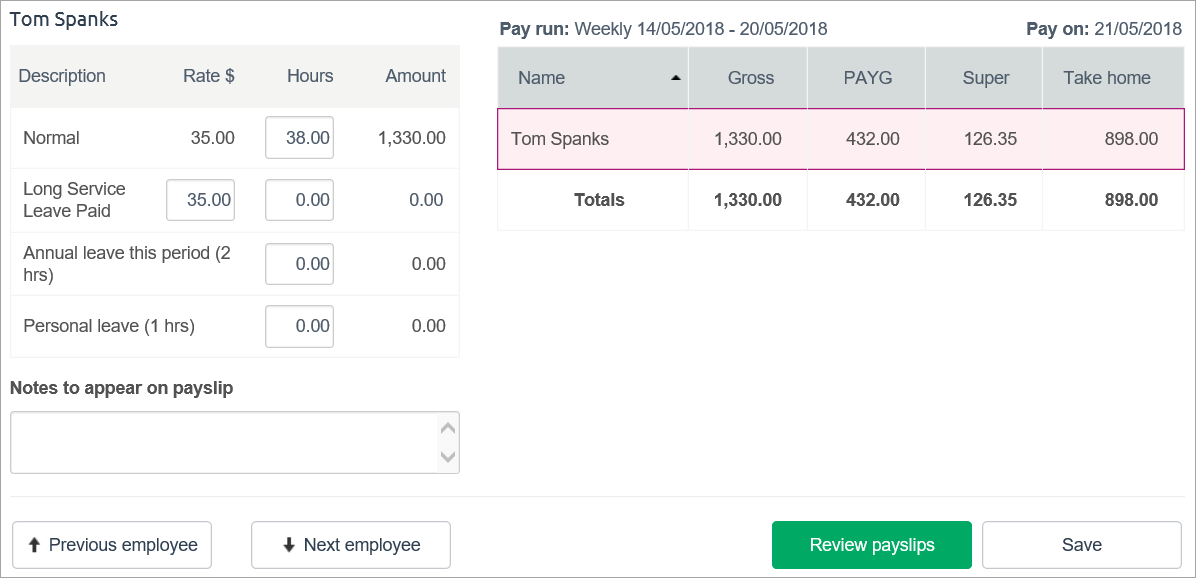
Changing the PAYG/PAYE tax
If you need to pay more or less tax for an employee, click on the employee's PAYG/PAYE amount in the grid and type the new amount. This must be the last change you make to the employee's pay in this pay run, as any additional changes will cause the PAYG/PAYE to be recalculated at the default rate.
If this is an ongoing change to the employee's tax, you'll need to manually override the default amount each time you do a pay run.
- (If paying more than one employee) click Next employee and review their pay as described above.
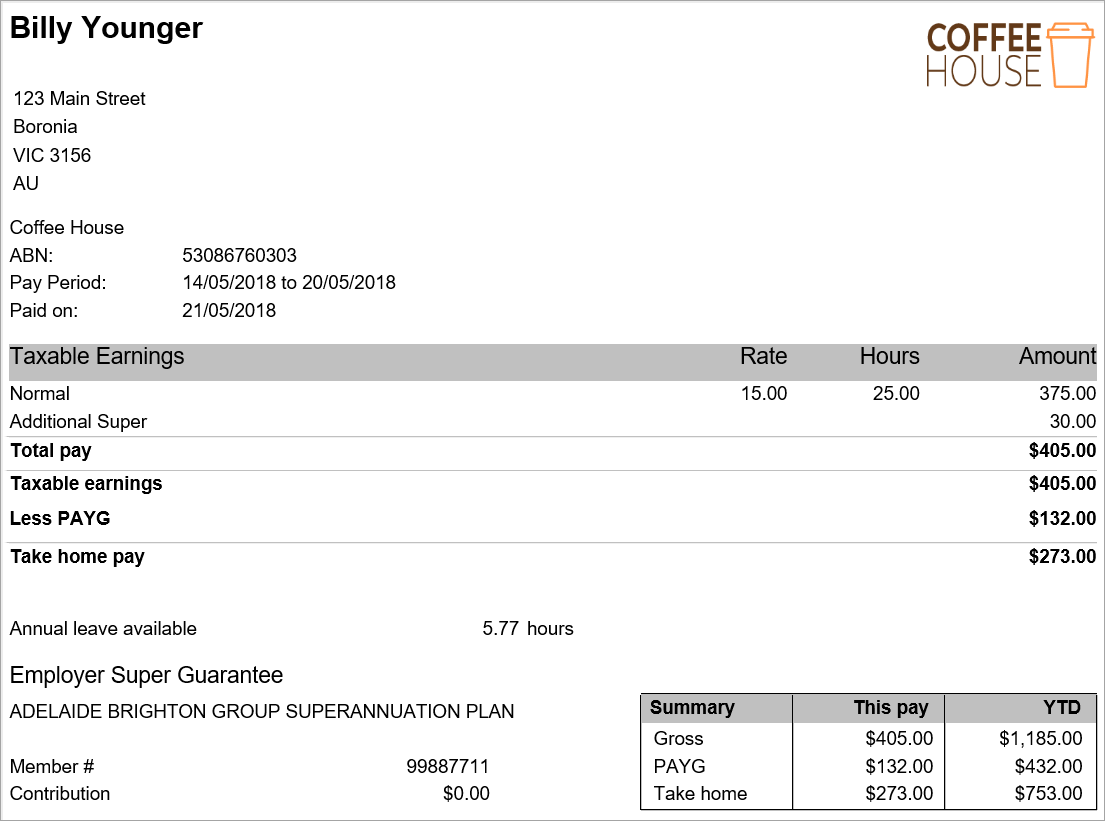
- When you’re satisfied that all the pays are correct, click Review payslips. The Review Payslips page appears, displaying all payslips for the current pay. Check them for irregularities, but don’t print them just yet—they'll be printed at the end of the pay run.
- If the payslips aren’t correct, click Return to pay run and make any required changes.
- If the payslips are correct, click Finish pay run. The Pay run summary page appears, showing a summary of each employee's pay.
- Check the pay run summary. If you need to make corrections or confirm any details, you can click Return to pay centre. You can then edit the current pay run by clicking Resume pay run on the Pay centre page, then making your changes.
You're almost done - see the final steps below.
When you're happy with the pay run, click Looks good. The pay run is processed and payslips are emailed to the employees you just paid.
- If you're paying any employees without an email address, you're prompted to print their payslips by clicking Print payslips to finish pay run. The payslips are created and appear as a PDF in your web browser.
- If you're paying any employees electronically, you're be prompted to download a bank file which you can upload to your online banking site. Click Download bank file and choose where you want to save the file. Learn more about paying employees electronically.
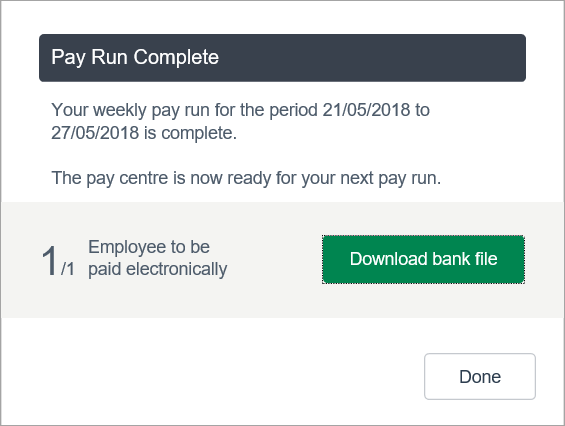
- If no employees are being paid electronically, click Done.
- You can now make the wages payments to your employees. For more information, see Paying your employees.
FAQs
How do I fix the "Looks like you don't have permission to access this page" error?
The following message might display when trying to enter a new pay:

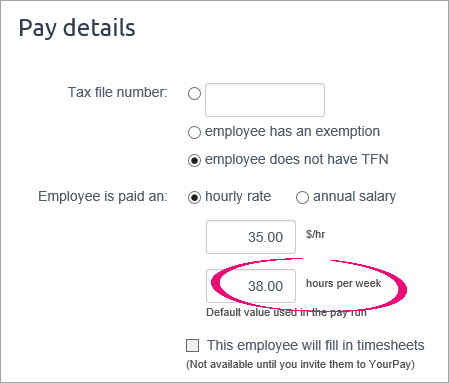
To fix this, you need to make sure each employee has the "hours per week" information specified. Here's how to check:
- On the Payroll menu, click Employees.
- Click an employee's name to display their details.
- Ensure there is a number (greater than zero) entered in the hours per week field under Pay details.
- Click Save.
- Repeat steps 2-4 for each employee.
How do I email my employees' payslips?
To email an employee their payslip, record their email address on the Employee details tab of their employee record. Learn more about entering employee details.
When you do a pay run, select the email payslip option for the employee.
Can I add a note to an employee's payslip?
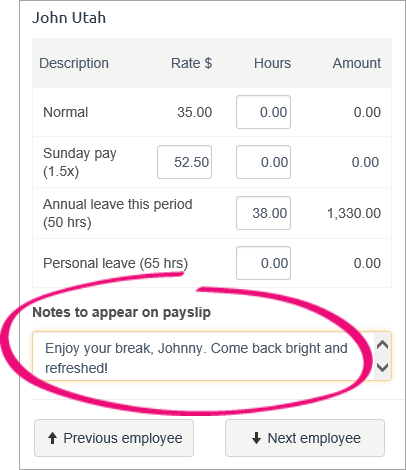
You can add a note to an employee's payslip on the Pay run page (after clicking Start pay run). Add your note in the Notes to appear on payslip field for the selected employee. Selecting another employee lets you add a different note.
Continue processing the pay as normal.

 Yes
Yes
 No
No
 Thanks for your feedback.