
- Created by ErikV, last modified by AdrianC on Sep 26, 2018
You are viewing an old version of this page. View the current version.
Compare with Current View Page History
« Previous Version 88 Next »
https://help.myob.com/wiki/x/YDHnAQ
How satisfied are you with our online help?*
Just these help pages, not phone support or the product itself
Why did you give this rating?
Anything else you want to tell us about the help?
AccountRight Plus and Premier, Australia only
When you print or email a pay slip, its content and layout is determined by the pay slip form - which acts like a template.
AccountRight comes with one default pay slip form which you can customise. This lets you change the look and feel of the pay slip as well as change what's displayed.
You can also save different versions of the pay slip form, which is handy if you have different pay slip requirements for different employees.
If you're not sure what needs to appear on a pay slip, check the FairWork website.
To customise pay slips
Go to the Setup menu and choose Customise Forms. The Customise Forms window appears.
Customise Forms option greyed-out? Your user role needs to be set up with permission to customise forms. If you need to regularly customise forms, ask your administrator to add this permission to your user role.
- Click the Pay Slips tab.
- Select the pay slip form then click Customise. The form opens, ready to be customised.

Customise the form to suit your needs. Here are some helpful topics:
If you want to Do this add a business logo - In the Customise tab, click Picture.
- Locate and select the picture file and click Open.
- Move, resize or rotate the image as required.
To learn more, see Add pictures and shapes to forms.
add text fields - In the Customise tab, click Text Box.
- Click and drag the mouse cursor over the area of the form where you want the text field to appear.
- Double-click in the text field and type the text you want to appear.
To learn more, see Add text and fields to forms.
add data fields - In the Customise tab, click Fields.
- Select the fields you want to appear by clicking in the column next to them. For a description of each data field, see Fields and columns you can add to forms.
- For some fields you need to select where you want the field to appear when a form has multiple pages. You can choose to show the field on every page, or just at the start (first page) or end (last page).
- When you've finished making your selections, click OK. The selected data fields appear on the form.
- Move the field to the required position by clicking and dragging it, or entering placement coordinates in the Customise tab.
To learn more, see Add text and fields to forms.
add a table - In the Customise tab, click Insert Table and choose the type of table you want to use from the list.
- Click the table box, and then drag the red cross to move the table into position.
- Click Table Layout and choose Show/HideColumns.
- Select a column you want to add to the table in the Available columns list and then click Show. Repeat this for other columns you want to add.
- Click OK. The columns appear in your table.
To learn more, see Add tables to forms.
set page margins, orientation and page size - Click the Print Preview tab.
- Set the page margins, orientation and page size.
To learn more, see Set the form size and background.
edit the page background - If you want to change the page colour, click Page Colour and select the required background colour.
- If you want to add a watermark (transparent image or text), click Watermark and choose one of the predefined watermarks, or select Custom Watermark.
- If you're adding a custom watermark, choose a picture or enter the watermark text and select the required formatting options.
- Click OK.
To learn more, see Set the form size and background.
move, arrange, align, cut, copy or paste form elements See Editing form elements. To preview your form, click the Print Preview tab.
- When you've finished customising your form, go to the File menu and click Save As. The Save Form As window appears:
- Enter a name and a description for the form.
- Click Save then click OK to the confirmation message.
To close the form, go to the File menu and choose Exit. If prompted to save again, click No. The Form window reappears. Your customised pay slip form will be listed.

To add employee addresses to pay slips
To add the employee's address to their pay slip you'll need to add the Payee field to the pay slip form. You should also make sure the address details are up to date in your employee cards.
- Open the pay slip form (go to the Setup menu > Customise Forms > Pay Slips tab > select the pay slip form > Customise).
- On the Customise tab, click Fields.
- Select the Payee field and click OK.

- Position and size the Payee field to suit your needs.
Because the Payee field includes the employee's name, you might want to remove the Name field from the form and replace it with the Payee field. Here's our example:
- When you're done, go to the File menu and click Save As. The Save Form As window appears.
- Enter a name and a description for the form.
- Click Save then click OK to the confirmation message.
The address now shows on the pay slip:

To add a note to pay slips
There's a few ways you can do this, depending on what you're trying to achieve.
| If you want... | Do this... |
|---|---|
| the same note to appear on all employee pay slips, every pay | Customise the pay slip form and add a text box containing the text you want to appear |
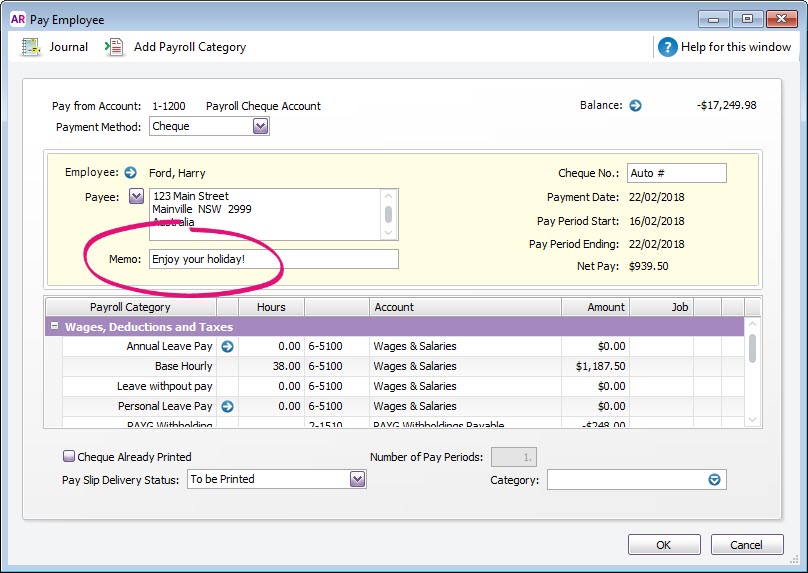
| a one-off note to appear on an employee's pay slip |
|
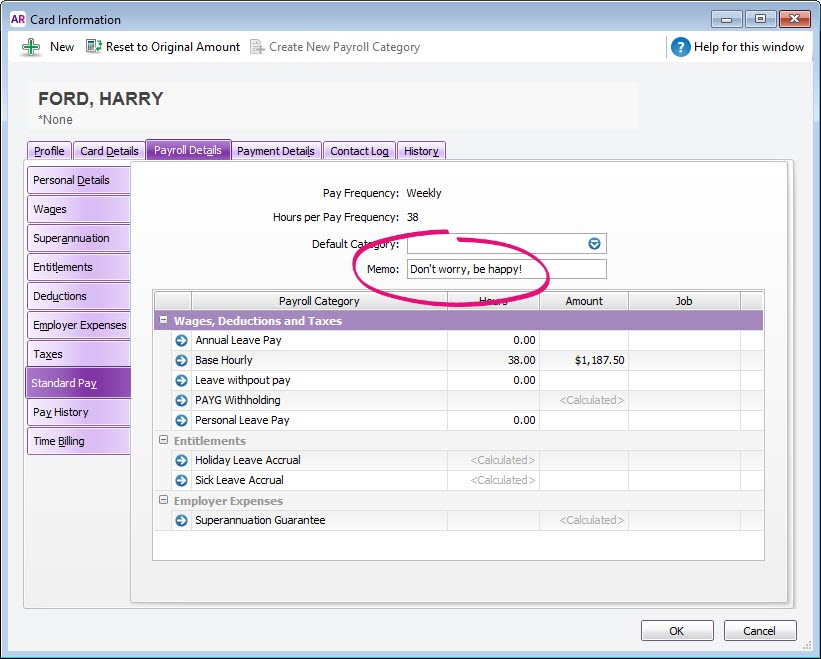
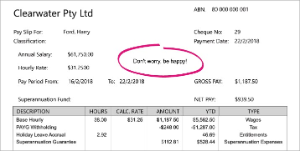
| the same note to appear on an employee's pay |
|


To include year-to-date balances on pay slips
You can include the year-to-date amounts paid and entitlement balances (which includes any carry-over balances) on your employee pay slips. Go to Setup > Preferences > Reports & Forms tab and select the option to Include all YTD amounts and Entitlement Balances on Paycheques Stubs.
To include super and entitlements on pay slips
Superannuation categories and entitlement categories include an option to Print on Pay Advice. To access a payroll category, go to Payroll > Payroll Categories > Superannuation (or Entitlements ) tab > click the zoom arrow to open the category.

Super not showing on a pay slip?
If you've checked the set up of your superannuation categories and your employees, then the most likely cause is that the employee is yet to reach their monthly superannuation threshold.
If the amount earned by an employee for the month is currently less than $450, no superannuation will be calculated. This is because in the Superannuation Information window for the Superannuation Guarantee contribution category, the wage threshold before superannuation is calculated is set to $450. When the employee receives their next pay and their gross earning are above $450, superannuation will be calculated on the total gross amount of wages/salary earned for the month. The superannuation amount will "catch up" because total gross wages/salary for the month are now greater than $450.
Other entitlements not showing on a pay slip?
Make sure that you've selected who the entitlement applies to.
Open the entitlement, click Employee and select all employees who are to receive the entitlement:

To use a customised pay slip
You can choose the form you want to use when printing or emailing pay slips. This will become your default pay slip form, but you can choose a different one any time.
- Go to the Payroll command centre and click Print/Email Pay Slips.
- Click the To Be Printed or To Be Emailed tab.
- Click Advanced Filters.
- In the Selected Form for Pay Slips field, choose the form you want to use.
- Click OK.
- Choose the employees requiring pay slips.
- Click Print or Send Email.
See it in action:
 Yes
Yes
 No
No
 Thanks for your feedback.