Page tree

You are viewing an old version of this page. View the current version.

Compare with Current View Page History

« Previous Version 13 Next »


Close

How satisfied are you with our online help?*

Just these help pages, not phone support or the product itself

0
1
2
3
4
5
Very dissatisfied
Very satisfied

Why did you give this rating?

Anything else you want to tell us about the help?

Cheques are usually made up of two forms—the cheque and the stub. The stub shows a summary of what's on the cheque.

You can customise both the cheque and each type of cheque stub in one window, by selecting the stub layout. Stub layouts include:

  • Regular—This layout is assigned to cheques recorded in the Spend Money window.
  • Payable (Not Basics)—This layout is assigned to cheques recorded in the Pay Bills window.
  • Refund—This layout is assigned to cheques recorded in the Settle Returns & Credits window.
  • Paycheque (Plus and Premier, Australia only)—This layout is assigned to cheques recorded in the Pay Employees window. 

Print two cheque stubs

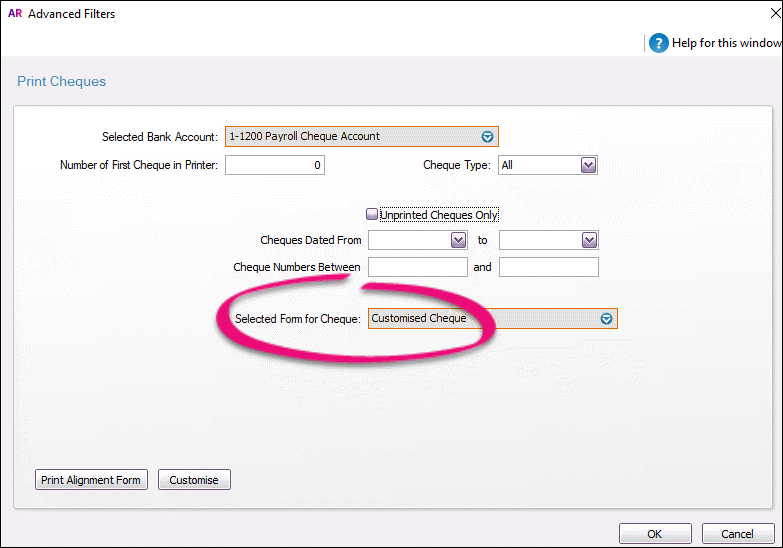
If your business prefers to produce two stubs for each cheque, you should select the Laser Cheque layout in the Selected Form for Cheque field in the Advanced Filters window when you print your cheque. 

To customise cheques

To customise cheques

  1. Go to the Setup menu and choose Customise Forms. The Customise Forms window appears.
  2. Click the Cheques tab.
  3. Select the cheque form you want to customise then click Customise.
  4. In the Layout field, choose the layout type you want to customise.

    If you want to customise the payment section of the cheque, choose Cheque, otherwise, choose the stub layout you want to customise.
    Examples of what you may want to add to your cheque include adding watermarks and text boxes.
  5. Make your changes to each layout as required. For more information, see Personalising forms.
  6. When you are finished, save the form.

    Test your customised cheques You should print an alignment cheque to make sure your new form prints correctly. Go to the Banking command centre and click Print Cheques. Click Advanced Filters, select your customised cheque in the Selected Form for Cheque field and then click Print Alignment Form.

To set a your customised cheque as the default form

To set your customised cheque as the default form

You've gone to the trouble of personalising a cheque, so here's how to use that cheque when printing or emailing.

If you areDo this
printing a cheque when you record it
  1. Click Print then choose Select Another Form.
  2. Select your customised cheque.
  3. Click Print.
printing a cheque after you record it

Select the form you want to use via the Advanced Filters on the Print Cheques window.
(click to enlarge)