Child pages
  • Using the MYOB Capture app

You are viewing an old version of this page. View the current version.

Compare with Current View Page History

« Previous Version 18 Next »


Close

How satisfied are you with our online help?*

Just these help pages, not phone support or the product itself

0
1
2
3
4
5
Very dissatisfied
Very satisfied

Why did you give this rating?

Anything else you want to tell us about the help?

To use this app, you must have an existing MYOB Essentials subscription. 

Is your shoebox overflowing with receipts you’re keeping “just in case”? With MYOB Capture, you can take a quick photo of your receipt and send it to your In tray in a matter of seconds – helping you keep compliant and organised.

If you have a compatible Android or iOS device, you’re ready to go—all you need to do is download and install MYOB Capture for Essentials app:

Once it's installed, here’s how it works: 

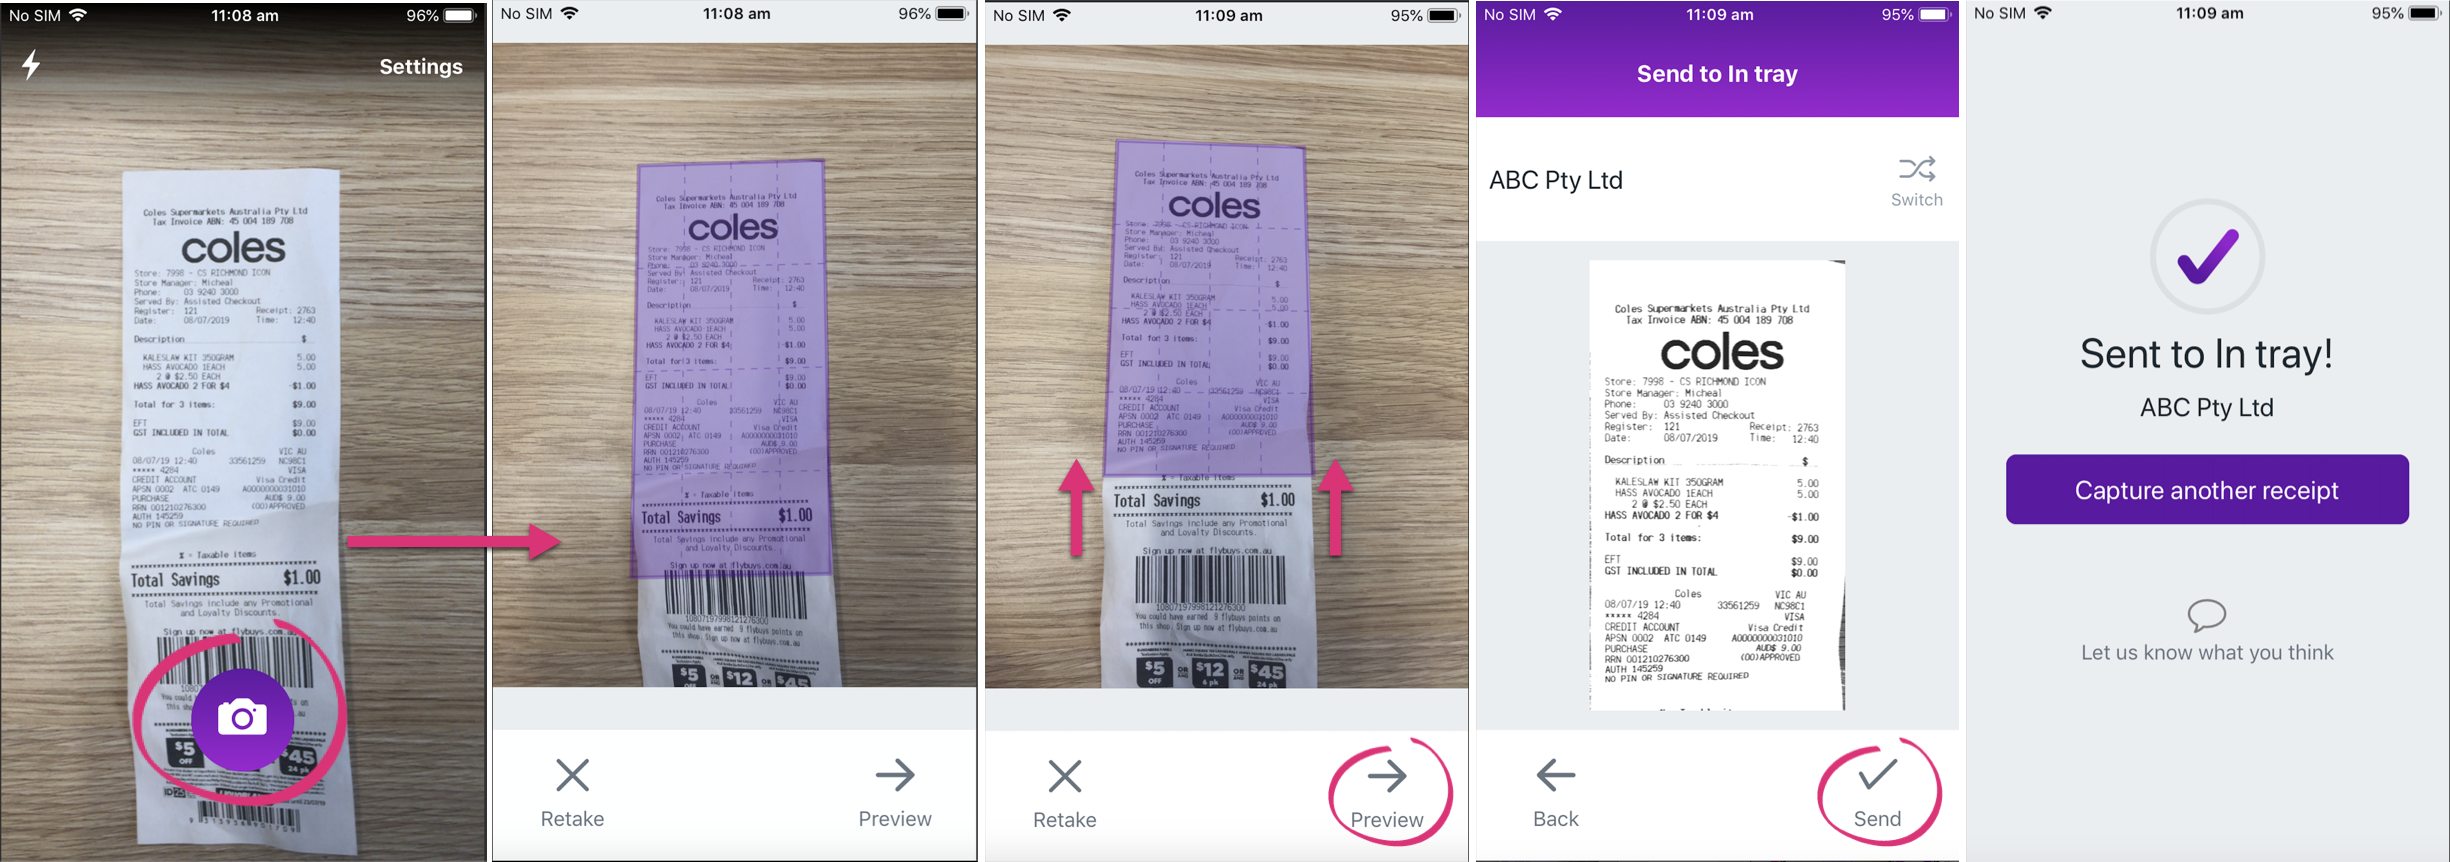
  1. Take a photo of your receipt. 
  2. Drag the purple rectangle around the edges of your receipt.  
  3. Check your receipt.
  4. Send your receipt to your In tray! 


Your receipt will be sent to your In tray and ready for you to use in MYOB Essentials. Plus, if you have multiple MYOB Essentials businesses, you can switch between them.  

With the documents in your In tray you can then:

  • Create a new bill
  • Link to an existing bill
  • Link to a bank transaction
  • Create a Spend money transaction

Learn how to work with documents in your In tray


How to adjust your image

How to adjust your image

  1. Take a picture of your receipt on the home screen.
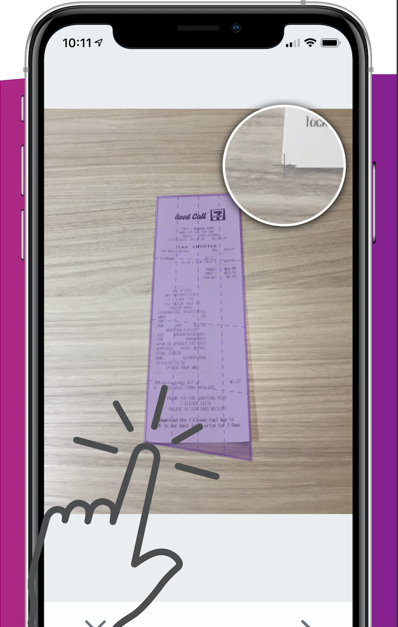
  2. A purple outline will appear over your image.
  3. Line up the corners of your receipt with the corners of the purple outline – a circle will appear to magnify wherever you place your finger.
  4. Once you've lined everything up, tap on Preview.
  5. A cropped version of the image will appear.
  6. If you're happy with the image, tap Send or tap Back to adjust.

How to save a copy of your receipts to your iOS device's gallery

How to save a copy of your receipts to your iOS device's gallery

To save photos to your device's gallery, you need to configure your settings.

  1. Go to your device's settings.
  2. Scroll down to the list of apps on your phone and select Capture.
  3. Tap Photos.
  4. Tap Read and Write.
  5. Now every time you send a photo to your In tray using Capture, it'll save to your gallery.
How to save a copy of your receipts to your Android device's gallery

How to save a copy of your receipts to your Android device's gallery

To save photos to your Android device's gallery, you need to configure your settings.

  1. Go to your device's settings.
  2. Select Apps.
  3. Scroll down to the list of apps on your phone and select Capture.
  4. Turn on Storage.
  5. Now every time you send a photo to your In tray using Capture, it'll save to your gallery.
How to switch businesses

How to Switch businesses

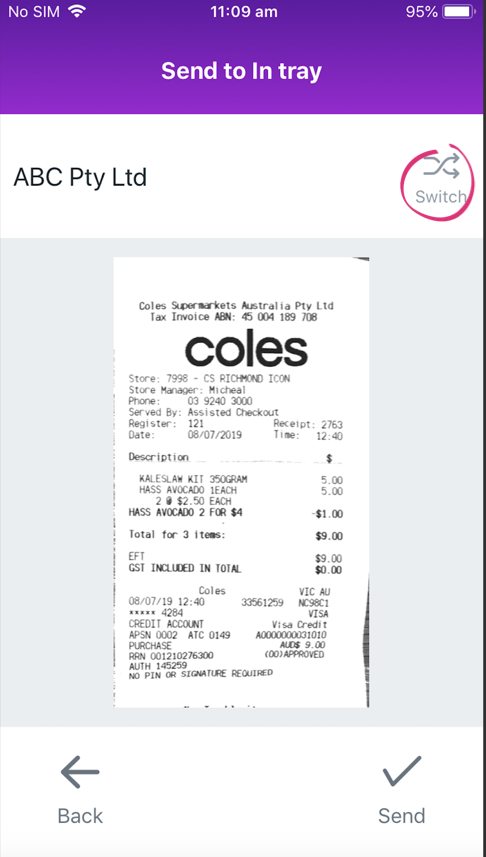
  1. Take your picture and adjust the purple outline.
  2. Tap Preview.
  3. Tap Switch.
  4. A list of your businesses will appear.
  5. Select the business you'd like to switch to.
  6. Now every time your images will be sent to the In tray of that business.