
- Created by KylieN, last modified by RonT on Apr 21, 2020
You are viewing an old version of this page. View the current version.
Compare with Current View Page History
« Previous Version 107 Current »
https://help.myob.com/wiki/x/TIIWAw
How satisfied are you with our online help?*
Just these help pages, not phone support or the product itself
Why did you give this rating?
Anything else you want to tell us about the help?
The In tray is designed to store a digital copy of your documents for you. Upload your invoices and receipts to make it easier to create bills, pay bills and track payments. Plus, you'll always have your proof of purchase documents on hand when you need them.
How does it work?
Check out this short video for an overview of uploading and working with your supplier documents and bills in MYOB Essentials.

Adding documents to your In tray
You can add documents up to 10MB in size, in these formats: PDF, JPG, JPEG, TIFF, TIF, and PNG.
You can add documents in a few ways:
- Drag documents saved on your computer straight into the In tray
- Click Upload document and choose documents stored on your computer
- Take a picture of a receipt using your phone and upload it to your In tray using the MYOB Capture app
- Have documents sent directly to your In tray from one of our partner suppliers
- Email documents to the address that appears in your In tray. You can share this address with your suppliers so they can email documents straight to your In tray. Tell me more about emailing documents to my In tray.

If an uploaded document has an orange warning icon (  ) it means MYOB Essentials has been unable to read any information from the document. But you can still work with the document as described below.
Working with In tray documents
Once a document is in your In tray, you can link it to a bill you've already entered into MYOB Essentials, or use the document to create a new bill or Spend Money transaction.
You can also download or delete In tray documents.
There's a couple of ways you can link documents to bills you've already entered into MYOB Essentials.
Link via bank transactions
Quickly attach documents straight to your bank transactions.
- From the Banking menu, choose Bank transactions.
- Click the dropdown arrow for the transaction you want to attach a document to.
- Click Attachments.

- Click Link from In tray.
- Choose the document you want to attach and click Link. The document is attached to the transaction.
Once you’ve linked a document, it will disappear from the In tray. If you unlink it, we’ll send it straight back.
Learn more about attaching documents to bank transactions.
Link bills from the In tray
If you've already entered a bill in MYOB Essentials that correlates to a supplier invoice in your In tray, you can link the document to your bill. Just select the document in your In tray, click Link to existing bill and choose the bill from the list.
If there's a bill that looks like it matches, MYOB Essentials will highlight it for you. Just choose the right bill from the list and click Link to selected bill.
The document is linked to the bill, and disappears from your In tray.
If you haven't entered the bill in MYOB Essentials, you can create it from the supplier invoice.
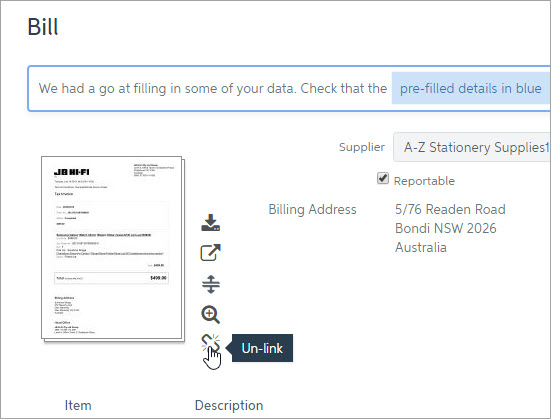
Click the document in your In tray, then click Create new bill. MYOB Essentials will use optical character recognition (OCR) to read and automatically fill in as many of the fields on the bill as possible, such as dates, quantities and amounts. If you captured the document using the MYOB Capture app and added a note to it before sending it to the In tray, that note will automatically appear too.
All you need to do is check the details that have been automatically entered (highlighted in blue), and enter any additional details that are needed.
Auto-coding your bill
If you frequently upload bills from the same supplier and allocate their items to the same account, select a default allocation account from the Account code dropdown.

The next time you create a bill for this supplier, the default account will populate the Allocate to field in the In tray.
If you want to take a closer look at the original document while you're entering its details, click the icons next to the document preview to download the original document, show it in a new window, split the view between the document and the bill you're creating, or enlarge it.
When you're done, just click Save.
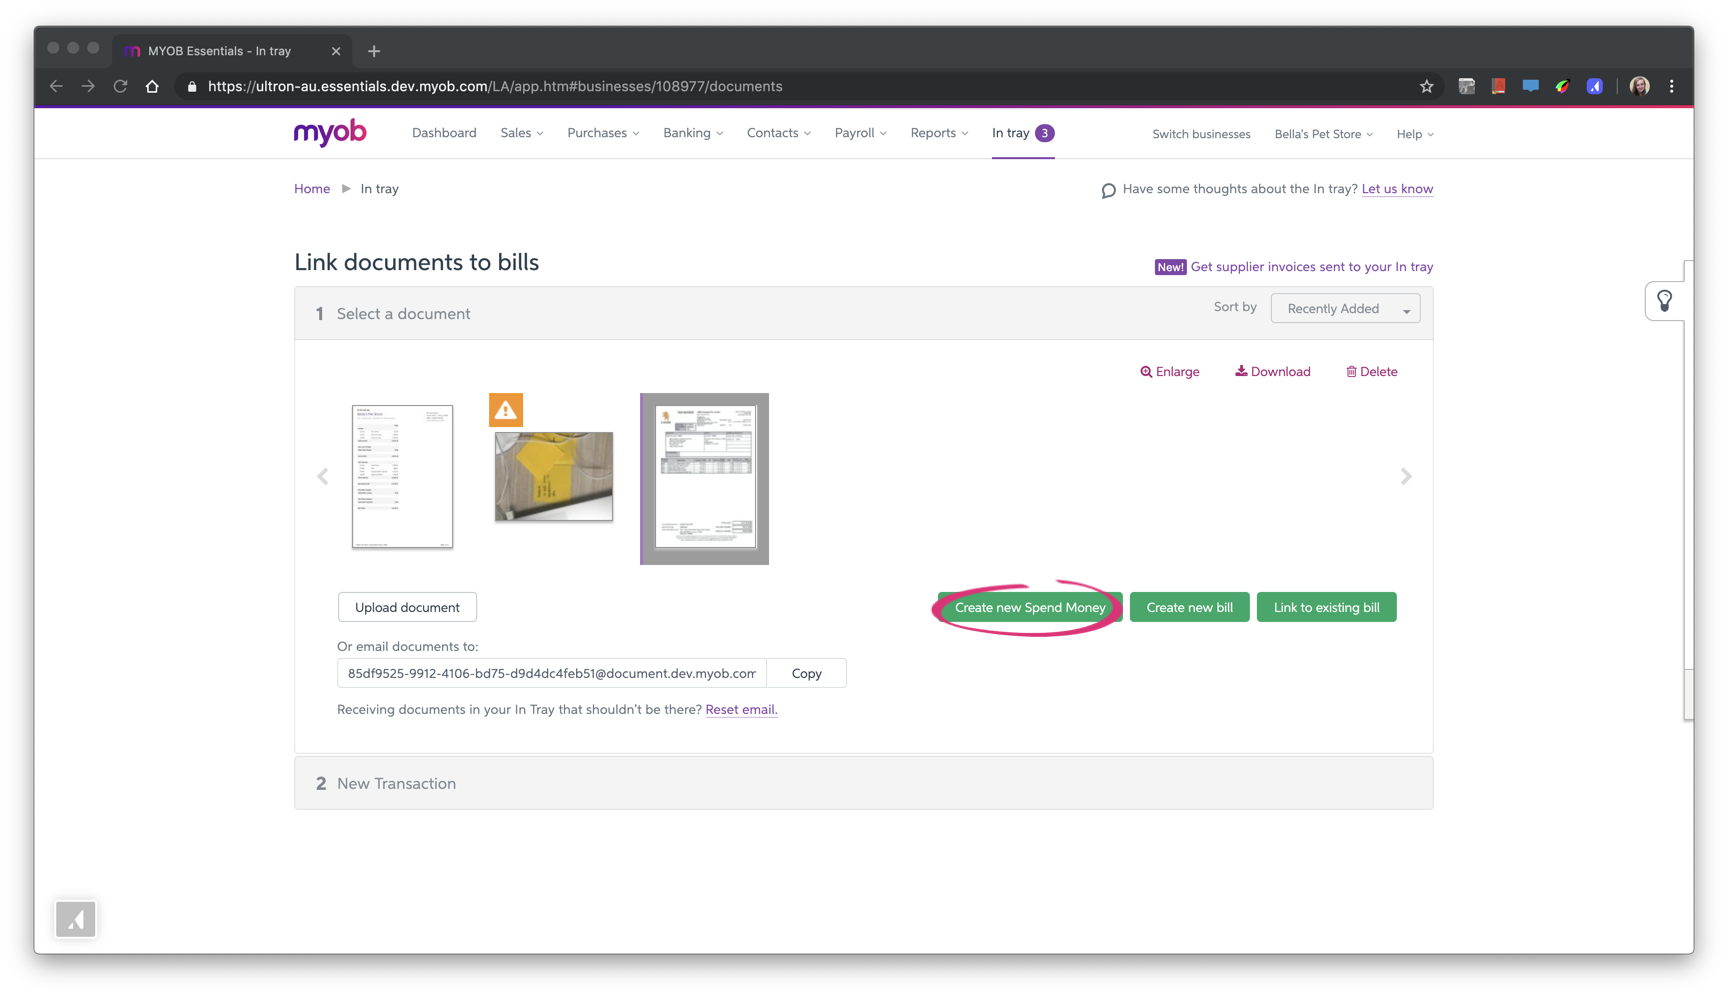
If the document you've uploaded to the In tray isn't a bill (maybe it's a receipt for an incidental purchase), you can use it to create a new Spend Money transaction.
Currently, you can’t delete attachments against your Spend money transactions. We’re working on sorting this out soon – so keep your eyes peeled.
- Select the document in your In tray and click Create new Spend Money
Fill in the details of the transaction.
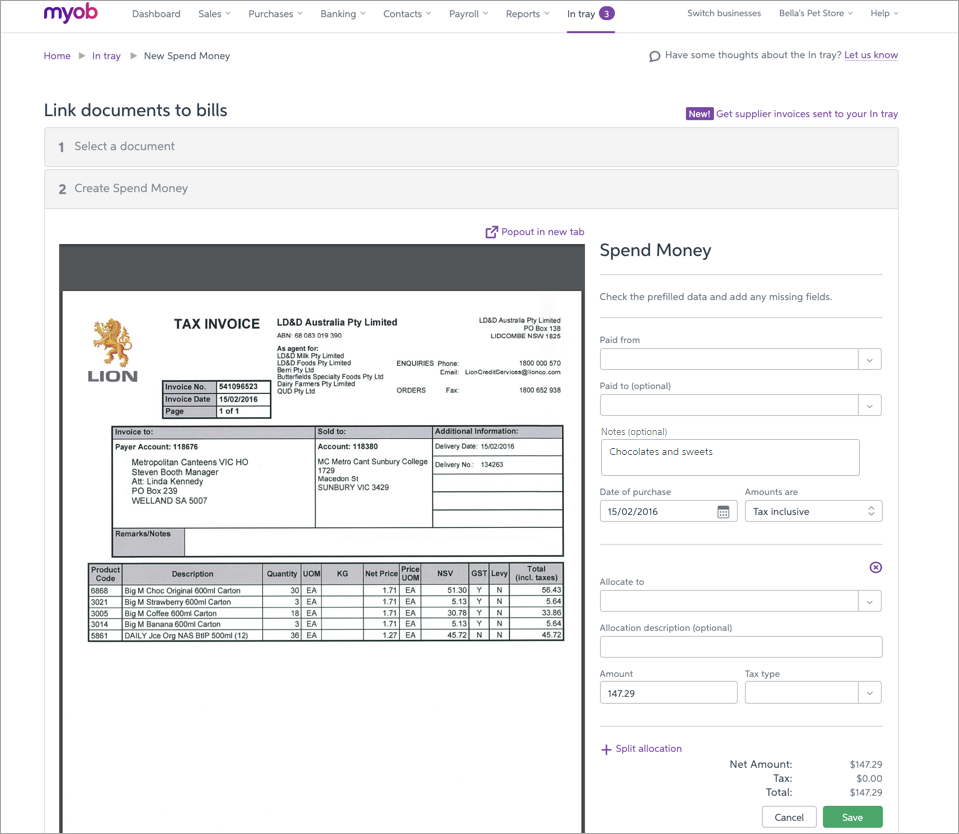
If you captured the document using the MYOB Capture app and added a note to it before sending it to the In tray, that note will automatically in the Notes field:

- Click Save. The Spend Money transaction is saved with the document attached to it.
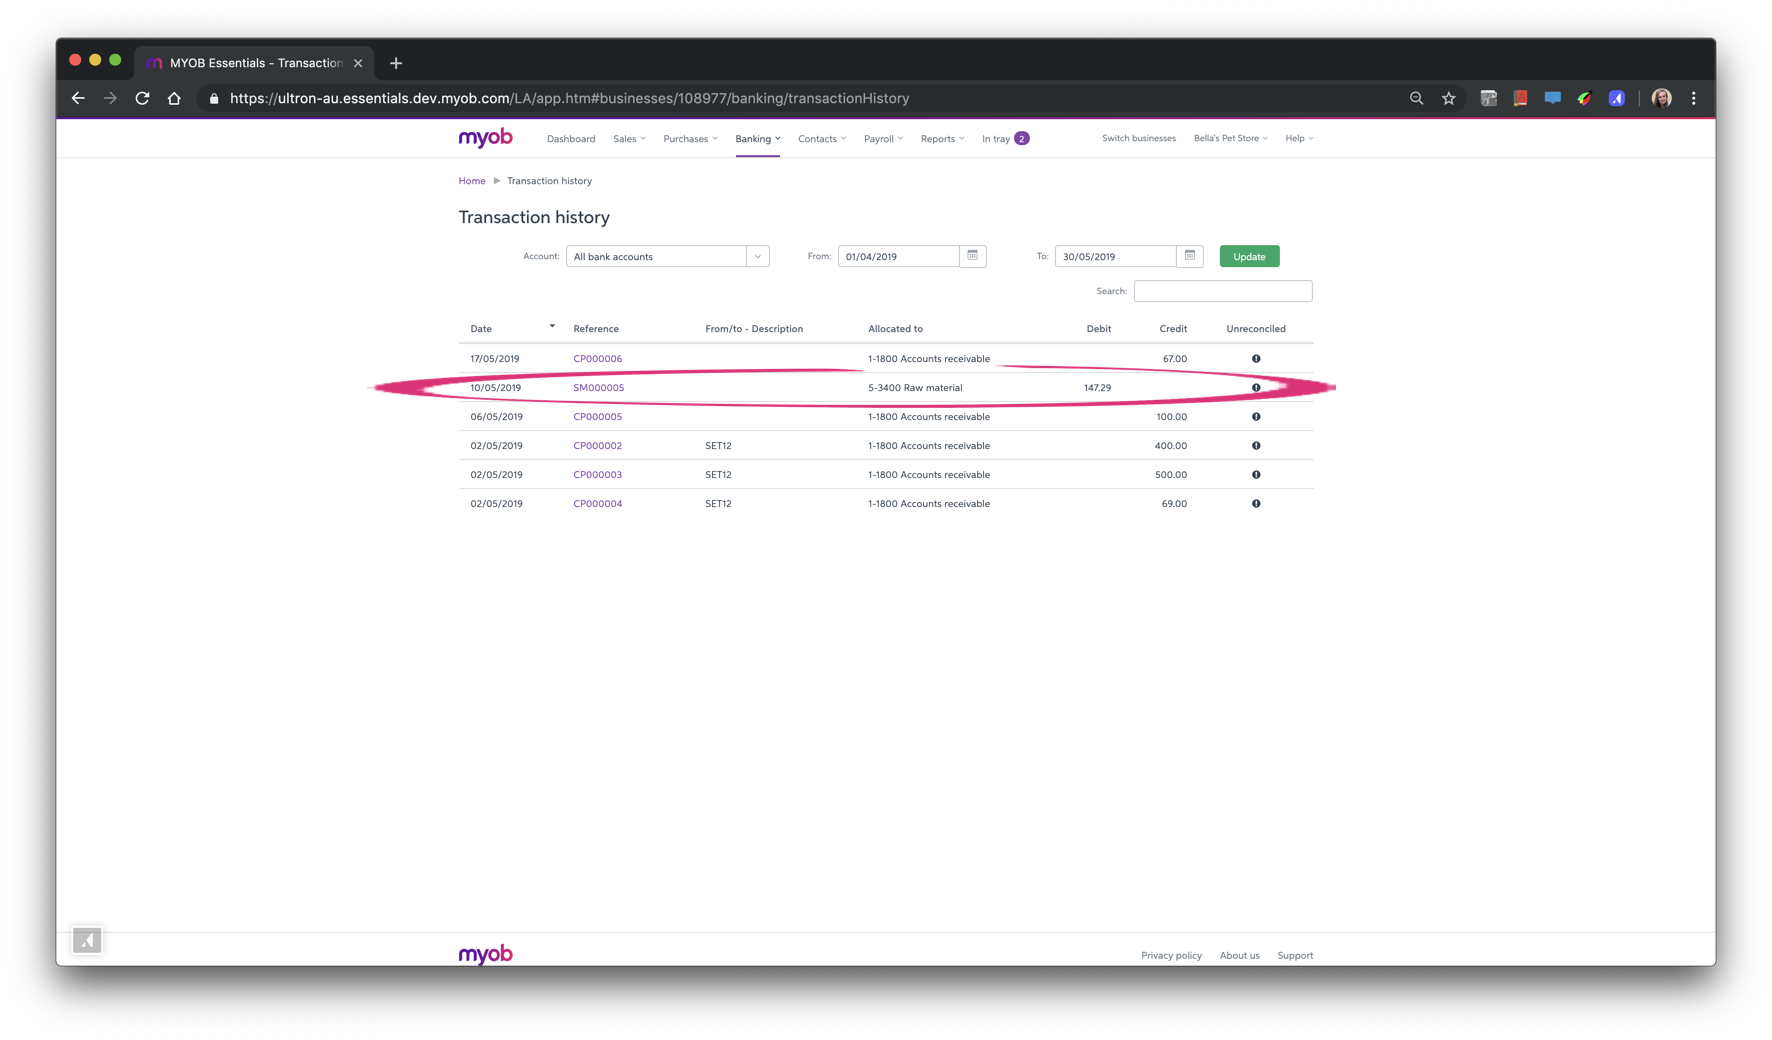
Tell me more about attaching documents to Spend money transactions.
Click the document in the In tray then click Download.
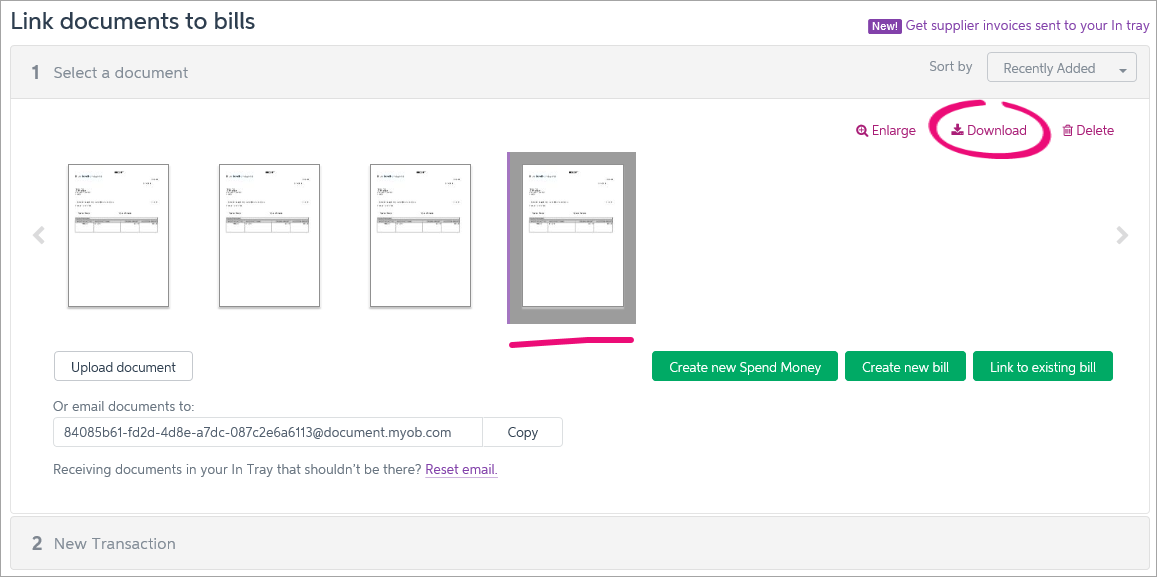
You can then choose to open or save the document. If you save it, give the file a name (it will be a PDF file, even if you uploaded it as an image file).
Once downloaded, you can view or print them using any PDF viewer or attach them to emails.
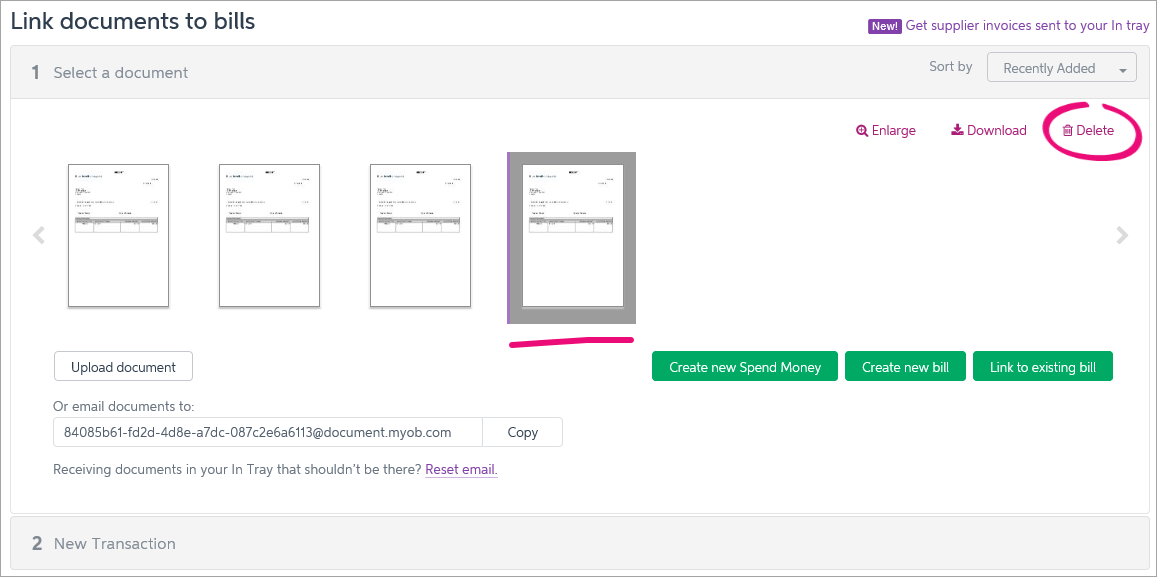
Click the document you want to remove then click Delete.
FAQs
How do I change which document is linked to a bill?
If you've accidentally linked the wrong document to a bill, or if you've received an updated invoice from a supplier and want to attach that to the bill instead, you can do this when viewing the bill.
- Go to the Purchases menu and choose Bills.
- Click to open the bill you want to edit (it'll have a document icon
 against it). Need help finding the bill?
 - Click the unlink icon next to the document. The document will be unlinked from the bill and sent back to the In tray.
- If you want to link a new document to that bill:
- Click Link document.
- Choose the document you want to link and click Link document to bill.
Can I link more than one supplier invoice to a bill
You can only link one supplier invoice to a bill.
If you have more than one document you want to link to a bill, you can either:
- scan all the associated documents together to create a single PDF, or
- use a 3rd party program to combine PDF documents (there are several free programs that will do this - search Google for "combine PDF free".
Can I link attachments from my In tray against bank transactions?
Yes, you can add files to your bank transactions by selecting a bank transaction, clicking on Attachments and then selecting the Link from In tray button.
Learn about attaching documents to bank transactions.
What's MYOB to MYOB?
Working with a fellow MYOB user? Now with MYOB to MYOB, you can link accounts so that any invoices you receive from another MYOB business will go straight to your In tray.
All you need to do is go to an invoice from that business and select Link to MYOB. Now all of your future invoices from that business will be sent to your In tray.

To stop invoices from particular businesses being sent to your In tray, just open up another email from that business and select Unlink from MYOB.

 Yes
Yes
 No
No
 Thanks for your feedback.