
- Created by BrianQ, last modified by AdrianC on Apr 16, 2018
https://help.myob.com/wiki/x/GYFW
How satisfied are you with our online help?*
Just these help pages, not phone support or the product itself
Why did you give this rating?
Anything else you want to tell us about the help?
You can create three custom lists that you can use to filter and group your inventory items.
An example of a custom list is Colour, in which you can create list entries of yellow, red, green and blue. When you create or edit an item, you can assign one of these colours to it. When you run an inventory report, you can choose to include only red items in the report.
To name a custom item list
Go to the Lists menu, choose Custom Lists & Field Names, and then click Items. The Custom List and Field Names window appears.
- Enter names for each of the three custom lists in the appropriate fields and click OK.

These list names will now appear on the Items Details view of the Item Information window.
To create a custom list entry
Go to the Lists menu, choose Custom Lists and then Items. The Custom Lists window appears.
- Select the custom list to which you want to add entries in the Custom List field.
- Click New and type the name of the list entry. For example, if you have a colour list, you would enter a colour, such as Purple.

- Click OK.
- Repeat from step 3 until you have created all your list entries.
- Click Close to close the Custom Lists window.
To edit or delete a custom list entry
Go to the Lists menu, choose Custom Lists and then Items. The Custom Lists window appears.
- Select the custom list to which you want to add entries in the Custom List field.
- Right-click the list entry and choose either:
- Edit List Entry - make your changes then click OK.
- Delete List Entry - the list entry is deleted.
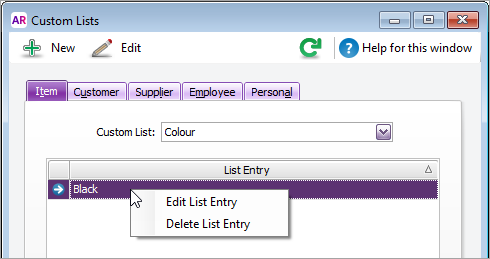
- Click Close to close the Custom Lists window.
To assign a custom list entry to an item
Go to the Inventorycommand centre and click Items List.
- Click the zoom arrow (
 ) to the left of the item. The Item Information window appears.
 - Click the Item Details tab.
- Select the list entry you require from the appropriate custom list.

- Click OK.
 Yes
Yes
 No
No
 Thanks for your feedback.