Page tree

You are viewing an old version of this page. View the current version.

Compare with Current View Page History

« Previous Version 44 Next »


Close

How satisfied are you with our online help?*

Just these help pages, not phone support or the product itself

0
1
2
3
4
5
Very dissatisfied
Very satisfied

Why did you give this rating?

Anything else you want to tell us about the help?

This information only applies if you have MYOB Practice without MYOB AE/AO.

If you use MYOB AE/AO, your family groups will be visible under the client's name. This is view-only access and any changes need to be made in AE/AO. Learn more about Family groups in AE/AO.

Groups can be used to consolidate together related clients and contacts. Groups are a label that you add to the contacts and clients who are associated with each other. By adding contacts to a group, you can access their information quickly without having to search every time.

Groups may consist of individuals, companies, trusts and other organisations. For example, you could create the group for:

  • Retail stores for Sunny Clothing Pty Ltd, Little Bird Bakery Ltd and Phones 4 U Ltd.
  • Smith Group for Mrs. Smith, Mr. Smith, Smiths Chip company, Smith Superannuation and the Smith Family Trust.
  • Farming clients for Three little pigs Ltd, Mary's Lambs Ltd and Jack and Jill's Crop Partnership.
To create a group
  1. Select Contacts > Contacts list.
  2. On the right side, from the Create drop-down, select Group.
  3. In the Create group window, enter the Group name and Group members. Click Create.

You can also create a group when adding a contact to a group in Add to group window.

To view a group

Known issue information panel doesn't open for clients and contacts when you sort with Group by

You won't be able to view more details for a client on the same page as the Contacts list when you:

  1. click the Group by drop-down
  2. select Group
  3. select a client.

 You’ll need to click on the client’s name and go into the client workspace to view their details.

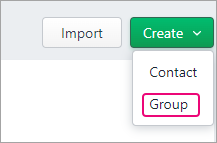
To view the list of Groups, select Contacts and then, in the Group by drop-down, select Group.

To search for a group, enter the group name in the search field:

AustraliaNew Zealand

All clients view

When you select All clients on the left panel, you can see the contacts consolidated by their group names. If a contact doesn't belong to a group, they will show under No Group.

To view the contacts under the group, click the down arrow before the group name:

Single client view

To view the group a client or contact belongs to, select Contacts and click anywhere other than the name to view the details on the right-side pane.

The groups will be visible below the client's name.

From the client details section, you can

  • add a client or contact to a group by selecting +Add to group
  • edit a group name or delete a group by clicking the group's name.
To edit or delete a group
  1. Select Contacts and then select Group in the Group by drop-down.

  2. Select the name of the group you want to edit or delete.
  3. In the Group details window, select Edit () or Delete:
    • Edit—make the changes such as group name, add or remove members and click Save.
    • Delete—in the confirmation window, click Delete.
Restricted clients

If you have restricted clients or contacts as part of a group, you'll see this message when you open the group: "There are restricted contacts in this group that are only visible to users with full access to that contact."

The restricted client will not appear in the list.

In the example below, there are 3 clients in the group, including a restricted client. You can see the names of all clients except the restricted client: