You can create a recurring transaction in a transaction window, or copy an existing recurring transaction to create a new one. Later on, you can change details of a recurring transaction, or delete one if it is no longer used.
To create a recurring transaction
When you create a recurring transaction, you'll set up its schedule which includes:
Schedule—how often you want the transaction to be recorded, and for how long you want to schedule it. For example, you can schedule your car payments monthly, for the next 22 months.
Alerts—who you want to be notified when the recurring transaction is due and whether you want it to record automatically.
Transaction—choose some transaction-specific options.
Create the transaction that you want to make recurring. For example, if you want to create a recurring invoice for a customer, first enter the details of the invoice via the Sales command centre.
At the bottom of the transaction window, click Save as Recurring (instead of clicking Record). The Recurring Schedule Information window appears.
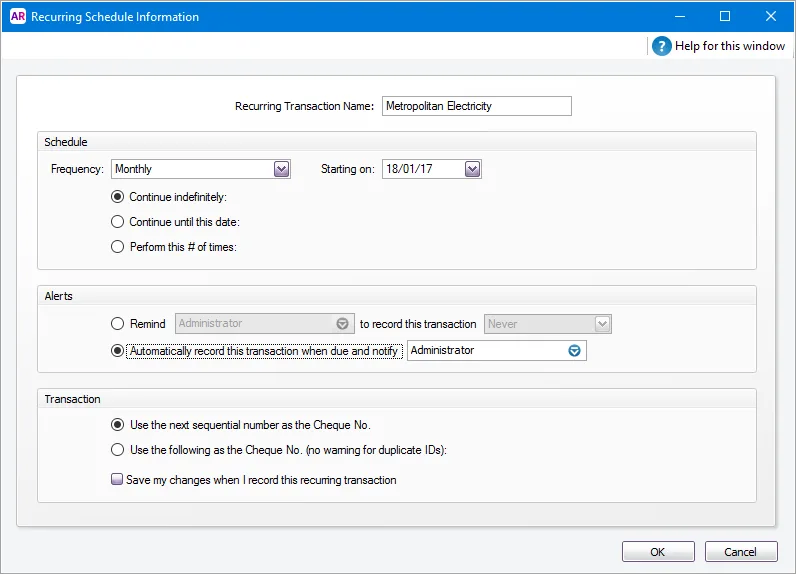
In the Recurring Transaction Name field, type a name to identify the transaction. Schedule the transaction
From the Frequency list, choose how often the transaction will be recorded.
Recurring transaction reports
If you specify the frequency and a reminder date for the transaction, you can use the Recurring Transactions reports to keep track of the transactions you need to enter.
In the Starting on field, enter or choose the date on which the transaction is first due.
Pre-dated recurring transactions
You can save a recurring transaction with a start date prior to the current date, provided the date entered is within the current financial year and is not in a locked period.
Indicate how long you want the recurring transaction to continue:
To schedule the transaction for an unlimited period, select Continue indefinitely.
To schedule the transaction until a set date, select Continue until this date and type the date in the adjacent field.
To schedule the transaction for a set number of times, select Perform this number of times and type the number of times in the adjacent field.
Specify an alert option
In the Alerts section of the window, you can set a reminder for a specific user to record the transaction when they open the company file. Or you can choose for the transaction to record automatically when a specific user opens the company file, at which time that user will also receive a notification.
Pre-dated recurring transactions cannot be recorded automatically
If you entered a pre-dated recurring transaction and you set a reminder date, the transaction will display as overdue on the To Do List. Pre-dated recurring transactions cannot be set to be recorded automatically.
To set a reminder, select the Remind option and choose a reminder option from the to record this transaction list. If you choose No. days in advance, type the number of days in the adjacent field.
Select the user who needs to be reminded from the list adjacent to the option, then Continue with step 7.
To automatically record the transaction, Click Automatically record this transaction when due and notify.
(Offline company files only) Select the user who needs to be notified from the list adjacent to the option.
Note: For offline company files, the transaction will only be recorded on or after the due date, once the selected user signs into the company file. Learn more about automatic recording.
In the Transaction section, select how you want the transaction ID number to be created. If you want:
the transaction ID number to be one greater than the previous transaction ID, click Use the next sequential number as the [...] No..
to use a specific transaction ID, click Use the following as the [...] No., then type the transaction ID in the adjacent field.
to save any changes you make to the recurring transaction each time it is recorded, for example, to change the amount, select the Save my changes when I record this recurring transaction option.
Click OK. The transaction window appears.
Click Record to record the transaction showing or click Cancel to close the transaction window. The new recurring transaction now appears in the Recurring Transactions List window.

To create a recurring transaction from an existing transaction
You can create a recurring transaction by copying an existing recurring transaction entry, then customising the details for the new one.
Go to the Lists menu and choose Recurring Transactions. The Recurring Transactions List window appears.
Select the recurring transaction you want to copy and click Create Copy. The Create Copy window appears.
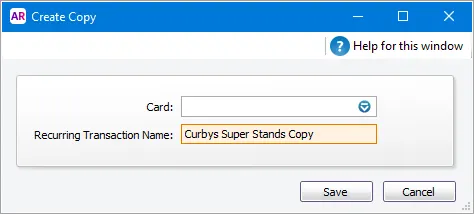
In the Card field, click the search button ( ). The Select from List window appears listing only card types relevant to the type of recurring transaction you are copying. For example, a sales transaction can only be applied to your customer cards.
Select the cards you want to create a copy for:
if you want to select all the cards, click the icon above the select column ( )
if you only want to select some cards, click in the select column next to each required card.
Click OK when you’ve finished selecting from the list. The Create Copy window appears.
Click Save.
If you selected one card, the transaction window for the new recurring transaction appears. You can edit the transaction details if required. Click Save. The Recurring Transactions List window appears.
If you selected more than one card, The Recurring Transactions List window lists all your recurring transactions. Each new transaction has a unique name—the original name suffixed by the name of the relevant card.If you need to change the schedule details or the name of a new recurring transaction:
Select the recurring transaction.
Click Edit Schedule. The Recurring Schedule Information window appears.
Make your changes and click OK.
Click Close.

Automatic recording
For online company files, recurring transactions scheduled to record automatically will be recorded between 6am and 11am (Melbourne time) on the due date, even if the file isn't open.

For offline company files, the recurring transaction will record automatically once the selected user signs into the company file, on or after the due date. The user you've specified will also receive a notification about it.
Keep on top of your recorded and upcoming recurring transactions by using the To Do List. We recommend turning on a preference to display the To Do List each time you open your company file (Setup menu > Preferences > Windows tab > Display the To Do List when opening your company file).
FAQs
Why am I getting a "ValidationException" error?
This workaround should eliminate this error when working with recurring transactions.
Go to the Setup menu and choose Preferences.
Click the System tab.
Deselect the option Warn if jobs are not assigned to all transactions.
Click OK.
Still need help?
If you're getting this error and the above info doesn't help, contact product support.