You can edit some default portal details and features.
For example, you can add a practice logo. Or you can use an alias to send tasks and emails from a name and email address that's different to that of the logged-in user.
Haven't set up your default portal details before? See Setting up your portal options. You may also want to edit other portal options. You can find more related topics to the right of this page.
About logos
There are two places where you can set logos in MYOB Practice.
Logo for notifications—The logo you set in Settings > Email notifications is displayed in any emails that are generated from MYOB Practice when you create portal tasks for clients or when you send a tax notice to a client.
Logo for portal—The logo you set in Settings > Portal is displayed on your client's portal login page and within the portal page after the client logs in.

About aliases
When you set an alias:
emails will be sent from the alias by default. At the time of sending the email, you can't select a different name or email to send as.
portal tasks will be sent from the user selected as the portal's default Send as sender. You select a default sender, including if you want to make the alias the default, when you create or edit the portal. You can also select the sender, including the alias, at the time of creating the portal task.
If a default portal sender hasn't been selected, tasks will be sent from the alias by default, unless another sender is chosen later when creating the task.
To edit your portal details
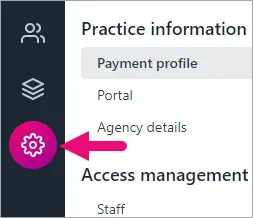
Open MYOB Practice and, on the left menu bar, select Settings and choose Portal.


If you need to update your practice name or the logo that will be displayed in your client portals, click the Edit icon in the Name and logo section:
Edit your Practice name, if required.
There are some restrictions to the practice name you can enter as part of the URL:
-
The field can't be blank.
-
It must be unique.
-
It can't contain spaces.
-
It must be 50 characters or less.
-
Only letters and numbers can be included. The following special characters can't be used: ([~#%&*{}<>?/+|\"]).
-
To update the logo, if there's already a logo displayed, click the icon next to the current logo. You can now click in the logo box to browse and select a different image.
There are some restrictions on your company logo:
-
It must be one of the following file types: PNG, JPG or JPEG.
-
Its file size can't be more than 800KB.
-
Its dimensions can't be more than 1000px wide and 1000px high.
-
Click Save.
If the Portal website field is blank, you'll be able to enter the subdomain for the URL your clients will sign in to, to access their client portal. For example, https://mypractice.portal.accountants
Click Edit in the Portal section and then enter your subdomain.You can't change the URL later, so choose carefully.
If you’d like to be able to select an alias, such as your practice name, as the portal task creator and as the "From" name on email notifications to clients, set up the practice alias. Otherwise, tasks and emails sent from MYOB Practice will continue to use the logged-in user as the sender.
Click Edit () in the Portal section.
Click Set up your practice alias to get started. To change an existing alias, first click the Edit icon () next to the alias.
Complete the details in the Create practice alias or Update practice alias window and click Create or Update.
To receive a copy of all incoming notifications to the practice alias email address, select Copy all incoming notifications to the alias email. This works well when your practice has a shared inbox, as you can avoid issues when notifications are sent to an employee who is on vacation, or has left the practice.
Click Save.
After creating the practice alias, you can select it as the sender of a task when creating the task (Send as field) and you can add it to the notify list for a task (the practice alias email address you specified will be used). You can also set the alias as the default sender when setting up the default sender and notify list when you create or edit the portal.
Click the Email notifications tab under Settings in the left menu bar.
Here’s where you can customise the notification emails that are sent to your clients or received by your practice:Add a picture or practice logo to the email header.
There are some restrictions on your company logo:
-
It must be one of the following file types: PNG, JPG or JPEG.
-
Its file size can't be more than 800KB.
-
Its dimensions can't be more than 1000px wide and 1000px high.
-
Add text to the email footer. You might want to include a disclaimer, privacy policy, or links to your website and other information.
To preview how the email will look, click Email me an example. The email is sent from and to the email address of the logged-in MYOB Practice user. When you send the actual tax notice email to your clients, it will be sent from your alias if you have one set up.