This information only applies to the AccountRight Server Edition.
During the AccountRight installation, a set of Windows "shares" are created which enable AccountRight to perform tasks including backing up, restoring, exporting, and importing. A share is like a shared folder, and if they don't install properly, AccountRight can't function.
The first thing to check is that you're installing the latest AccountRight version.
It's known that malicious software such as viruses can prevent shares from being created, so if you're getting this error we recommend you scan your computer with the most up to date anti-malware and anti-virus software.
If the AccountRight installation continues to report that there was an issue creating a Windows shared folder, you can manually create the shares.
To manually create shares
There are 6 shares that need to be created:
Share name | Folder path | Description |
|---|---|---|
AccountRight.Backup | C:\Users\Public\Documents\MYOB\My AccountRight Files\.backups | MYOB AccountRight Library Share |
AccountRight.Export | C:\Users\Public\Documents\MYOB\My AccountRight Files\.exports | MYOB AccountRight Library Share |
AccountRight.Import | C:\Users\Public\Documents\MYOB\My AccountRight Files\.imports | MYOB AccountRight Library Share |
AccountRight.Migrate | C:\Users\Public\Documents\MYOB\My AccountRight Files\.migrates | MYOB AccountRight Library Share |
AccountRight.Restore | C:\Users\Public\Documents\MYOB\My AccountRight Files\.restores | MYOB AccountRight Library Share |
AccountRight.Upgrade | C:\Users\Public\Documents\MYOB\My AccountRight Files\.upgrades | MYOB AccountRight Library Share |
Referring to the table above, create the shares as follows:
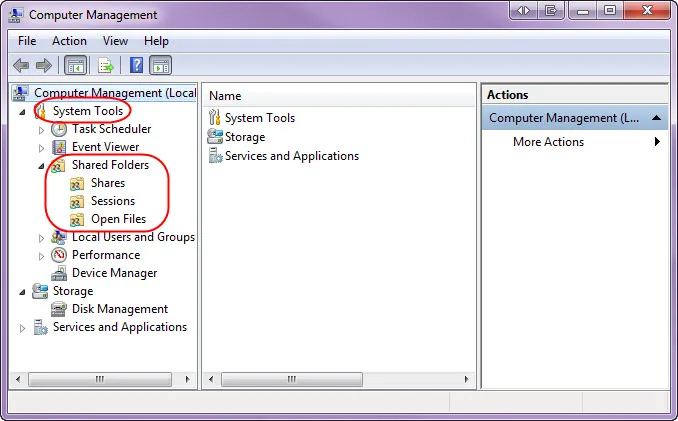
Open the Computer Management window:
In Windows 10 or 8: Right-click in the bottom left corner of the screen and choose Computer Management.
In Windows 7: Click the Windows Start button, right-click Computer and choose Manage.
In the left panel, click to expand System Tools then click to expand Shared Folders. Three folders will be displayed under this (Shares, Sessions and Open Files).
Right-click Shares and choose New Share. The Create A Shared Folder Wizard appears.
If the New Share option isn't available when you right-click Shares, simultaneously press the Windows ( ) and R keys on your keyboard to display the Run window. Type shrpubw.exe then click OK. The Create A Shared Folder Wizard will appear.
If the New Share option isn't available when you right-click Shares, simultaneously press the Windows and R keys on your keyboard to display the Run window. Type shrpubw.exe then click OK. The Create A Shared Folder Wizard will appear.
Click Next.
In the Folder path field, enter the folder path for the share being created. You can copy this information from the table above and paste it into the Folder path field.
Click Next.
If a warning displays about "The system cannot find the specified path", click Yes to create it.
Enter the Share name and Description for the share being created. Refer to the table above for this information.
Click Next.
Click Finish then click Finish again.
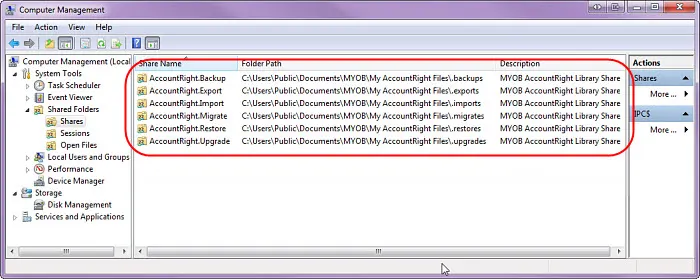
Repeat steps 3 - 10 to create all the shares listed in the table above. The shares will then be listed in the Computer Managementwindow as shown below.


Still having trouble?
Contact product support and we'll be happy to help.