
- Created by admin, last modified by AdrianC on Apr 06, 2016
https://help.myob.com/wiki/x/sQec
ANSWER ID:9104
In some industries, adding value to inventory items is a common practice. Your software can be used to track an item's additional costs which can then be included in the cost of the finished item.
Setting up your company file to add value to your inventory
All that's required is a Job to track the expenses, and the Item itself.
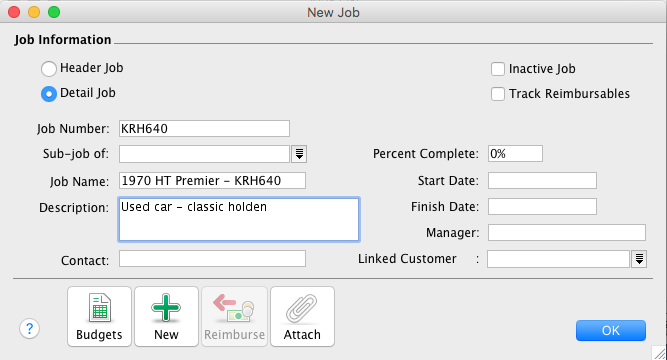
- Go to the Lists menu and choose Jobs.
- Click New.
- Enter the Job information as per the window below, specifying a suitable Job Number and Job Name.
Want to learn more about jobs?
See the AccountEdge help (Australia | New Zealand).
- Go to the Inventory command centre and click Items List.
- Click New.
- Setup the Item as per the window below, selecting an Item Number that best suits your Items List. Note: The accounts selected in the lower section of the window will be specific to your business and must have been created in your software.
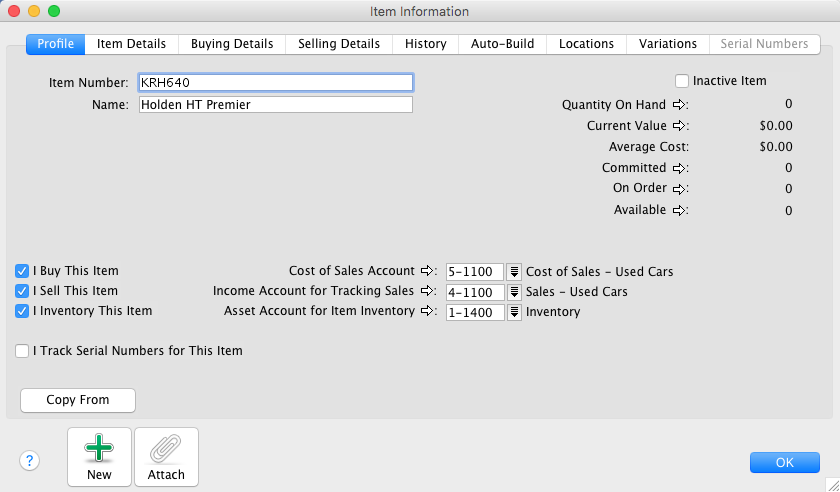
- Click the Buying Details and Selling Details tabs and specify the applicable Tax/GST Code to use when buying and selling. Speak to your accountant or the ATO/IRD for advice of the applicable tax/GST codes to use in your circumstances.
Click OK.
This item is setup using the perpetual inventory control method. Please seek your accountant's advice if you are unfamiliar with the various methods of accounting for inventory and how they can affect your accounting records.
How is value added to an item?
Expenses that are incurred to place an item in a saleable condition are recorded using a Bill or Spend Money transaction and allocated to the relevant cost of sales account. These expenses are then transferred to the cost of the Item using an Adjust Inventory transaction.
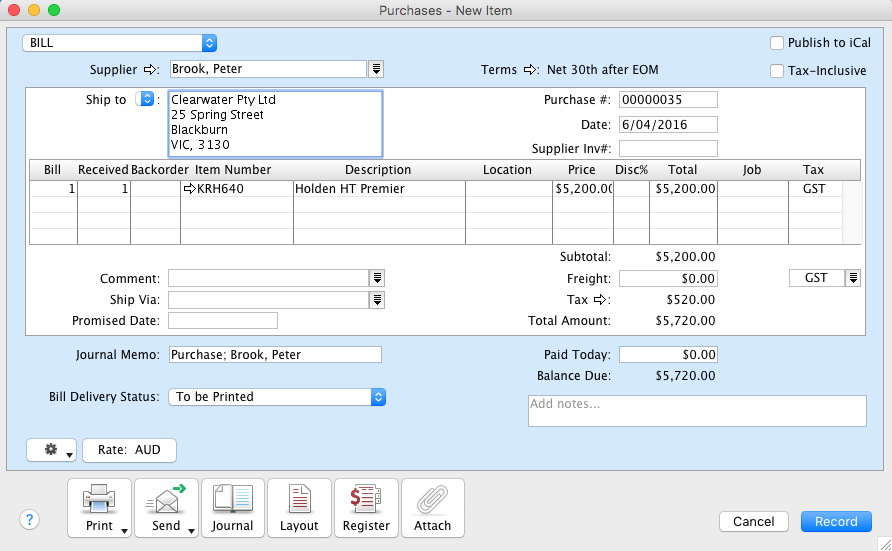
- Go to the Purchases command centre click Enter Purchases.
- Click Layout and choose Item then click OK.
- Select the Supplier's Card then enter the Date and other transaction details.
- Enter the amount Received, the Item Number and Price.
- Check the transaction details then click Record. See our example Item type Bill below.
Enter the additional costs using either a Spend Money or Purchases transaction.
The window below shows an example Spend Money transaction used to record an expense associated with the Item.
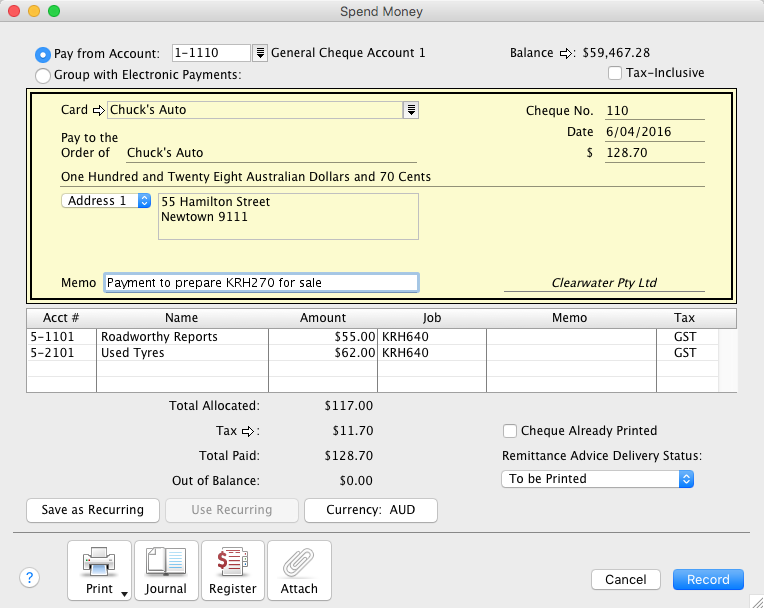
The relevant Job Number is applied to the expenses associated with the Item.
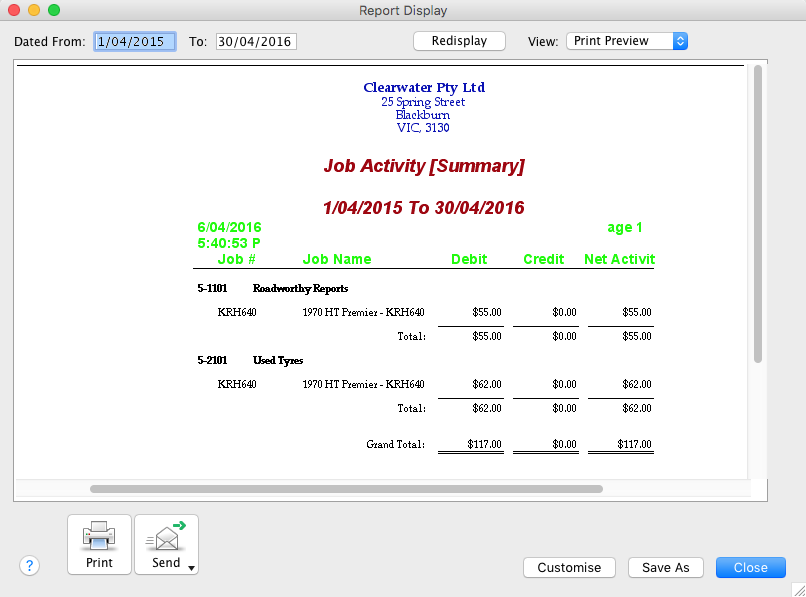
Use the Jobs Activity Summary report to determine the expenses and the ledger account allocations. This information is needed for transferring the relevant expense amounts to the Item.
To use this report:
- Go to the Accounts command centre and click Reports.
- Scroll down and highlight the Jobs Activity Summary report (under the Jobs sub-heading).
- Click Customise.
- In the Source Journal field, select All.
- Enter the Dated From and To dates to capture the entire Job activity for the Item.
- In the Jobs field, select the item's job number.
- Click Display. The window below shows an example Jobs Activity Summary report.
An Adjust Inventory transaction can now be used to transfer the expenses from the relevant cost of sales accounts to the cost of the Item.
- Go to the Inventory command centre and click Adjust Inventory.
- Enter the Date and Memo.
- In the lower portion of the window, enter the Item Number.
- Enter zero in the Quantity and Unit Cost fields.
- Refer to the Jobs Activity Summary report then enter the Amount and Account.
- Repeat steps 3 - 5 for each expense.
The window below shows an example Adjust Inventory transaction.
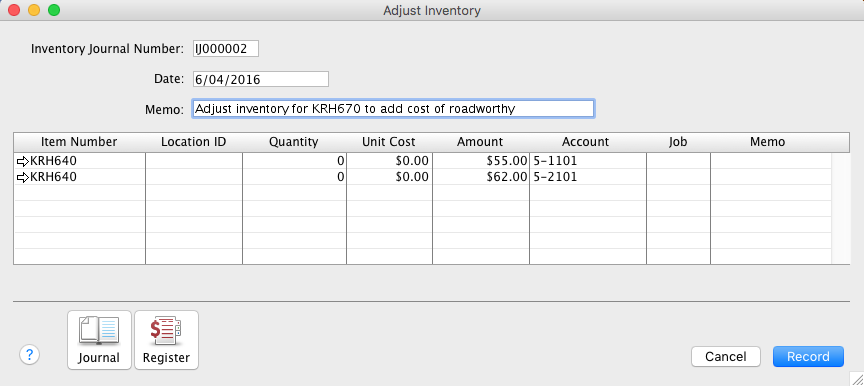
- Compare the Amounts and Accounts with the Jobs Activity Summary report shown in Task 3 above.
- This transaction will reverse the expenses and transfer them to the cost of the Item. Due to the nature of the perpetual inventory system, the expenses will be realised when the Item is sold.
The window below shows the item's Current Value ($5317.00), which equals the item's purchase price plus the expenses ($5200.00 + $117.00).
