- Created by admin, last modified by AdrianC on Oct 14, 2019
This information applies to MYOB AccountRight version 19. For later versions, see our help centre.
https://help.myob.com/wiki/x/jwGc
ANSWER ID:9218
You can remove, repair or reinstall AccountRight with or without your software CD. Setting up a new computer? See Moving AccountRight v19 to a new computer.
You'll need to be logged in to your computer as an administrator, or a user with administrator privileges, to perform these functions.
Let's step you through each of these options.
- If possible, back up your AccountRight company file (File > Backup). This ensures your company file information is safe. For detailed instructions on backing up, see the AccountRight help (Australia | New Zealand).
- If your computer only allows users with administrator privileges to install or uninstall programs, log into Windows as administrator.
- Close all programs on your computer.
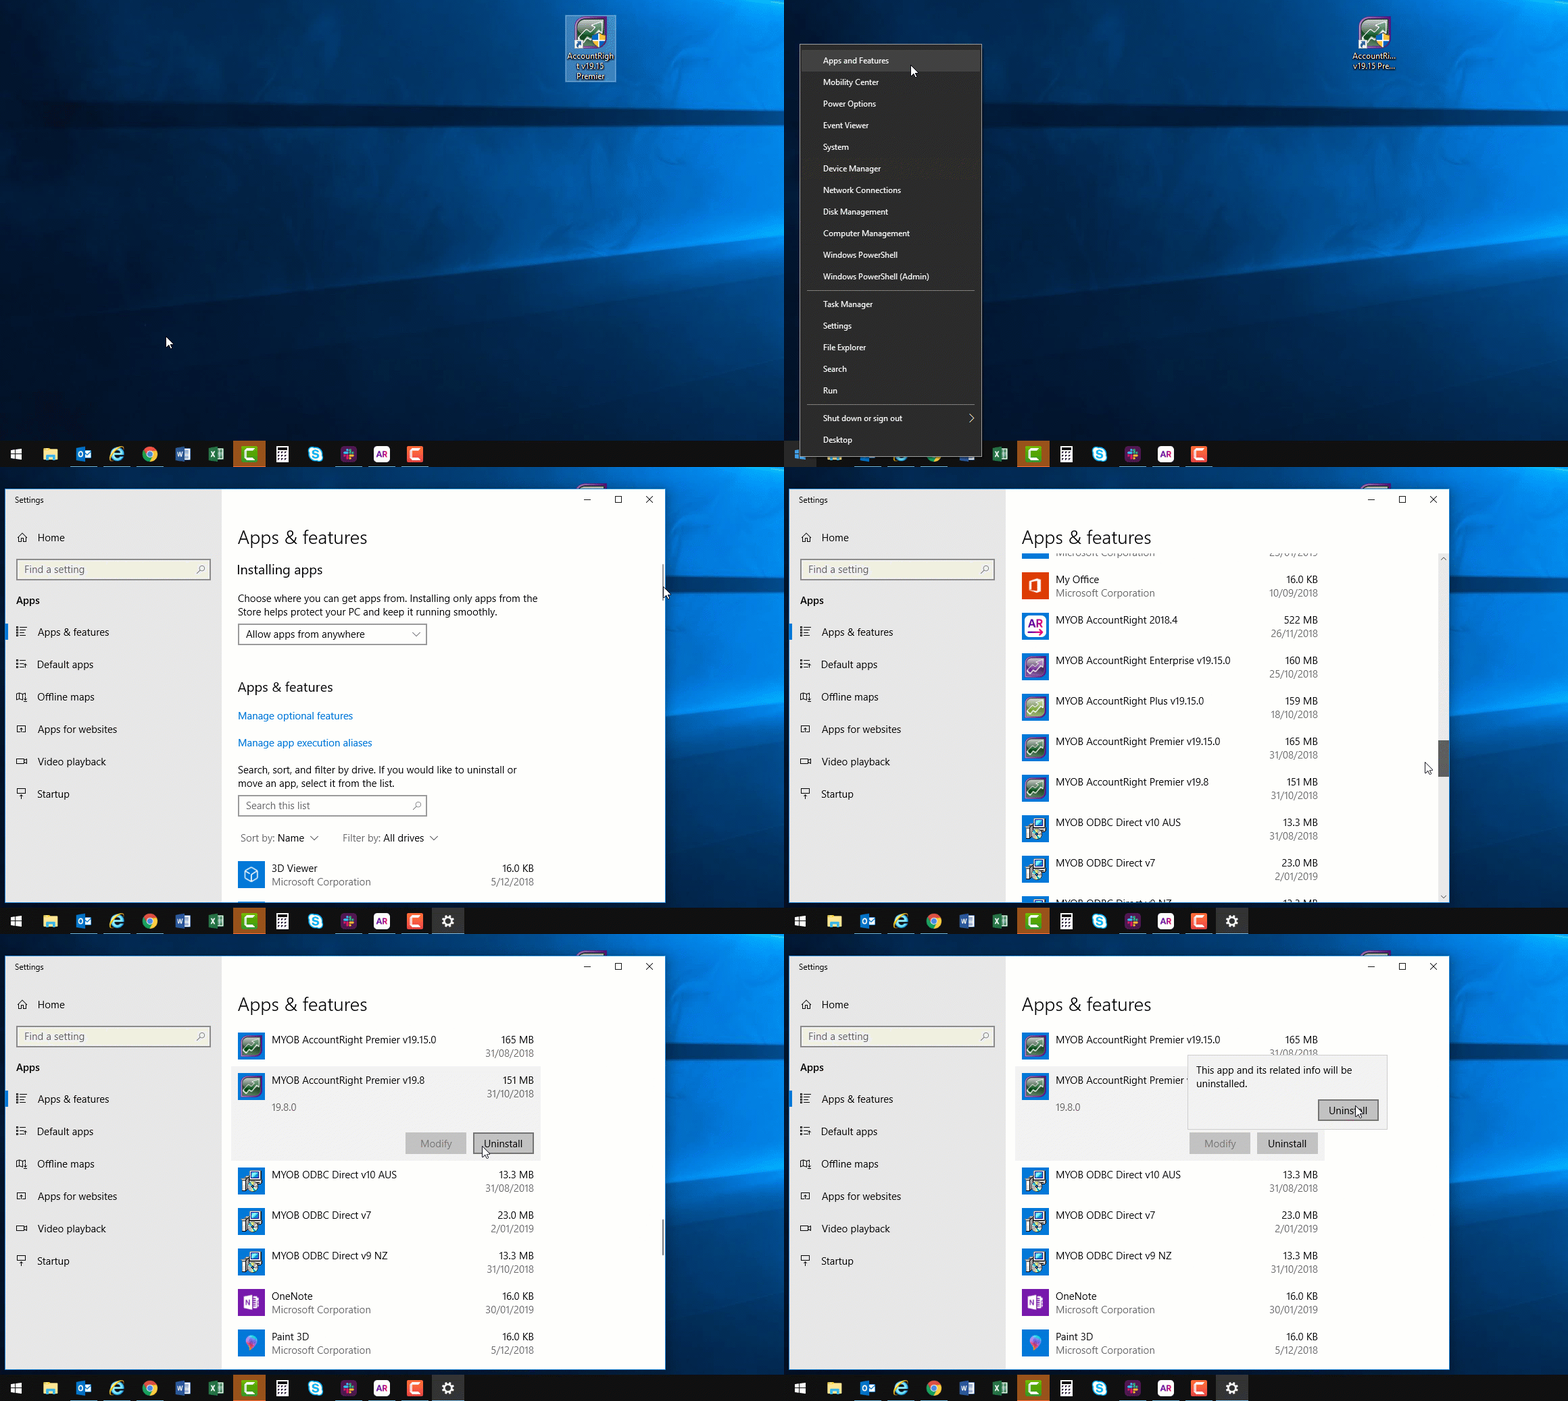
Access the list of programs installed on your computer:
If you're using... Do this... Windows 10 Right-click the Windows Start button and choose Apps and Features.

Windows 8 Right-click in the screen's bottom-left corner and choose Programs and Features. Windows 7 Click the Windows Start button and choose Control Panel then choose Programs and Features (or Uninstall a program). - Click the MYOB AccountRight software to be uninstalled then click Uninstall. In some Windows versions this button might be called Change/Uninstall.
- If a confirmation message is displayed, click Yes.
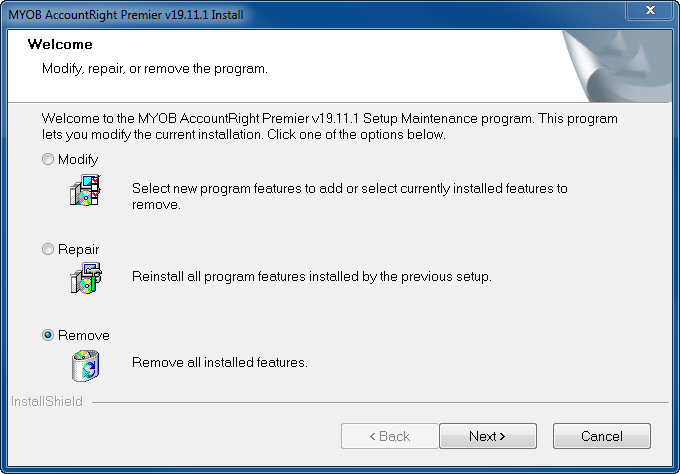
- If the Setup window is displayed, select the Remove option.

- Click Next.
- Click Yes to the confirmation message.
- Click Finish once the uninstall process is complete.
- Restart your computer.
Having trouble uninstalling or is some part of the software left behind? See Fixing issues uninstalling AccountRight v19.
The Repair option will reinstall all the software components you specified during the original install process, but you won't have the opportunity to add or remove specific components in the process. This process may be used, for example, if asked to do so by MYOB technical support.
- If your computer only allows users with administrator privileges to install or uninstall programs, log into Windows as administrator.
- Close out of all programs on your computer. This includes disabling any anti-virus software.
Access the list of programs installed on your computer:
If you're using... Do this... Windows 10 Right-click the Windows Start button and choose Apps and Features.

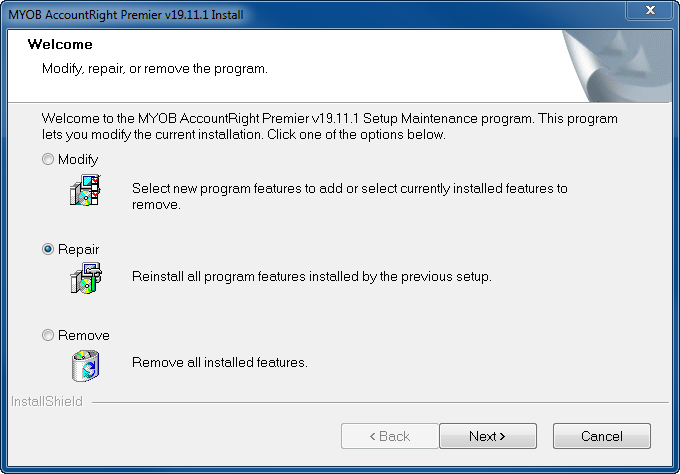
Windows 8 Right-click in the screen's bottom-left corner and choose Programs and Features. Windows 7 Click the Windows Start button and choose Control Panel then choose Programs and Features (or Uninstall a program). Click the MYOB software version to be repaired then click Change or Modify. The Setup window will be displayed.
If the Change or Modify options aren't available, you'll need to uninstall then reinstall AccountRight.
- Select the Repair option.

- Click Next.
- Click Finish once the repair is complete.
- Restart your computer.
You can reinstall AccountRight using the installation CD or by downloading AccountRight (providing you have an active support subscription).
If you've downloaded AccountRight
- If your computer only allows users with administrator privileges to install or uninstall programs, log into Windows as administrator.
- Close all programs on your computer. If a virus scanner is enabled, disable it. Note that installation of some components may fail if you have a virus scanner running.
- Double-click the downloaded install file. The installation will begin.
- Follow the on screen prompts to complete the installation.
- When complete, restart your computer
If you have an installation CD:
- If your computer only allows users with administrator privileges to install or uninstall programs, log into Windows as administrator.
- Close all programs on your computer. If a virus scanner is enabled, disable it. Note that installation of some components may fail if you have a virus scanner running.
- Place the MYOB software CD into the disc drive. If the installation window does not automatically display:
- Simultaneously press the Windows and E keys on your keyboard to display My Computer (or Computer).
- Double-click your CD-ROM drive (usually the D: drive).
- Locate the file named autorun.exe and double-click it.
- Follow the on screen prompts to complete the installation.
- When complete, restart your computer.
Having trouble installing? See Installation troubleshooting.
