You are viewing an old version of this page. View the current version.
Compare with Current View Page History
« Previous Version 34 Next »
https://help.myob.com/wiki/x/cYYlB
How satisfied are you with our online help?*
Just these help pages, not phone support or the product itself
Why did you give this rating?
Anything else you want to tell us about the help?
To pay an employee, you'll need to set them up in MYOB and enter some basic details (Payroll menu > Create employee).
- Obtain a completed Tax code declaration (IR330) from each new employee (get the IR330 from Inland Revenue)
- Check the employee's KiwiSaver eligibility status
- Obtain the employee's bank account details for wage payments
To add an employee
Go to the Payroll menu and choose Create employee. Use the tabs on this page to enter the employee's details.

Here's an overview of each tab.
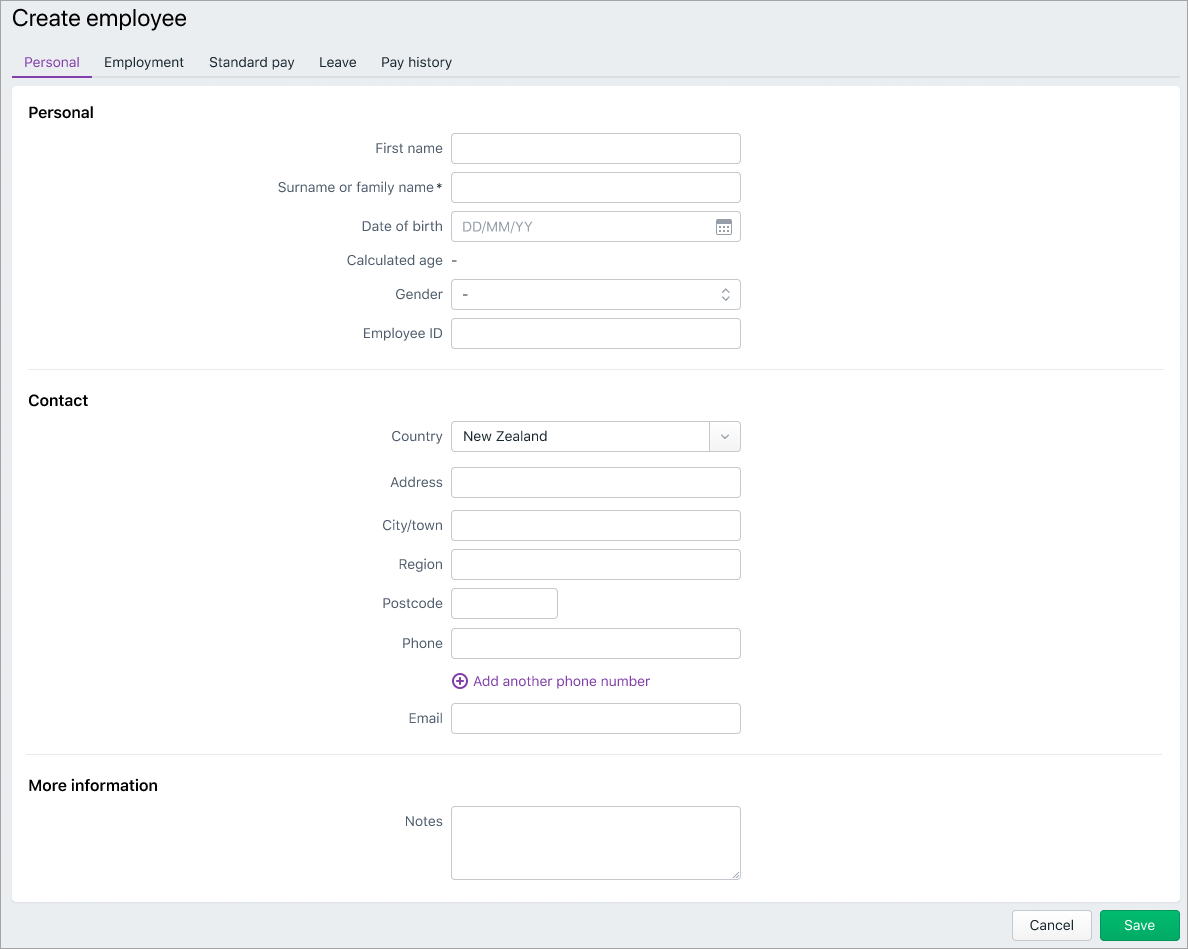
No surprises here—this is where you'll enter the employee's personal and contact details.
Some things to note:
- Use the Employee number field if you use a number or code system to identify each employee.
- Enter an Email address if you'll be emailing their pay slips.
- Use the Notes field for additional information, like an emergency contact.

Here you'll enter the employee's start date and their tax, KiwiSaver and bank account details.
Some things to note:
- You'll find the Tax code and IRD number on the employee's completed IR330 form.
- Choosing STC as the Tax Code requires additional ACC levy information.
- Choosing WT as the Tax code requires a Tax rate (%), and the KiwiSaver status will default to Exempt.
- If you need help with KiwiSaver, see the IR's information: KiwiSaver for Employers.
- Enter Bank account details if you'll be paying the employee into their bank account.

This is where you set how much the employee is paid and choose the earnings and deductions to include in their pay. You can set default amounts here, but you can always change these when you do a pay run.
Some things to note:
- Choose the employee's Pay period (how often you'll pay them) and whether they're paid an Annual salary or Hourly rate.
- The Days worked per week and Hours worked per week you enter here are used to calculate leave. If these vary from pay to pay, you can change these values when you do a pay run.
- By default, Salary is assigned to salaried employees and Ordinary hours is assigned to hourly-based employees. The Quantity and Rate is from the Base pay details at the top of the screen.
- Click Add earning and Add deduction to choose the earnings or deductions to include in the employee's regular pay. Need to create an earning or deduction?
- If you enter a custom rate or amount for an earning or deduction, it'll only apply to this employee.
- You'll see Tax and KiwiSaver amounts when you do a pay run, as they're automatically calculated.

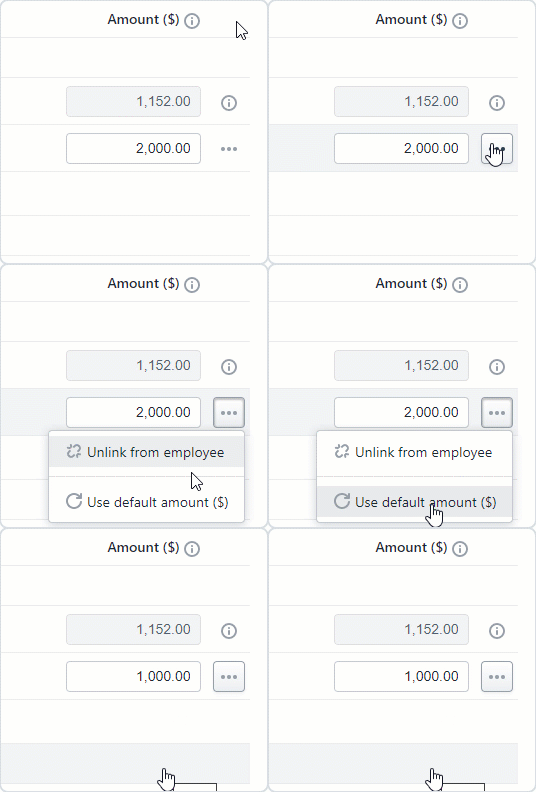
Remove or reset earnings and deductions
Use the ellipsis button next to an earning or deduction to unlink (remove) it from the employee, or to reset a custom amount back to its default value.

Here you'll set the Employment status (Full-time / Part-time, Casual (Pay as you go), or Fixed term), and define the details of their leave.
Click a leave type to set it up for this employee or enter an opening leave balance.

what do we want to say about each leave type? What information is useful here?
| Holiday pay | Set the Percentage of gross earnings. For fixed term employees, use the option Include in each pay (what does this do?) |
| Annual holidays | Definition of a week (from the Hours worked per week in Standard pay tab) Adding annual holiday balance (current leave due) |
| Sick leave | Adding sick leave balance (available balance days) |
| Alternative holidays | Adding alternative holidays balance (available balance days) |
If an employee has already been paid in the current financial year (prior to setting them up in MYOB) this is where you'll enter their pay history. This ensures the employee's year-to-date totals in MYOB are complete and accurate.
Choose a Period end date and enter the applicable amounts for that period. For example, you might enter one row for their entire year-to-date totals, or use several rows to enter their amounts in more detail, e.g. monthly or quarterly totals.

What's next?
Once you've finished setting up payroll, you're ready to pay your employees!
Need some help?
Contact our support team and we'll get you back on track.

 Yes
Yes
 No
No
 Thanks for your feedback.