Online company files only, but not available in AccountRight Basics
Is your shoebox overflowing with receipts you’re keeping “just in case”? With MYOB Capture, you can take a quick photo of a receipt and send it to your In Tray in seconds – helping you keep compliant and organised.
Using the latest AccountRight version?
MYOB Capture will suggest matching spend money transactions for you to link the receipt to. See Matching receipts to spend money transactions below.
If your AccountRight company file is online and you have a compatible Android or iOS device, you’re ready to go—just download and install MYOB Capture:
Download from the App Store (iOS)
Download from Google Play (Android)
Once it's installed, here’s how it works:
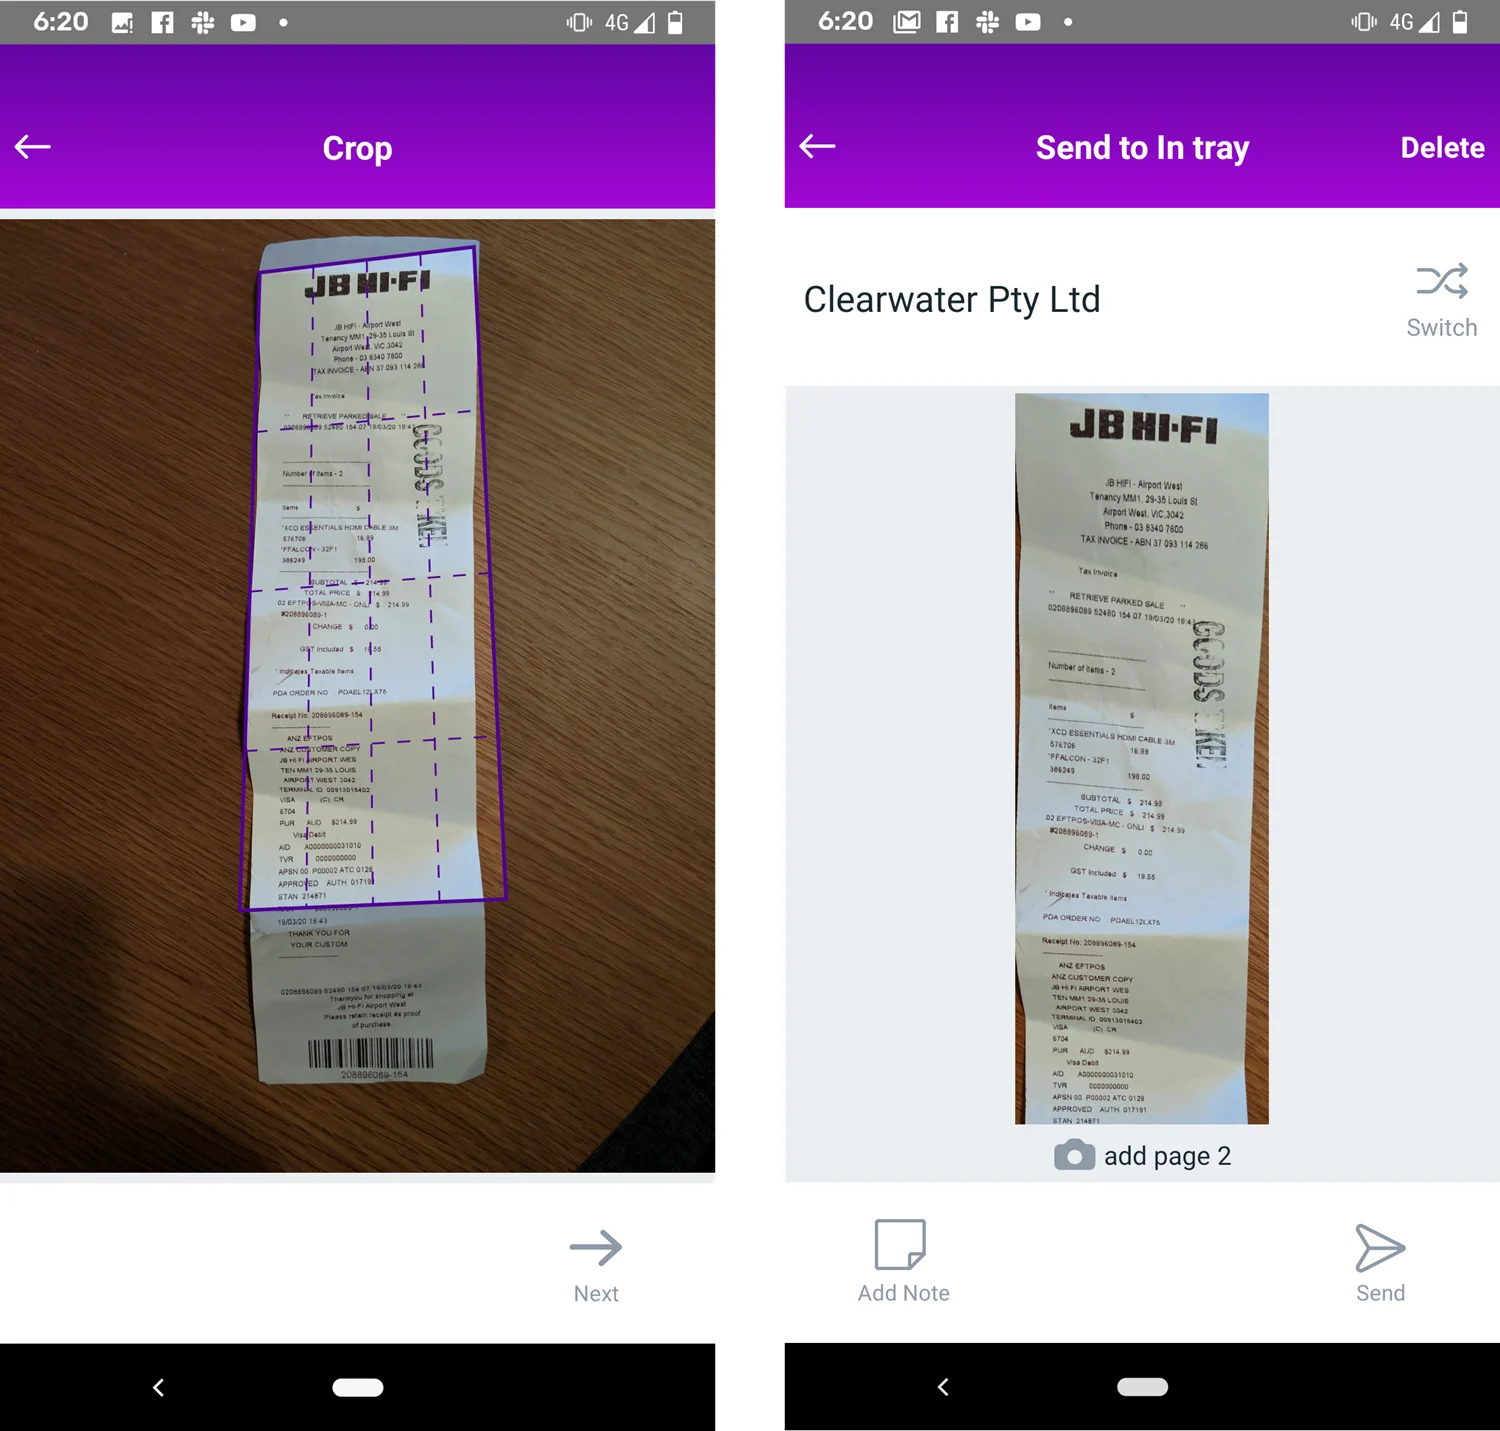
Take a photo of a receipt.
Crop the photo to remove unwanted areas.
Send the photo to your In Tray!
Your receipt will be sent to your In Tray, ready for you to use in MYOB.
You can also add a note to your captured receipt. You may want to add notes about who captured the receipt, how it was paid or how it should be allocated. Notes will be saved along with the document and will appear in any transactions you use them in, such as a Spend Money transaction or a Bill.
Notes don't appear in the In tray.
Do you have multiple AccountRight company files? No problem—the app lets you switch between files.
Who has access to MYOB Capture? Anyone who has access to your online company file will be able to use MYOB Capture to send receipts to your In Tray. They don’t need any special permissions. See Set up a new user for MYOB Capture below.
To capture and adjust an image
Take a picture of your receipt on the home screen. A purple outline will appear over your image.
Line up the corners of your receipt with the corners of the purple outline – a circle will appear to magnify wherever you place your finger. If you're not happy with the pic, tap Retake to have another go.
Once you've lined everything up, tap Next. A cropped version of the image will appear.
If you'd like to add a note to go along with the image:
Click on Add note ( ).
Type the note text.
Click Save at the top right.
The note will be saved with the image and will appear in any transactions you create from it.
If you're happy with the image, tap Send or tap Back to adjust.

To save a copy of your receipts to your iOS device's gallery
To save photos to your device's gallery, you need to configure your settings.
Open the app and tap Settings in the top right hand corner.
Tap Save uploads to Photos. A pop up appears.
Select Settings . You'll be taken to your phone settings.
Select Photos.
Select Read and write.
Now every time you send a photo to your In Tray using MYOB Capture, it'll save a copy of the photo in your phone's gallery.
To save a copy of your receipts to your Android device's gallery
To save photos to your Android device's gallery, you need to configure your settings.
Open the app and tap Settings in the top right hand corner. A Permission required pop up appears.
Tap OK. Another pop up appears.
Tap Allow to give MYOB Capture access to your device.
Now every time you send a photo to your In Tray using MYOB Capture, it'll save a copy of the photo in your phone's gallery.
To switch businesses
If you have more than one AccountRight company file or MYOB Business that you can access with the same login details, you can choose which file to send captured receipts to.
Take your picture and adjust the purple outline.
Tap Preview.
Tap Switch. A list of your company files will appear.
Select the business you'd like to switch to.
Now every time your images will be sent to the In tray of that business.

Setting up a new user
Anyone who has access to your online company file will be able to use MYOB Capture to send receipts to your In Tray. If you want to set up a new user for MYOB Capture, you need to invite them to your online file. Follow the procedure below.
To set up a new user for MYOB Capture
Before you start: You must be a user assigned the Administrator role to set up a new user.
Open the company file.
Go to the Setup menu and choose User Access. The User Access window appears.
Click New User.
Select the This user will sign on with a my.MYOB account option.
If they don't already have a my.MYOB account (also called an MYOB account), they'll be invited to create one when you finish setting them up.Set up company file sign-on details:
Type the user’s name in the User name field.
Enter their email address in the Email field.
This must be the email address that they use to log into MYOB. If they don't already have an MYOB account, they'll be invited to create one when you finish setting them up.
In the Company file roles list, select any roles you want to assign to this user account.
If this user will only need to use MYOB Capture and not any other features, you can deselect access to any feature or even set some as read-only.Click Save and Invite User. An email will be sent to the user's email address inviting them to access your online company file.
Once they accept the invitation, they can start using MYOB Capture.
Matching receipts to spend money transactions
If you use MYOB AccountRight v2019.4 or later, you'll get early access to our new matching feature. This uses the amount and date on your captured receipts and finds any spend money transactions that match. You can review the matches and attach the document if it's correct. This way, you won’t need to link receipts in AccountRight back at the office. It’ll all be done for you!
To use matching, you'll need:
your user role linked to your MYOB account (for more information, see your MYOB account details).
read/write permissions to the spend money feature (for more information, see Default user roles).
To review matches and attach receipts
If you see a "XYZ matches" message at the top of your MYOB Capture app, it means one of your documents has a spend money transaction that appears to match.
Click on the "XYZ matches" message. You'll see a summary of the spend money transaction at the top and your receipt just below.
If the match is correct and you want to attach the receipt to the transaction, tap Attach.
If the match is incorrect or you don't want to link the receipt, tap Skip.
If there are more matches, the next suggested match will appear.
Any documents you've matched to spend money transactions in MYOB Capture will be automatically reflected in AccountRight.
To enable or disable matching
Transaction matching is automatically enabled by default. You can turn it off in the Settings screen of your MYOB Capture app.
What happens next?
Once the receipt is in your In tray you can:
create a new bill
link to an existing bill
link to a bank transaction
create a Spend money transaction
Learn how to work with documents in your In Tray