If the company file is shared through network access to a shared folder, this folder must be fully shared and all users of the company file must have full access to the folder.
A windows user account identifies a person to a computer system or network, and each user account can be set to allow or restrict users from certain areas of the computer system.
We strongly recommend that you log onto your system with Administrator access. Windows user accounts set with limited access may experience difficulties in using some of the advanced features within AccountRight. For example, it may stop them from using the OfficeLink function to create personalised letters, sending reports to Excel, or using the ODBC Direct Driver.
To determine a user's access privileges
- Click the Windows Start button and choose Control Panel.
- Click Administrative tools then click Computer Management.
- In the left pane click Local Users and Groups and then double-click click Users in the right pane.
- In the right frame, locate the current user's name that is logged into Windows.
- Right click their name and select Properties. In our example the Windows User Account name is Roger.
 Image Modified
 - Click the Member Of tab and note what Windows User Access group that this user belongs to. In our example, Roger is part of the 'Users' group which only allows access to basic function within the Windows operating system.
 Image Modified
How do I allow members of this Windows User Access group to have full access to company files?
- Open Windows Explorer by simultaneously pressing the Windows and E keys on your keyboard.
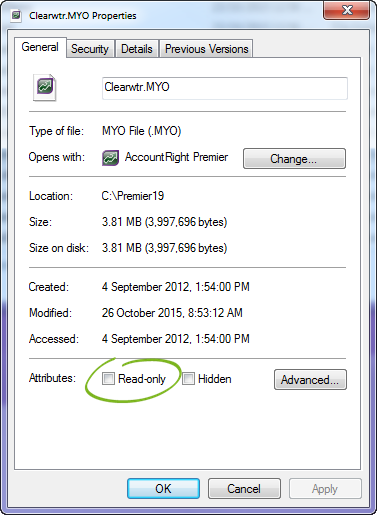
- Locate and right-click your current version MYOB folder and choose Properties. In our example we will select the Premier19 folder.
- Click the Security tab.
- In Windows XP Click Add. In Windows Vista and Windows 7, click Edit then click Add. This allows you to include the Windows User Access group to the list.
 Image Modified
 - Click Advanced.
 Image Modified
 - Click Find Now.
 Image Modified
 - Select the Windows User Access group you wish to give full access to company files, then click OK. In our example it was the 'Users' group.
- Click OK to add this group.
- Highlight the newly added Group then place a tick in Allow under the Full Control section. Click Apply then click OK.
 Image Modified
 - Repeat this process for any other Windows User Access group that requires full access to company files.
This process can be undertaken for individual users as well as groups as per the steps above. Placing a tick in under the Full Control section for the Everyone group is also another option.