Accountants Enterprise with Practice Manager only If your accounting periods (months) and accounting years have not been set up correctly, you can either: - Edit the description and dates or
- delete the period or year before adding the details back correctly.
When to edit the date- When the year start and end dates are incorrect. For example they don't start on the 1st day of the year or end on the last day of the year.
- When the month dates are incorrect. For example, they don't start on the 1st day of the month or end on the last day of the month.
See how to set up, edit and delete an accounting year as well as accounting periods. | UI Expand |
|---|
| title | To edit an accounting year |
|---|
| From the menu bar, go to Maintenance > Maintenance Map > Time Setup > Processing Time Setup. The Processing Time Setup tab opens. From the drop-down, select the Accounting Year and click  to open the year. to open the year.
or
On the Tasks bar, click Add/Edit Accounting Year. The Add/Edit Accounting Year window opens.
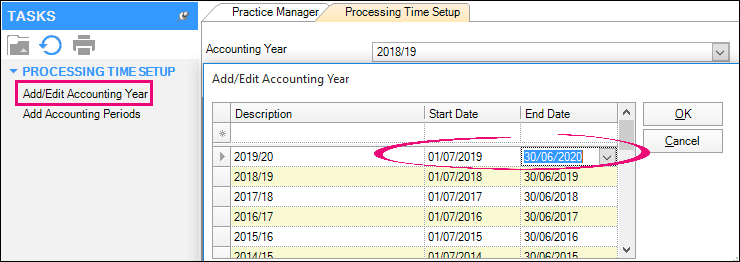 Select the relevant year. You can edit the details for the year by modifying the Description and the Start and End dates. Click OK to save the changes. The Add/Edit Accounting Year window closes. The new year is now available in the Accounting Year drop-down in the Processing Time Setup tab.
|
| UI Expand |
|---|
| title | To delete an accounting year |
|---|
| From the menu bar, go to Maintenance > Maintenance Map > Time Setup > Processing Time Setup. The Processing Time Setup tab opens. From the drop-down, select the Accounting Year and click to open the year.
or
On the Tasks bar, click Add/Edit Accounting Year. The Add/Edit Accounting Year window opens. Click  to highlight the row containing the accounting year you want to delete. to highlight the row containing the accounting year you want to delete. Press Delete on your keyboard. A Confirm Delete message is displayed.
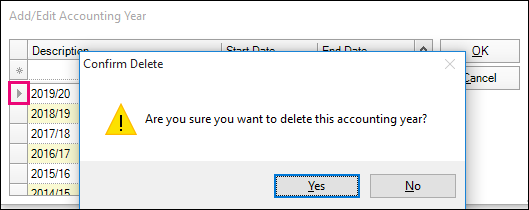 Click Yes. Click OK. The Add/Edit Accounting Year window closes. Click OK to save the changes. The Processing Time Setup tab closes.
|
| UI Expand |
|---|
| title | To edit an accounting period |
|---|
| From the menu bar, go to Maintenance > Maintenance Map > Time Setup > Processing Time Setup. The Processing Time Setup tab opens. From the drop-down, select the Accounting Year. Under Description, click the row containing the accounting period you want to edit. Overtype the existing text to change the description (if applicable). | UI Text Box |
|---|
| Enter a maximum of 100 alphanumeric characters for the accounting period name. |
Enter the Start Date, for example 01/07/2019, and the End Date, for example 31/07/2019 (if applicable). Enter the dates in the format dd/mm/yyyy or select them from the respective drop-down calendars.
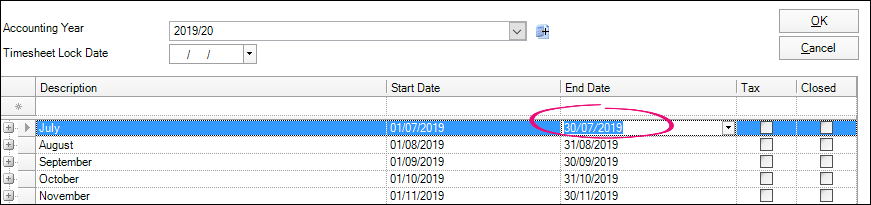 Click OK to save the changes. The Processing Time Setup tab closes.
|
| UI Expand |
|---|
| title | To delete an accounting period |
|---|
| From the menu bar, go to Maintenance > Maintenance Map > Time Setup > Processing Time Setup. The Processing Time Setup tab opens. From the drop-down, select the Accounting Year. Click the row containing the accounting period you want to delete. Click to highlight the entire row. Press Delete on your keyboard. A Confirm Delete message displays.
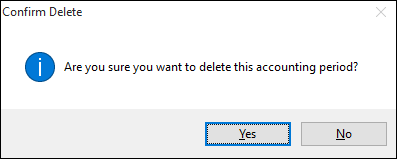 Click Yes. The Accounting Period is deleted. Click OK to save the changes. The Processing Time Setup tab closes.
|
| 
 Yes
Yes
 No
No
 Thanks for your feedback.