Practice Manager only
Estimates Estimate to Complete fees are used to raise bills for client work that has not yet been entered as WIP. They are also known as interim fees. An estimate essentially puts a credit against the total WIP amount. There is no write–off/on required. You can apply add an estimate against any client assignment (AE)/job (AO), regardless of whether it has billable WIP against it. The Estimate to Completetask code must be set up in the system to add these entries. An Estimate to Complete fee is added in Stage Two of the Billing Wizard / the Bill Amounts window. - An estimate fee when posted will credit the client's WIP ledger and leave a carry forward credit amount.
- When work commences on the job and timesheets are input to record the work done so far, these entries will debit the WIP ledger and reduce the credit balance.
- When the work is finalised, you will process a final or zero fee to absorb the estimate bill and bill out the timesheet lines to ensure employee billing productivity reports are correct.
| UI Text Box |
|---|
| In MYOB AE, estimates previously raised can be viewed in the Misc/Est tab of the relevant Assignment Details page. |
An estimate can be added in one of two ways: The Bill Amounts window > Create new estimate to complete window at the time of billing. You can use this to create an estimate at the assignment/job level. The Bill Amounts window at the time of billing using an automatic estimate. You can use this to create an estimate at the more detailed employee and task level.
| UI Text Box |
|---|
| An automatic estimate is created when a bill is raised in excess of the amount of available WIP. This is also known as overbilling. A WIP credit is applied against a specific employee and task. The estimate is raised on allocation of the bill and the credited (or negative) amount is then automatically allocated to further WIP as it is posted. The The system alerts you when an automatic estimate is created (by adding  to the AE (Automatic Estimate) column on the Bill Amounts window). to the AE (Automatic Estimate) column on the Bill Amounts window). MYOB don't recommend using this facility. |
| UI Expand |
|---|
| title | To add an assignment/job level estimate during billing |
|---|
| Create a draft bill for the client or assignment/job you want to bill. See Creating bills for clients using the Billing Wizard. | UI Text Box |
|---|
| If you want to add the estimate to an existing draft bill, double–click the draft bill to open it in the Billing Main page. Ensure that you are in Edit Bill mode, see To edit a draft bill. |
Click Bill Amounts  Image Removed from either the Billing Main page for the client or by working through the Billing Wizard. The Bill Amounts window opens. Image Removed from either the Billing Main page for the client or by working through the Billing Wizard. The Bill Amounts window opens. Click Create Estimate In Stage Two of the Billing Wizard, click Create Estimate . The Select Client Assignment/Select Client Job window opens.Select the assignment/job to record the estimate against from the list. . The Select Client Assignment/Select Client Job window opens.Select the assignment/job to record the estimate against from the list. | UI Text Box |
|---|
| If you require an assignment/job that is not listed, click Find to open the Find Assignments/Find Jobs window. From here you can search for any client assignment/job in the system. |
Click OK. The Find Assignments/Find Jobs window closes and the selected assignment/job is added to the Select Client Assignment/Select Client Job window. |
Select the assignment/job to record the estimate against from the list. Click Add. The Create new estimate to complete window opens. The Implemented by field defaults to the employee creating the estimate and the In Employee’s Time Period field defaults to the current time period selected for the employee. The Transaction date field defaults to the current date.
 Image Added Image Added Change the Transaction Date by entering a date in the format dd/mm/yyyy or selecting it from the drop-down calendar. Select the required Type from the drop-down. | UI Text Box |
|---|
| | Types must be set up by your system administrator in order to be available here. This is done from Maintenance > Maintenance Map (AO) > Miscellaneous > Code TypesThe Type of estimate to complete you select will determine if the final bill includes GST or not. To check the tax rate set-up on the the code, go to Maintenance > Miscellaneous > Code Types and expand the Est to Complete code type. |
Enter the net amount to be charged in the Amount field. Enter internal notes to explain the charge in the Notes field.
 Image Added Image Added Click OK. This will close the window. Click Close. The Select Client Assignment window closes. The bill amount of the estimate is displayed in the Bill Amounts window in the Bill field against the relevant assignment/job as a future credit in the Carried Forward field. The bill total increases to reflect the new charge.
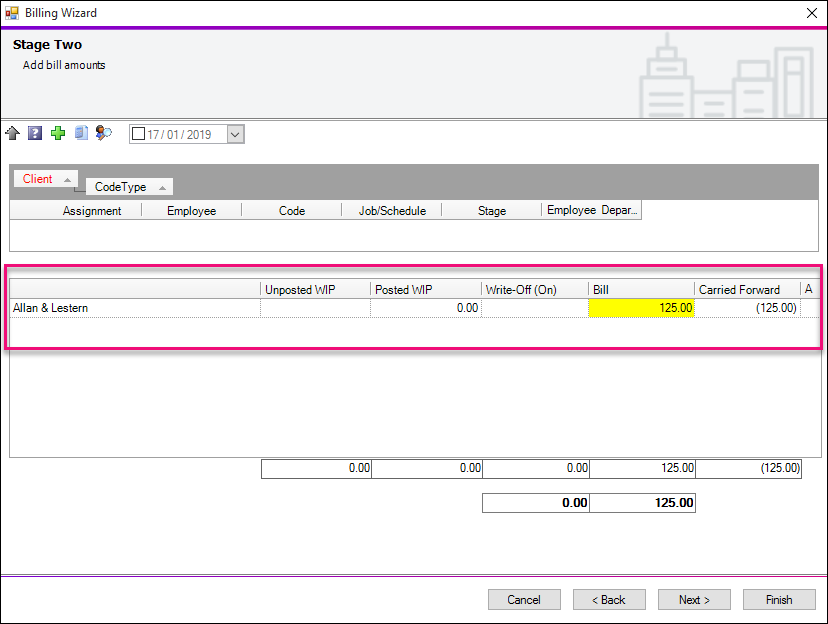 Image Added Image Added To view the estimate in the Bill Amounts window drill down through client/assignment/job or group the items by Code Type to show estimates as their own item.  Image Added Image Added
Continue through the Billing Wizard and add Paragraphs, reviewing address details and the amounts being billed and click Finish. | UI Text Box |
|---|
| All estimates for a client will be displayed as one item in the Bill Paragraphs window, whether entered before or during billing. Manually create separate line items in the Bill Paragraphs window if you want them to display individually in the client’s bill. Ensure that the individual item amounts are amended to match the total estimates amount or you will be unable to post the bill. |
|
| UI Expand |
|---|
| title | To add an automatic estimate during billing |
|---|
| Create a draft bill for the client or assignment/job you want to bill. See Creating bills for clients using the Billing Wizard. | UI Text Box |
|---|
| If you want to add the estimate to an existing draft bill, double–click the draft bill in the list to open it in the Billing Main page. Ensure that you are in Edit Bill mode, see To edit a draft bill. |
Click Bill Amounts Image Removed on the Billing Main page for the client or work through the Billing wizard. The Bill Amounts window opens. Enter the amount to be billed in the Bill field against the assignment/job or transaction level you want it to apply to. If there is already a WIP against the item, you must enter an amount that exceeds the WIP amount against that item or no automatic estimate will be created. The Write–Off (On) field will display the excess WIP amount against the selected item (this is still only a write-on amount and not yet an estimate). Delete the amount in the Write–Off (On) field. Press [Enter] or click elsewhere on the page. The estimate amount will be displayed in the Carried Forward field in brackets and the Automatic Estimate Image Removed icon is displayed beside the item. Click Automatic Estimate Image Removed. The Automatic Estimates window opens. | UI Text Box |
|---|
| When you create an automatic estimate, you will not be able to exit the billing area until the estimate has been completed. A warning message is displayed telling you to define the amount. If you accidentally create the estimate you will need to zero the Bill field to exit the billing page. |
Select the employee and code for the estimate. If the required employee or code is not in the list, select the Other option in the list to access the Find Employees or Find Tasks window. You can use these windows to find the employee and code for the estimate. Enter any internal notes in the Comments field. Click OK. The AE field displays the completed icon  Image Removed, showing that the estimate has been applied. The bill amount of the estimate is displayed in the Bill Amounts window in the Bill field against the relevant assignment/job and has a future credit in the Carried Forward field (displayed as (9,999.99)). The bill total increases to reflect the new charge. Image Removed, showing that the estimate has been applied. The bill amount of the estimate is displayed in the Bill Amounts window in the Bill field against the relevant assignment/job and has a future credit in the Carried Forward field (displayed as (9,999.99)). The bill total increases to reflect the new charge. To view the estimate in the Bill Amounts window, drill down through the client/assignment/job or group the items by Code Type to show estimates as their own item| report on unabsorbed estimate fee amounts |
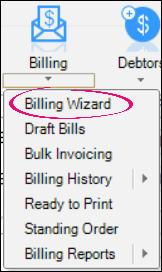
| At some point, you will want to report on clients with estimate fees where the entries have not been absorbed/cleared from the WIP ledger. To report on these clients: - Click Reports
 Image Added. The Reports page opens. Image Added. The Reports page opens. - From TASKS, scroll down & click the WIP heading. The WIP reporting area expands.
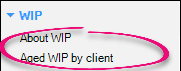 Image Added Image Added - From TASKS, select Aged WIP by Client. The WIP - Aged WIP by Client reporting area displays in the middle of the screen.
- Double-click the Aged WIP by Client Partner report. The Report Fields window opens.
 Image Added Image Added - Select the date you want to run the report up to.
- Apply any filters if applicable and click OK. The Aged WIP by Client Partner report displays.
 Image Added Image Added - Either print the report or review the amounts in the Estimates column on screen to see which clients still have unabsorbed estimate amounts to determine when you will raise the final/zero fee to clear these amounts.
|
| UI Expand |
|---|
| title | To absorb an estimate fee (AE) |
|---|
| ExampleLet's say you've raised 4 estimate bills for $2,500 each throughout the year for the compliance assignment. The work has now been completed, and you want to absorb the estimate bills and clear the WIP ledger for the client. In the WIP ledger for the client, you have timesheet transactions totalling $11,590 but the bills issued so far have totalled $10,000 (which was the quoted amount). The following procedure shows you how you'd manage the WIP using these example figures. |
| UI Expand |
|---|
| title | To absorb estimate fees (AO) |
|---|
| ExampleLet's say you've raised 4 estimate bills for $2,500 each throughout the year for the compliance job. The work has now been completed, and you want to absorb the estimate bills and clear the WIP ledger for the client. In the WIP ledger for the client, you have timesheet transactions totalling $11,590 but the bills issued so far have totalled $10,000 (which was the quoted amount). The following procedure shows you how you'd manage the WIP using these example figures. | UI Expand |
|---|
| title | To report on unabsorbed estimate amounts |
|---|
| At some point, you will want to report on clients with estimate fees where the entries have not been absorbed/cleared from the WIP ledger. To report on these clients: - Click Reports. The Reports page opens.
- From TASKS, scroll down & click the WIP heading. The WIP reporting area expands.
- From TASKS, select Aged WIP by Client. The WIP - Aged WIP by Client reporting area displays in the middle of the screen.
- Double-click the Aged WIP by Client Partner report. The Report Fields window opens.
- Select the date you want to run the report up to.
- Apply any filters if applicable and click OK. The Aged WIP by Client Partner report displays.
- Either print the report or review the amounts in the Estimates column on screen to see which clients still have unabsorbed estimate amounts to determine when you will raise the final/zero fee to clear these amounts.
|
|
|


 Yes
Yes
 No
No
 Thanks for your feedback.