Before you can record a sale, you need to create a card for your customer. A card is a record which contains details of an individual or business that you deal with.
Import customer details
If you have customer details in another program, like a spreadsheet, use an import template to bring these details into AccountRight.
To create a customer card
Go to the Card File command centre and click Cards List. The Cards List window appears.
Click New. The Profile tab of the Card Information window appears.

Select Customer from the Card Type list.
Select the designation of the card: Company or Individual (is it a business or a person?). This determines whether you'll enter a company name, or first and last name.
Type the customer name.
If you use codes to identify customers, type the code for the customer in the Card ID field. For more information, see Card identification codes.
Enter contact details for the customer. If you want to enter more contact information, select Address 2 from the Locations list and enter the additional details. You can enter contact details for five locations or people at the same business.
Got multiple email address or contact details for one business?
If you've got more than one contact at a business, enter their details as a different location. You can enter the details for up to five contacts, this includes multiple email addresses and phone numbers. You can select the different contacts when sending emails.
Click the Card Details tab. You can enter notes about the customer, insert a picture and assign attributes.
To insert a picture, see Card pictures
To assign identifiers to the card, see Card identification codes
To assign an attribute from a custom list, see Custom lists
To enter additional information in a custom field, see Custom card fields
Click the Selling Details tab and enter your selling details.
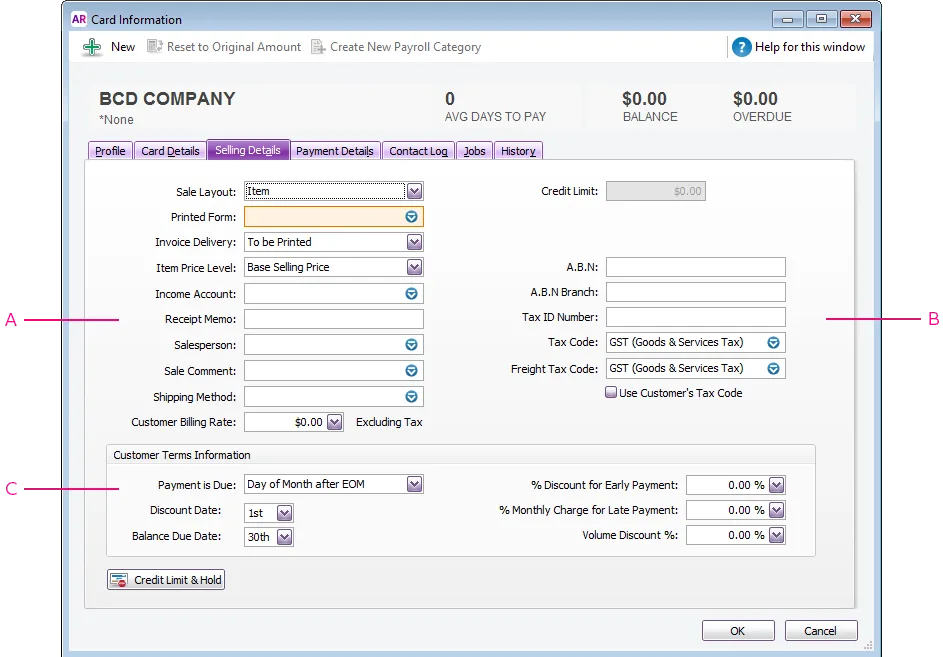
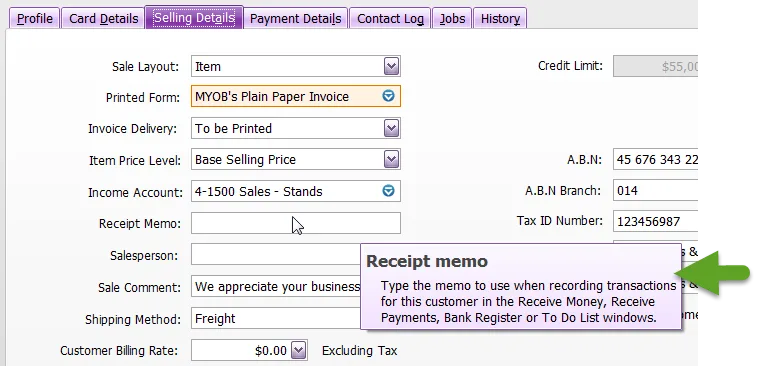
A - Selling information - The selections you make here will be used, by default, on new sales that you create for this customer. You can override these selections when recording a sale. If you want to learn about each option, hover your mouse over the field to display the field help (you'll need field help turned on, go to Help > Show Field Help). If the Printed Form and Invoice Delivery fields are not shown, make sure the Sale Layout field isn't set to No Default or Miscellaneous.
B - Tax/GST information - The customer’s tax or GST information is entered here. If the customer’s tax/GST status takes precedence over that of the item or service being sold, select the Use Customer’s Tax Code (Australia) or Use Customer’s GST Code (New Zealand) option. This tax code will override the item’s tax code in an item sale, and the allocation account’s tax code in a non-item sale. You can also set the default Freight Tax Code for the customer here.
C - Credit terms - The credit terms entered here are used as the default terms for all sales to the customer, but can be changed at any time. If you want to learn about each option, hover your mouse over the field to display the field help.
Click the Payment Details tab and select the method of payment your customer will use to pay you.
[Optional] Click the Jobs tab and enter the details of each job you have started or are about to start for the customer. For more information about jobs, see Jobs.
[Optional] Click the History tab and type the dollar value of the sales made prior to your conversion month. You can also enter the date that the contact became a customer.
Click OK to save the card.


See your customer list
Run one of the Card List reports to display your customers (Reports menu > Index to Reports > Card tab > Card List [Summary] or Card List [Detail] report).Alternatively, display your customers on the Cards List window, right-click the list and choose Copy List to Clipboard - ready to be pasted into Excel or any other document.
FAQs
How do I delete a card?
You can only delete a card if it has never been used in a transaction. If it has been used, you will not be able to delete it, even after deleting any associated transactions. This ensures you keep a history of cards used in transactions for auditing reports.
Instead of deleting, you can make the card inactive or combine the card with another one to remove the old card from your lists.
To delete a card
Go to the Lists menu and choose Cards.
Locate the card you want to delete.
Right-click the card and choose Delete Card.
Delete Card greyed-out?
Your user role needs to be set up with permission to delete. If you need to regularly change transactions, ask your administrator to add this permission to your user role.
To make a card inactive
Go to the Lists menu and choose Cards.
Right-click the card to be made inactive and choose Mark Inactive.
Read the displayed information.
Click OK.
If you later need to activate the card:
Go to the Lists menu and choose Cards.
Select the option Show Inactive.
Right-click the card to be activated and choose Mark Active.