When you upgraded from AccountRight Classic (v19), most of your company file information was brought across to the new AccountRight. Depending on the features you use in AccountRight, there may be some additional one-off tasks you'll need to complete to finish your upgrade.
Refer to the checklist below, which puts these tasks in the order you'll most likely need to do them in.
Once you've upgraded, you might need to:
-
Reactivate your users so they can access your company file
-
Set up Pay Super if you previously used MYOB's super portal
-
Set up your BAS/IAS reporting to lodge statements online
-
Migrate or recreate customised invoices and other forms
If you don't need to do these tasks, you can get started by checking out what's changed.
Open your company file and reactivate your users
Reactivate your users
When you upgraded, all of your existing users became inactive. You need to reactivate, and assign roles to them before they can access your file.
Open your company file in your newly upgraded AccountRight.
Sign on to the company file as an Administrator.
Go to the Setup menu and choose Users. The User Access window appears.
Select a user you need to reactivate from the Company file users list.
In the right pane, deselect the Inactive User option.
Inactive user option greyed out? This is because the user has been set up with the Administrator role. Deselect the Admistrator role and click Save. Now, you should be able to deselect the Inactive User option. Make sure that after you reactivate the user you re-select the Administrator role for them and click Save.
What you do next depends on whether your file's offline or online. If your file is:
offline, you just need to assign roles. A role is a pre-defined profile that determines which windows and tasks they can access.
online, you need to:
Select the This user will sign on with a my.MYOB account option.
Enter the user's email address. This must be the email address they use to sign into their MYOB account. If they don't already have an MYOB account, they'll be invited to create one when you've finished setting them up.
We'll use this email address to invite the user to access your online company file.
Decide whether they need to be an online administrator.
Assign roles. A role is a pre-defined profile that determines which windows and tasks they can access.
Set an offline password. This will be required if you're not working online.
Repeat from step 3 for all user accounts that need to be reactivated.
Set up super payments and payroll reporting
Set up Pay Super (Australia only)
If you pay superannuation to employees you need to be SuperStream compliant by setting up the Pay Super feature. It lets you make super payments directly from AccountRight and ensures you meet your employer super obligations. Pay Super is included free with your AccountRight subscription.
If you used the MYOB super portal service in AccountRight v19, you still need to sign up for Pay Super .
Set up Single Touch Payroll Reporting (Australia only)
Single Touch Payroll (STP) is how you report your payroll to the ATO each time you do a pay run.
STP allows you to report payroll and super information directly to the ATO when you process a pay run in AccountRight (from either online or desktop company files). See About Single Touch Payroll reporting.
Set up your BAS/IAS reporting (Australia only)
Import your BASlink settings (Australia only)
You can now prepare and lodge activity statements online , straight from AccountRight. If you're upgrading from AccountRight v19 , or AccountRight 2014.3 or earlier and you want to continue using BASlink to manually lodge your activity statements you'll need to import your BASlink settings into your new software.
In the Accounts command centre of your upgraded company file, click Prepare BAS/IAS. (In AccountRight 2016.2 and earlier, click BASlink).
In the Lodge Manually tab, select the last month of any BAS period that you would normally prepare a statement for and click Prepare Statement.
An information message appears.Click OK.
If a message appears stating that a previous BASlink version has been found on your computer and asking if you want to import your setup information, click Yes.
The Import Setup & Links window appears.If the above message does not appear:
In the AccountRight BASlink window, go to the File menu, choose Setup & Links, then choose Import Setup & Links.
If you're prompted to back up your activity statement, click No. The Import Setup & Links window appears.
Locate your previous BASlink setup file. The file name will be
[yourABN].bas(for example71123456789.bas)and will be located in the Setup folder within the BASlink folder, in your previous software folders.
For example, in AccountRight Premier v19, it’s located at:C:\Premier19\BASlink\Setup or
C:\PremierClassic\BASlink\Setup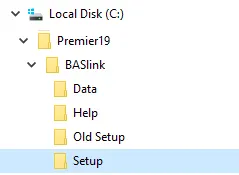
and in AccountRight 2014.3 it’s in:
C:\Users\Public\Public Documents\MYOB\AccountRight\2014.3\BASlink\SetuporC:\Users\<name>\Documents\MYOB\AccountRight\2014.3\BASlink\Setup
Click your setup file then click Open . The BASlink setup file is imported and your BAS form appears.
You can check the setup settings of a field by clicking the Setup button next to it.

Migrate or recreate your customised invoices
You can bring your customised invoices and other forms over to the new AccountRight. See Upgrade task - migrating personalised forms.
But make sure you check out the improved design tools for personalising your invoices in the new AccountRight as creating them from scratch might get you a better result. See Personalising invoices.
You can also set your invoices up to enable customers to pay you online using their VISA, MasterCard, AMEX or BPAY. See Online invoice payments.
Other things you might need to do
Set up taxable payments reporting (Australia only)
If you report taxable payments made to contractors (Plus and Premier, Australia only), you need to set up the taxable payments feature before you can track or report payments. See Reporting taxable payments for more information.
If you used the taxable payments features in v19, see Upgrade task - taxable payments reporting to learn what’s changed and what you need to do before using the taxable payments features in the latest release.
Import your customised letters
If you have customised letters, you can bring them over to the new AccountRight:
Copy your customised letter templates from your v19 Letters folder, for example C:\Premier19\Letters or C:\PremierClassic\Letters
Paste them into the Letters folder of the new AccountRight:
PC Edition:C:\Users\<name>\Documents\MYOB\AccountRight\ 20xx.x\Letters
Server Edition:C:\Users\Public\Documents\MYOB\AccountRight\ 20xx.x\Letters
Put your company file online
If you opted not to put your file online during the upgrade, you can put it online later. Your local file will have a purple status bar instead of green. Click it and choose to Go Online (Upload This File).

You'll need your MYOB account login details (email address and password), and to be the Administrator of this account. See Put your company file online.
Post-upgrade FAQs
Why can't I see one of my command centres after upgrading?
If you've upgraded to a version of AccountRight with more features (for example from Basics to Plus), some command centres might not initially appear.
For example, if you've upgraded to AccountRight Plus or Premier (Australia only) and you’ve never used payroll features before, the Payroll command centre won’t appear. Similarly, if you've upgraded from AccountRight Basics to AccountRight Standard, the Purchases and Inventory command centres won't appear.
To fix this, open your file, go to the Help menu and choose Change Product.

Select the product you’re licensed to use and the missing command centre will appear when you next open the file (you'll need internet access to confirm the file and save the change).