MYOB Team is a time-management tool which enables employers to manage their teams across multiple locations on any device. If you're new to MYOB Team, find out how to get started in AccountRight.
Once you're set up, you'll manage your teams in the MYOB Team admin portal, accessible via any web browser.
Using the MYOB Team admin portal
We'll step you through accessing and using the admin portal.
Sign in to the MYOB Team admin portal
Only users who have access to the payroll features of your MYOB business/online company file can sign in to the MYOB Team admin portal.
Head to team.myob.com and sign in using your MYOB account details. The My businesses page appears, showing all of your MYOB businesses.
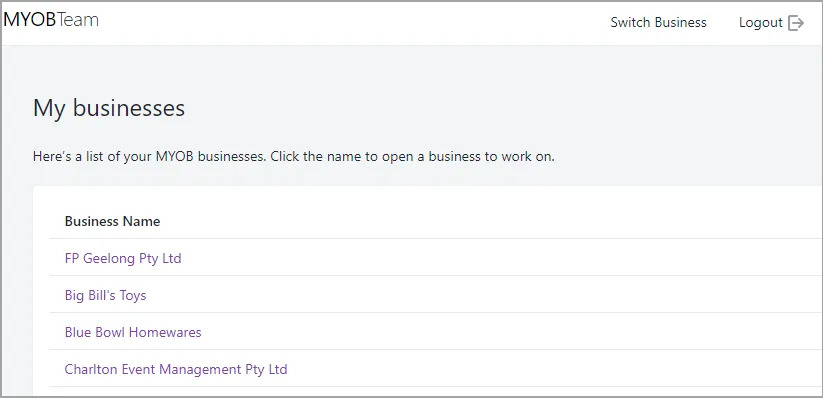
Click the name of the business you'd like to work on. If you see a message about "Business needs to be upgraded", open your business file in your MYOB software and follow the prompts to upgrade.
If anything in your MYOB software needs attention:
You'll be notified about what needs fixing.
Click the issue for more details. Here's an example:
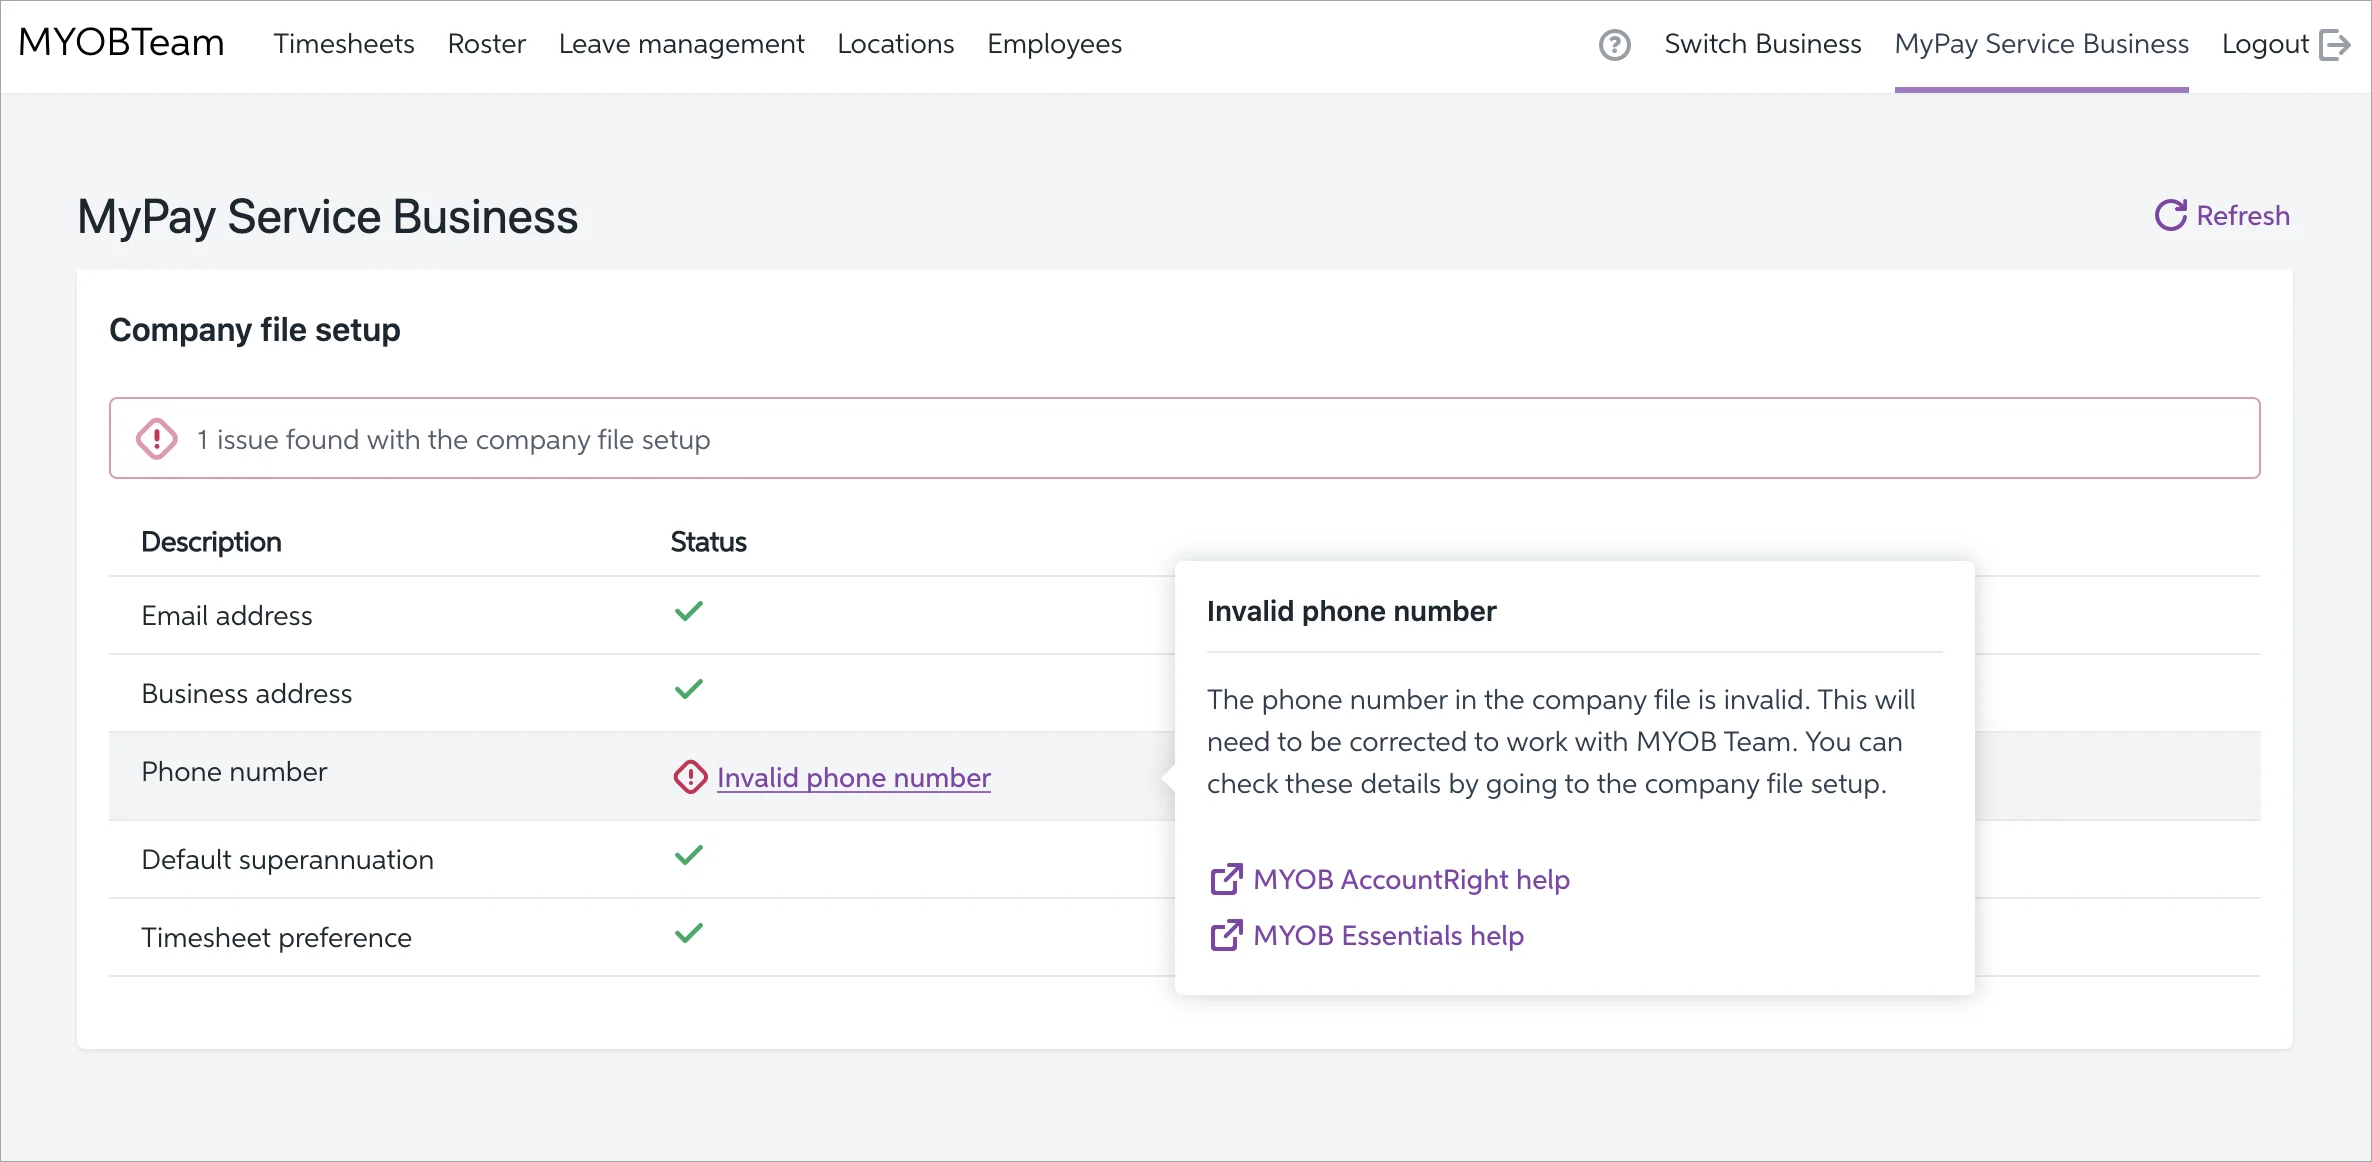


After signing in to the MYOB Team admin portal, you can access this checklist at any time by clicking your business name.

Timesheets
MYOB Team uses online timesheets so that your employees (or you) can add the hours worked during each shift. You can also approve, edit and delete timesheets.
Delete timesheets
You can delete a timesheet that hasn't yet been approved. Note once a timesheet has been deleted it can't be retrieved.
If you haven't already, sign in to the MYOB Team admin portal as described above.
Go to the Timesheets menu. The Timesheets page appears listing all employees with timesheets for the current payroll week.
Filter the list as required by choosing a Location, Payroll week, Approving manager or Employee.
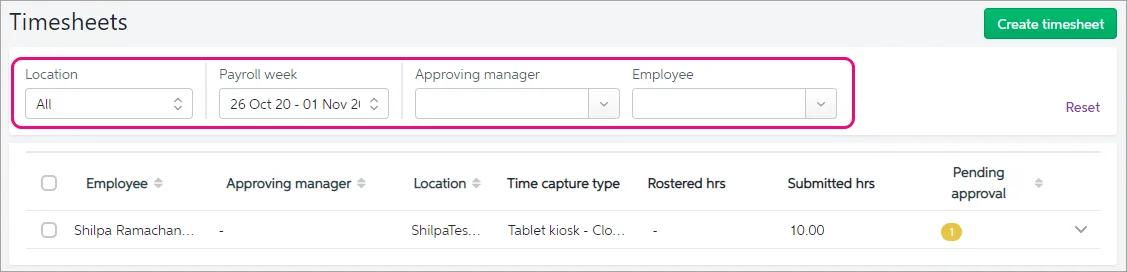
Click a column heading to sort the list by that column.
Click the dropdown arrow to the right to view an employee's timesheets.
Click the ellipsisbutton for the timesheet to be deleted and choose Delete timesheet.
At the confirmation message, click Delete.

Add timesheets on behalf of employees
If you haven't already, sign in to the MYOB Team admin portal as described above.
Go to the Timesheets menu. The Timesheets page appears.
Click Create timesheet. The Create timesheet screen appears.
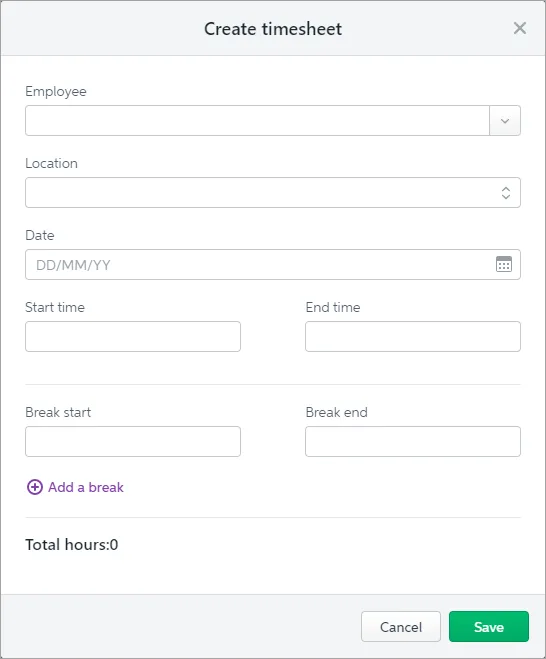
Choose an Employee from the list.
Choose their Location.
Choose the Date.
Enter the employee's Start time and End time. This will be displayed as a 24-hour format.
Enter the employee's Break start and Break end times. Click Add a break to record additional breaks.
When you're done, click Save.

The employee's timesheet will now appear on the Timesheets page.
Verify an employee's photos or geolocation status
If your business has a location set up with photo capture or geolocation enabled, you can:
check the photos captured each time the employee clocked on or clocked off using the tablet kiosk, or
check the geolocation status.
Using AccountRight? Make sure you're using the latest AccountRight version by installing updates whenever they're released. Learn about getting the latest version.
If you haven't already, sign in to the MYOB Team admin portal at team.myob.com and choose your MYOB business.
Go to the Timesheets menu. The Timesheets page appears listing all employees with timesheets for the current payroll week.
Filter the list as required by choosing a Location, Payroll week, Approving manager or Employee.

Click a column heading to sort the list by that column.
Click the dropdown arrow to the right to view an employee's timesheets.
Verify their submitted photos or geolocation statuses.
If photo capture is enabled—click View photo verification in the Evidence captured column.

If geolocation is enabled—click View geolocation in the Evidence captured column to see the status for each interaction.

Here's what each status means:


Geo status | Description |
In perimeter | The employee's mobile phone was within the business location's 200 metre geo fence (perimeter) when clocking on and off. |
Out of perimeter | The employee's mobile phone was outside the business location's 200 metre geo fence (perimeter) when clocking on or off. |
Off | The employee's mobile phone location service was turned off for this interaction. |
Not captured | The timesheet was created with the MYOB Team admin portal so location capture was not applicable. |
Rosters
You can add a number of rosters online making them available for your employees to view from any location. Currently only administrators of your MYOB business can create rosters in the MYOB Team admin portal.
Add, edit or publish a roster
If you haven't already, sign in to the MYOB Team admin portal as described above.
Go to the Roster menu. The Roster page appears
Click Add roster and choose Add new roster.

Choose the Location and Week from the list.
The Week is displayed based on the working week preferences you've set in MYOB.
Click Add. A list of employees will appear.
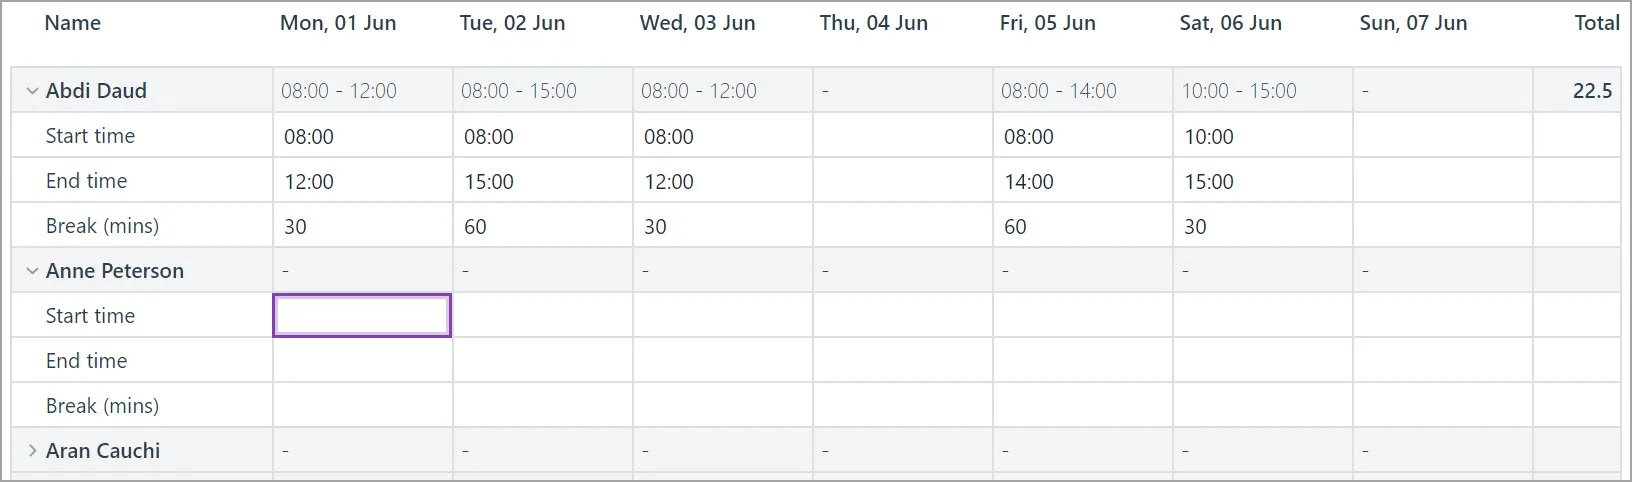
Click the arrow next to the employee's name to expand their roster details.
Click on the required field to enter an amount:
Enter employee's Start time. This will be displayed as a 24-hour format.
Enter employee's Finish time. This will be displayed as a 24-hour format.
Enter employee's total (unpaid) Break time in minutes.
Repeat step 6 for each employee.
Once you're done, click Publish Roster.


Your employees will receive a notification in their MYOB Team mobile app that the roster has been published and they'll be able to view the roster in the app.
Leave management
Employees can use the MYOB Team mobile app to request leave for any type of paid leave you've assigned to them. Find out how to set up leave in your MYOB software ( AccountRight | MYOB Business ).
You can approve or delete pending leave requests, and view all leave requests, in the MYOB Team admin portal.
Approve or delete pending leave requests
If you haven't already, sign in to the MYOB Team admin portal as described above.
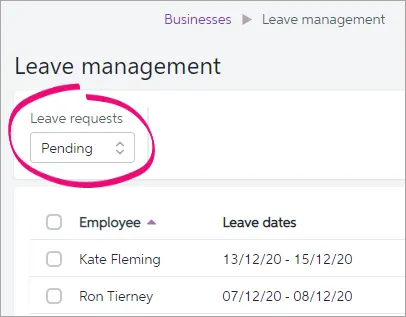
Go to the Leave management menu.
To see only pending leave requests, choose Pending from the Leave requests list.
Action a leave request. To:
approve a leave request:Select a pending leave request. The Approve button appears.
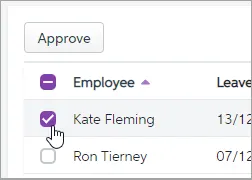
Click Approve.
At the confirmation, tap Approve.
The leave will now appear in a timesheet in your MYOB software, ready for processing in your pays.
Also, the employee will receive a notification in their MYOB Team mobile app that their leave request has been approved.
decline a leave request: You can't decline a leave request in the MYOB Team admin portal. Instead, you'll need to advise the employee that their request has been declined then you (or the employee) can delete the pending request.
delete a pending leave request:Click the ellipsis for the pending leave request and choose Delete leave request.
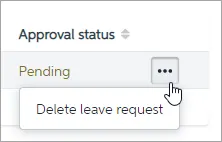
At the confirmation, click Delete.
The employee will receive a notification in their MYOB Team mobile app that their leave request has been deleted.


Need to change an approved leave request? You'll be able to update the leave hours when processing the pay it applies to in your MYOB software.
View leave requests
If you haven't already, sign in to the MYOB Team admin portal as described above.
Go to the Leave management menu.
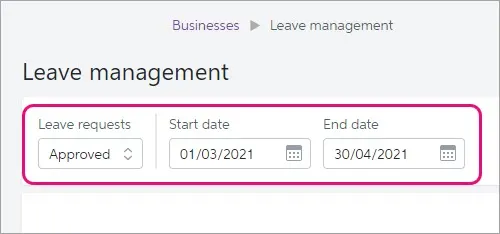
Use the Leave requests filter to display the type of leave requests you want to view (All, Approved, Pending or Upcoming).
Use the Start date and End date fields to enter a date range to narrow down the list (not available for Pending requests).

Locations
Locations are your business's physical workplaces, departments or teams of employees. You'll choose a time capture type for each location, based on your business needs and how you want your employees to submit their hours.
If your employees clock on and off using the MYOB Team mobile app or a tablet kiosk, you can use either geolocation or photo capture to reduce time theft and increase transparency around employee attendance. You can verify submitted geolocations and photos when approving timesheets.
Feature | Use with | Description |
Geolocation | Mobile phone app | See whether employees clock on and off within 200 metres of the business location. Employees will need to have mobile phone location services turned on when clocking on and off. |
Photo capture | Tablet kiosk | Captures a photo of an employee each time they clock on or off using the tablet kiosk. |
Create a location
Click Create location. The Create location page appears.
Enter the Location name and Address. If you see the message Unable to find a matching address, start typing the address again, choose one of the suggested addresses then overtype it with the correct address.
Select a Time capture type.
Clock on, Clock off mobile: for businesses whose employees will use their mobile device to capture and prove attendance with high accuracy
Clock on, Clock off - tablet kiosk: for businesses with a fixed location(s) and an emphasis on capturing and proving attendance with high accuracy on a kiosk tablet
Timesheets (Payroll only): employees use their mobile device to record their time retrospectively (ie at end of day or week) and the business has lower emphasis on proving attendance
Timesheets (Payroll & Time Billing): as above, but for businesses who also wish to capture employees time for time billing purposes
The time capture type can't be changed after you've saved the location. Instead, you'll need to delete the location (see below) then create a new location with the different time capture type selected.
Choose your timezone.
(Optional) Enable geolocation or photo capture for this location. These options are based on the Time capture type selected at step 4.
For the Clock on, Clock off mobile Time capture type:
Select the option Enable geolocation to record an employee's location each time they clock on or off via their mobile phone.
Click View my legal obligations and read the displayed information.
Select the option to acknowledge you understand your legal obligations.
For the Clock on, Clock off - tablet kiosk Time capture type:
Select the option Enable photo capture to take a photo of the employee each time they clock on or off via the tablet kiosk.
Click View my legal obligations and read the displayed information.
Select the option to acknowledge you understand your legal obligations.
Here's our example location: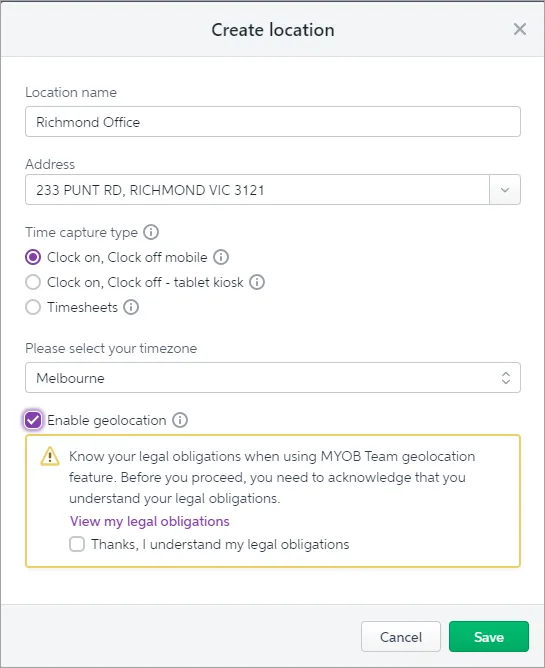
When you're done, click Save.

View, edit or delete a location
Once you've created a location, you'll see it listed on the Locations tab. Click the name of a location to see its details.
Once saved, you can change a location's name and address or, if applicable for the chosen time capture type, turn on or off photo capture or geolocation.
If you need to change a location's time capture type, you'll need to delete the location then create a new location with the different time capture type selected.
To edit a location
In the MYOB Team admin portal, click the Locations tab.
Click the ellipsis for the location and choose Edit location.
Update the location as required.
Click Save.
To delete a location
Deleting a location removes access to all employee information associated with it, including historic timesheet and rostering information. Approved timesheet hours will be stored in your MYOB software.
Instead of deleting a location, consider editing it or making it inactive instead.
In the MYOB Team admin portal, click the Locations tab.
Click the ellipsis button for the location and choose Delete.
Read the displayed message to ensure to understand the implications of deleting a location.
Click Delete to delete the location.
To make a location inactive
Instead of deleting a location, you can make it inactive. This prevents the location appearing in selection lists, but it retains the location's details if want to reactivate it later.
In the MYOB Team admin portal, click the Locations tab.
Click the ellipsis button for the location and choose Edit location.
Select the Inactive location option.
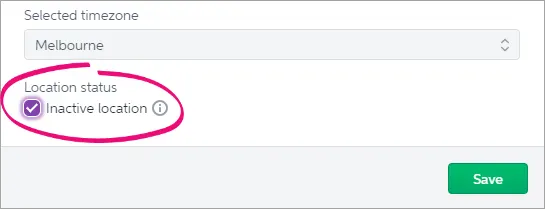
Click Save.

To reactivate an inactive location, repeat these steps to deselect the Inactive location option.
Employees
If you've added an employee in your MYOB software, you can invite them to use MYOB Team via the MYOB Team admin portal. Once they're added, you can edit the employee's name and email address in the MYOB Team admin portal. This won't update the employee's details in your MYOB software so you'll need to update the details there too.
Add an employee
In the MYOB Team admin portal, click the Employees tab.
Click Add employee. A list of employees from your MYOB software appears. If you need to add an employee to your MYOB software, see the help for AccountRight.
Select the employees you want to add to MYOB Team.
If an employee you'd like to add can't be selected (their name is greyed out), you need to ensure the employee has a valid email address entered in your MYOB software.
Click Add employees.
You can now add approving managers and assign them employees as described below.
Add approving managers
An approving manager is someone who can approve your employees' timesheets using the MYOB Team mobile app. If you have an employee, like a team leader, who needs to approve timesheets, add them as an approving manager in the MYOB Team admin portal. When you add an approving manager, you'll choose the location they're responsible for. The approving manager will then be sent an invitation to use the MYOB Team mobile app.
You may need to set up the approving manager as an employee
If you'd like to add an approving manager who is not currently an employee, like the business owner, a bookkeeper, or payroll officer, you'll need to set them up as an employee in MYOB Business (go to the Payroll menu > Create employee).
Just create a new employee record for them and enter their name and email address on the Contact details tab, and set their Employment basis to Other on the Payroll details > Employment details tab.
You should also set their Pay basis to Hourly (Payment details > Salary and wages tab). If you don't want to include this person in pay runs, select Inactive employee in the Contact details tab.
If you don't have, or don't want to use, an existing employee, you can set up a dummy approving manager employee in MYOB Business. For example, just call them Approving Manager.

You can then add them as an employee in the MYOB Team admin portal as described above, then add them as an approving manager to a location.
To add an approving manager:
Click the Locations tab.
Click a location.
From the Select an approving manager list, choose an employee.
Click Add and invite. The employee is listed as an approving manager and will be sent an invitation to download the MYOB Team mobile app.
If you want to:
add another approving manager for the current location, repeat from step 2
add approving managers to other locations, repeat from step 1.
Add and invite employees to a location
Once you've added a new employee (see above), you'll need to assign them to one or more locations. This also sends an invitation to the employee to use MYOB Team.
In the MYOB Team admin portal, click the Locations tab.
Click a location.
Click the approving manager.
From the Select employee list, choose an employee to assign to the approving manager.
Click Add.
Click Add and invite. The selected employees will be sent an email with information about downloading the MYOB Team mobile app and getting started.
If an employee works at more than one location, repeat these steps for each location.
Accepting the invitation
Once employees download the mobile app, they'll need to create an MYOB account prior to signing in (unless they already have one). They'll do this by clicking Create an account on the sign in screen, then follow the prompts. When creating their account, employees must use the same email address as the one saved in their employee card in AccountRight.

Self-onboarding
When an employee first signs into the MYOB Team mobile app, they'll be prompted to enter any personal, tax and superannuation details that are missing from their employee record in your MYOB software. This eliminates paperwork, reduces your data entry, and simplifies your workflow.
For all the details on using the MYOB Team mobile app, see this help topic (you might even want to send it to your employees for their reference).
Remove an employee or approving manager from a location
If you remove an approving manager from a location, the employees assigned to them will also be removed.
In the MYOB Team admin portal, click the Locations tab.
Click a location.
Select an employee or approving manager.
Click Remove. The employee or manager (and their assigned employees) will be removed. from the location. If needed, you can now add the approving manger to a different location or assign the employees to a different manager.
Reassign an employee to a different approving manager
In the MYOB Team admin portal, click the Locations tab.
Click a location.
If you haven't already done so, add the new approving manager to the location as described above.
Click to select the employee to be reassigned.
Click Reassign employee to and choose the new approving manager.
FAQs
What if an employee changes their email address?
If an employee changes their email address, you'll need to update this in two places:
your MYOB software (here's more info about this for AccountRight).
the MYOB Team admin portal.
To update an employee's email address in the MYOB Team admin portal
Open the MYOB Team admin portal (go to team.myob.com and sign in using your MYOB account details).
Click the Employees tab.
Click the ellipsis ... button next to the employee and choose Edit.
Enter the new Email.
Click Save.
An email will be automatically sent to the employee's new email address advising them you've made this change. The email will also advise the employee to create a new MYOB account so they can sign into the MYOB Team mobile app using their new email address.
Using the MYOB Team admin portal
MYOB Team is a time-management tool which enables employers to manage their teams across multiple locations on any device. If you're new to MYOB Team, find out how to get started in MYOB Business.
Once you're set up, you'll manage your teams in the MYOB Team admin portal, accessible via any web browser.
Using the MYOB Team admin portal
Choose your country and we'll step you through accessing and using the admin portal.
Sign in to the MYOB Team admin portal
Only users who have access to the payroll features of your MYOB business/online company file can sign in to the MYOB Team admin portal.
Head to team.myob.com and sign in using your MYOB account details. The My businesses page appears, showing all of your MYOB businesses.
Click the name of the business you'd like to work on. If you see a message about "Business needs to be upgraded", open your business file in your MYOB software and follow the prompts to upgrade.
If anything in your MYOB software needs attention:
You'll be notified about what needs fixing.
Click the issue for more details. Here's an example:
After signing in to the MYOB Team admin portal, you can access this checklist at any time by clicking your business name.
Timesheets
MYOB Team uses online timesheets so that your employees (or you) can add the hours worked during each shift. You can also approve, edit and delete timesheets.
Approve timesheets
After an employee submits their timesheet, it will appear in the MYOB Team admin portal ready for approval. Approving managers can also approve timesheets using the MYOB Team mobile app.
If you haven't already, sign in to the MYOB Team admin portal as described above.
Go to the Timesheets menu. The Timesheets page appears listing all employees with submitted timesheets.
Filter the list as required by choosing a Location, Payroll week, Approving manager or Employee. The Pending approval column helps identify timesheets awaiting approval.

Click a column heading to sort the list by that column.
You'll see how many timesheets are waiting to be approved in the Pending approval column.
To approve all pending timesheets for an employee:
Select the employee.
Click either:
Approve submitted hours to approve the timesheet hours that employees have entered
Approve rostered hours to approve only those timesheet hours that the employee was rostered for
If an employee worked multiple or split shifts over a day, the Rostered hrs for that day only appears next to the first submitted shift:
To clear the pending shifts showing zero Rostered hrs, select these shifts and click Approve rostered hours.
To view or approve individual timesheets for an employee:
Click the dropdown arrow for the employee.
(Optional) Verify the employee's photos or geolocation status. See 'Verify an employee's photos or geolocation status' below for more details .
If photo capture is enabled—click View photo verification in the Evidence captured column.
If geolocation is enabled—click View geolocation in the Evidence captured column.
Select the timesheet you'd like to approve. It will have an Approval status of Pending.
Click either:
Approve submitted hours to approve the timesheet hours that employees have entered
Approve rostered hours to approve only those timesheet hours that the employee was rostered for

Approved timesheets are sent to your MYOB software, ready for processing in your payroll. Learn more about processing timesheets in MYOB Business.
Edit timesheets
You can edit a timesheet that hasn't yet been approved.
If you haven't already, sign in to the MYOB Team admin portal as described above.
Go to the Timesheets menu. The Timesheets page appears listing all employees with timesheets for the current payroll week.
Filter the list as required by choosing a Location, Payroll week, Approving manager or Employee.
Click a column heading to sort the list by that column.
Click the dropdown arrow to the right to view an employee's timesheets.
Click the ellipsisbutton for the timesheet to be edited and choose Edit Hours.
Edit the details of the shift as required.
Once you're ready, click Save.
Delete timesheets
You can delete a timesheet that hasn't yet been approved. Note once a timesheet has been deleted it can't be retrieved.
If you haven't already, sign in to the MYOB Team admin portal as described above.
Go to the Timesheets menu. The Timesheets page appears listing all employees with timesheets for the current payroll week.
Filter the list as required by choosing a Location, Payroll week, Approving manager or Employee.
Click a column heading to sort the list by that column.
Click the dropdown arrow to the right to view an employee's timesheets.
Click the ellipsis ... button for the timesheet to be deleted and choose Delete timesheet.
At the confirmation message, click Delete.
Add timesheets on behalf of employees
If you haven't already, sign in to the MYOB Team admin portal as described above.
Go to the Timesheets menu. The Timesheets page appears.
Click Create timesheet. The Create timesheet screen appears.
Choose an Employee from the list.
Choose their Location.
Choose the Date.
Enter the employee's Start time and End time. This will be displayed as a 24-hour format.
Enter the employee's Break start and Break end times. Click Add a break to record additional breaks.
When you're done, click Save.
The employee's timesheet will now appear on the Timesheets page.
Verify an employee's photos or geolocation status
If your business has a location set up with photo capture or geolocation enabled, you can:
check the photos captured each time the employee clocked on or clocked off using the tablet kiosk, or
check the geolocation status.
If you haven't already, sign in to the MYOB Team admin portal at team.myob.com and choose your MYOB business.
Go to the Timesheets menu. The Timesheets page appears listing all employees with timesheets for the current payroll week.
Filter the list as required by choosing a Location, Payroll week, Approving manager or Employee.
Click a column heading to sort the list by that column.
Click the dropdown arrow to the right to view an employee's timesheets.
Verify their submitted photos or geolocation statuses.
If photo capture is enabled—click View photo verification in the Evidence captured column.
If geolocation is enabled—click View geolocation in the Evidence captured column to see the status for each interaction.
Here's what each status means:
Geo status | Description |
In perimeter | The employee's mobile phone was within the business location's 200 metre geo fence (perimeter) when clocking on and off. |
Out of perimeter | The employee's mobile phone was outside the business location's 200 metre geo fence (perimeter) when clocking on or off. |
Off | The employee's mobile phone location service was turned off for this interaction. |
Not captured | The timesheet was created with the MYOB Team admin portal so location capture was not applicable. |
Rosters
You can add a number of rosters online making them available for your employees to view from any location. Currently only administrators of your MYOB business can create rosters in the MYOB Team admin portal.
Add, edit or publish a roster
If you haven't already, sign in to the MYOB Team admin portal as described above.
Go to the Roster menu. The Roster page appears
Click Add roster and choose Add new roster.
Choose the Location and Week from the list.
The Week is displayed based on the working week preferences you've set in MYOB.
Click Add. A list of employees will appear.
Click the arrow next to the employee's name to expand their roster details.
Click on the required field to enter an amount:
Enter employee's Start time. This will be displayed as a 24-hour format.
Enter employee's Finish time. This will be displayed as a 24-hour format.
Enter employee's total (unpaid) Break time in minutes.
Repeat step 6 for each employee.
Once you're done, click Publish Roster.
Your employees will receive a notification in their MYOB Team mobile app that the roster has been published and they'll be able to view the roster in the app.
Leave management
Employees can use the MYOB Team mobile app to request leave for any type of paid leave you've assigned to them. Find out how to set up leave in your MYOB Business.
You can approve or delete pending leave requests, and view all leave requests, in the MYOB Team admin portal.
Approve or delete pending leave requests
If you haven't already, sign in to the MYOB Team admin portal as described above.
Go to the Leave management menu.
To see only pending leave requests, choose Pending from the Leave requests list.
Action a leave request. To:
approve a leave request:Select a pending leave request. The Approve button appears.
Click Approve.
At the confirmation, tap Approve.
The leave will now appear in a timesheet in your MYOB software, ready for processing in your pays.
Also, the employee will receive a notification in their MYOB Team mobile app that their leave request has been approved.
decline a leave request: You can't decline a leave request in the MYOB Team admin portal. Instead, you'll need to advise the employee that their request has been declined then you (or the employee) can delete the pending request.
delete a pending leave request:Click the ellipsis for the pending leave request and choose Delete leave request.
At the confirmation, click Delete.
The employee will receive a notification in their MYOB Team mobile app that their leave request has been deleted.Need to change an approved leave request? You'll be able to update the leave hours when processing the pay it applies to in your MYOB software.
View leave requests
If you haven't already, sign in to the MYOB Team admin portal as described above.
Go to the Leave management menu.
Use the Leave requests filter to display the type of leave requests you want to view (All, Approved, Pending or Upcoming).
Use the Start date and End date fields to enter a date range to narrow down the list (not available for Pending requests).
Locations
Locations are your business's physical workplaces, departments or teams of employees. You'll choose a time capture type for each location, based on your business needs and how you want your employees to submit their hours.
Verifying attendance at a location
If your employees clock on and off using the MYOB Team mobile app or a tablet kiosk, you can use either geolocation or photo capture to reduce time theft and increase transparency around employee attendance. You can verify submitted geolocations and photos when approving timesheets.
Feature | Use with | Description |
Geolocation | Mobile phone app | See whether employees clock on and off within 200 metres of the business location. Employees will need to have mobile phone location services turned on when clocking on and off. |
Photo capture | Tablet kiosk | Captures a photo of an employee each time they clock on or off using the tablet kiosk. |
Create a location
Click Create location. The Create location page appears.
Enter the Location name and Address. If you see the message Unable to find a matching address, start typing the address again, choose one of the suggested addresses then overtype it with the correct address.
Select a Time capture type.
Clock on, Clock off mobile: for businesses whose employees will use their mobile device to capture and prove attendance with high accuracy
Clock on, Clock off - tablet kiosk: for businesses with a fixed location(s) and an emphasis on capturing and proving attendance with high accuracy on a kiosk tablet
Timesheets (Payroll only): employees use their mobile device to record their time retrospectively (ie at end of day or week) and the business has lower emphasis on proving attendance
Timesheets (Payroll & Time Billing): as above, but for businesses who also wish to capture employees time for time billing purposes
The time capture type can't be changed after you've saved the location. Instead, you'll need to delete the location (see below) then create a new location with the different time capture type selected.
Choose your timezone.
(Optional) Enable geolocation or photo capture for this location. These options are based on the Time capture type selected at step 4.
For the Clock on, Clock off mobile Time capture type:
Select the option Enable geolocation to record an employee's location each time they clock on or off via their mobile phone.
Click View my legal obligations and read the displayed information.
Select the option to acknowledge you understand your legal obligations.
For the Clock on, Clock off - tablet kiosk Time capture type:
Select the option Enable photo capture to take a photo of the employee each time they clock on or off via the tablet kiosk.
Click View my legal obligations and read the displayed information.
Select the option to acknowledge you understand your legal obligations.
Here's our example location:
When you're done, click Save.
View, edit or delete a location
Once you've created a location, you'll see it listed on the Locations tab. Click the name of a location to see its details.
Once saved, you can change a location's name and address or, if applicable for the chosen time capture type, turn on or off photo capture or geolocation.
If you need to change a location's time capture type, you'll need to delete the location then create a new location with the different time capture type selected.
To edit a location
In the MYOB Team admin portal, click the Locations tab.
Click the ellipsis for the location and choose Edit location.
Update the location as required.
Click Save.
To delete a location
Deleting a location removes access to all employee information associated with it, including historic timesheet and rostering information. Approved timesheet hours will be stored in your MYOB software.
Instead of deleting a location, consider editing it or making it inactive instead.
In the MYOB Team admin portal, click the Locations tab.
Click the ellipsis button for the location and choose Delete.
Read the displayed message to ensure to understand the implications of deleting a location.
Click Delete to delete the location.
To make a location inactive
Instead of deleting a location, you can make it inactive. This prevents the location appearing in selection lists, but it retains the location's details if want to reactivate it later.
In the MYOB Team admin portal, click the Locations tab.
Click the ellipsis button for the location and choose Edit location.
Select the Inactive location option.
Click Save.
To reactivate an inactive location, repeat these steps to deselect the Inactive location option.
Employees
If you've added an employee in your MYOB software, you can invite them to use MYOB Team via the MYOB Team admin portal. Once they're added, you can edit the employee's name and email address in the MYOB Team admin portal. This won't update the employee's details in your MYOB software so you'll need to update the details there too.
Add an employee
In the MYOB Team admin portal, click the Employees tab.
Click Add employee. A list of employees from your MYOB software appears. If you need to add an employee to your MYOB software, see the help for MYOB Business.
Select the employees you want to add to MYOB Team.
If an employee you'd like to add can't be selected (their name is greyed out), you need to ensure the employee has a valid email address entered in your MYOB software.
Click Add employees.
You can now add approving managers and assign them employees as described below.
Add approving managers
An approving manager is someone who can approve your employees' timesheets using the MYOB Team mobile app. If you have an employee, like a team leader, who needs to approve timesheets, add them as an approving manager in the MYOB Team admin portal. When you add an approving manager, you'll choose the location they're responsible for. The approving manager will then be sent an invitation to use the MYOB Team mobile app.
You may need to set up the approving manager as an employee
If you'd like to add an approving manager who is not currently an employee, like the business owner, a bookkeeper, or payroll officer, you'll need to set them up as an employee in MYOB Business (go to the Create menu > Employee).
Just create a new employee record for them and enter their name and email address on the Contact details tab, and set their Employment basis to Other on the Payroll details > Employment details tab.
You should also set their Pay basis to Hourly (Payment details > Salary and wages tab). If you don't want to include this person in pay runs, select Inactive employee in the Contact details tab.
If you don't have, or don't want to use, an existing employee, you can set up a dummy approving manager employee in MYOB Business. For example, just call them Approving Manager.
You can then add them as an employee in the MYOB Team admin portal as described above, then add them as an approving manager to a location.
To add an approving manager:
Click the Locations tab.
Click a location.
From the Select an approving manager list, choose an employee.
Click Add and invite. The employee is listed as an approving manager and will be sent an invitation to download the MYOB Team mobile app.
If you want to:
add another approving manager for the current location, repeat from step 2
add approving managers to other locations, repeat from step 1.
Add and invite employees to a location
Once you've added a new employee (see above), you'll need to assign them to one or more locations. This also sends an invitation to the employee to use MYOB Team.
In the MYOB Team admin portal, click the Locations tab.
Click a location.
Click the approving manager.
From the Select employee list, choose an employee to assign to the approving manager.
Click Add.
Click Add and invite. The selected employees will be sent an email with information about downloading the MYOB Team mobile app and getting started.
If an employee works at more than one location, repeat these steps for each location.
Accepting the invitation
Once employees download the mobile app, they'll need to create an MYOB account prior to signing in (unless they already have one). They'll do this by clicking Create an account on the sign in screen, then follow the prompts. When creating their account, employees must use the same email address as the one saved in their employee card in AccountRight.
Self-onboarding
When an employee first signs into the MYOB Team mobile app, they'll be prompted to enter any personal, tax and superannuation details that are missing from their employee record in your MYOB software. This eliminates paperwork, reduces your data entry, and simplifies your workflow.
For all the details on using the MYOB Team mobile app, see this help topic (you might even want to send it to your employees for their reference).
Edit an employee
In the MYOB Team admin portal, click the Employees tab.
Click the ellipsis ... button for the employee and choose Edit.
Change the employee's name and email address as required.
Click Save.
If you've changed the employee's email address, an email will be automatically sent to the employee's new email address advising them you've made this change. The email will also advise the employee to create a new MYOB account so they can sign into the MYOB Team mobile app using their new email address.
Remove an employee or approving manager from a location
If you remove an approving manager from a location, the employees assigned to them will also be removed.
In the MYOB Team admin portal, click the Locations tab.
Click a location.
Select an employee or approving manager.
Click Remove. The employee or manager (and their assigned employees) will be removed. from the location. If needed, you can now add the approving manger to a different location or assign the employees to a different manager.
Reassign an employee to a different approving manager
In the MYOB Team admin portal, click the Locations tab.
Click a location.
If you haven't already done so, add the new approving manager to the location as described above.
Click to select the employee to be reassigned.
Click Reassign employee to and choose the new approving manager.
FAQs
What if an employee changes their email address?
If an employee changes their email address, you'll need to update this in two places:
your MYOB software (here's more info about this for MYOB Business).
the MYOB Team admin portal.
To update an employee's email address in the MYOB Team admin portal
Open the MYOB Team admin portal (go to team.myob.com and sign in using your MYOB account details).
Click the Employees tab.
Click the ellipsis button next to the employee and choose Edit.
Enter the new Email.
Click Save.
An email will be automatically sent to the employee's new email address advising them you've made this change. The email will also advise the employee to create a new MYOB account so they can sign into the MYOB Team mobile app using their new email address.