
- Created by admin, last modified by AdrianC on Apr 12, 2022
https://help.myob.com/wiki/x/yYER
How satisfied are you with our online help?*
Just these help pages, not phone support or the product itself
Why did you give this rating?
Anything else you want to tell us about the help?
When working with bank feeds or imported bank statements, if a transaction hasn't been entered into MYOB Essentials, you can allocate it directly to one or more of your MYOB Essentials accounts. This means you won't have to waste time manually recording a transaction.
If you need to, you can split the transaction between more than one account, or capture quantities against transactions for reporting purposes.
If you've already entered a corresponding transaction in MYOB Essentials, you should match the transaction instead. See Matching bank transactions.

Regularly make the same payments? You can set up rules to automatically allocate these to your MYOB Essentials accounts, saving you from manual data entry.
Allocate a transaction to a single account
If a transaction on the bank feed hasn’t been entered in MYOB Essentials, you can allocate it to your MYOB Essentials accounts.
If you're not sure which accounts to allocate transactions to, consult your bookkeeper or accountant.
To allocate to a single account, just click the Allocate me link in the Allocate or Match column then choose which account you want to allocate the transaction to.
When you allocate a bank transaction, a matching transaction is created in MYOB Essentials. If you allocate a withdrawal, this will be a Spend Money transaction; if you allocate a deposit, this will be a Receive Money transaction.
You can also attach documents to bank transactions, see Attaching documents to bank transactions and Attaching documents to Spend money transactions.

(Partners only) Need a report showing your client's unallocated transactions? MYOB Partners can generate this report straight from the Bank transactions page. See Banking reports for more information.
Allocate to more than one account
To allocate a transaction to more than one account, click the down arrow to expand the transaction. On the Allocate tab, choose the accounts you want to allocate the transaction to, enter any quantities against the transaction, and enter the amount to allocate to each account.
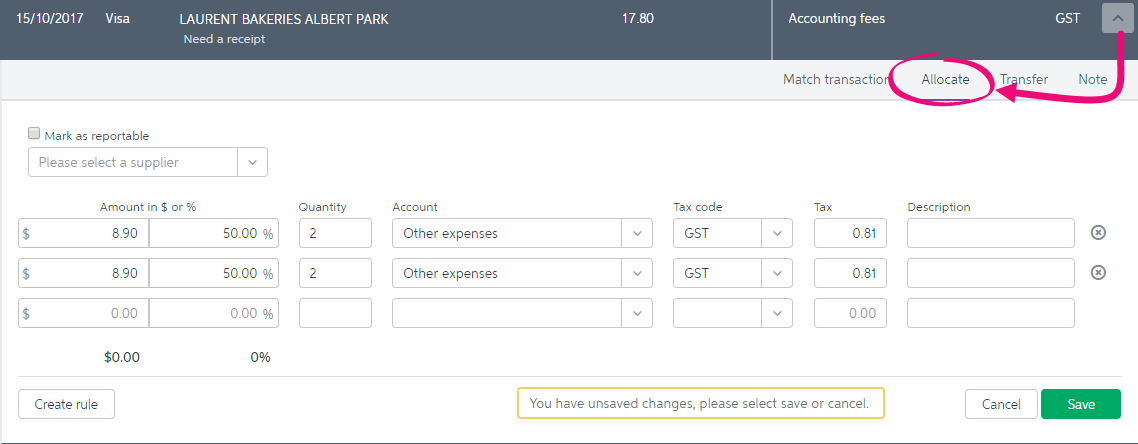
Entering quantities
While in the Allocate view, you can enter quantities against transactions, which will then be reflected in the General ledger details report.
This means that if you're an accountant who imports the General ledger details report into your practice software, quantities will also be included.
When you’re done, click Save. The allocation account is shown in the list, next to the transaction details. If you chose multiple accounts, this will appear as Split across accounts.

FAQs
How do I allocate a $0 transaction?
If you need to allocate an account to a $0 transaction, click on the arrow to the right of the transaction. Enter 100% in the Amount in $ or % field and enter any additional information.
When you’re done, click Save.

How do I undo or change an allocation?
To undo an allocation, click the X icon next to the allocation.

The transaction is unallocated, ready to be allocated again.
Why can't I select a tax code?
If you're not registered for GST you won't be able to select a tax code when allocating transactions. If you should be registered for GST change your GST settings to reflect this.
![]()
Why can't I see unallocated transactions?
Sorting by Allocate or Match in the Bank Transactions screen will put you in Review mode, which only shows allocated transactions. To exit review mode, sort by any other column, or click Exit review.

Also, if transactions that previously appeared no longer appear, check the date range filters—transactions outside of the date range won't appear:

Can’t save an allocated transaction?
Check that you haven’t edited the reference number and entered one that’s already been used. You can do this from the Transaction history page (accessible via the Banking menu).

Once you find the highest reference number for the relevant type of transaction, edit the reference number of the of the transaction you’re trying to save to be higher.
Can I attach documents to a bank transaction?
Yes, you sure can. Here's how:
- From the Banking menu, choose Bank transactions.
- Click the down arrow next to the transaction you want to attach a document to.
- Click Attachments.
Attach the document. There's a couple of ways to do it:
- Click browse for files, select the document to be attached then click Open.
- Click and drag a file from your computer and drop it into the transaction.
The document is attached to the transaction. For more details (and pics), see Attaching documents to bank transactions and Attaching documents to Spend money transactions.
What is 'Review mode' and how do I get out of it?
Sorting by Allocate or Match in the Bank Transactions screen will put you in Review mode, which only shows allocated transactions. To exit review mode, sort by any other column, or click Exit review.
 Yes
Yes
 No
No
 Thanks for your feedback.