New Zealand only | UI Text Box |
|---|
| This page includes an overview of some of the tax return preparation steps. For the full, detailed workflow, see Compliance workflow. |
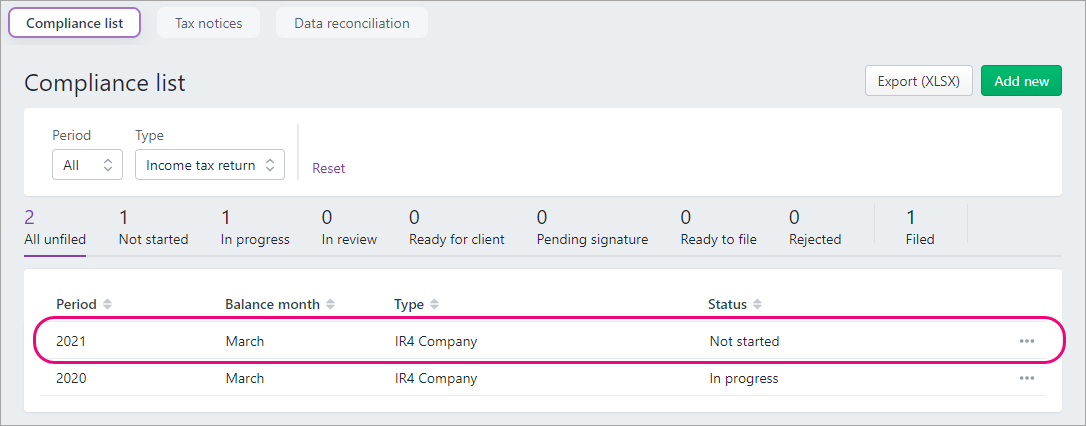
The Compliance list is where you'll create, access and keep track of the progress of your client's tax returns. You can go to this page by clicking Compliance in the top menu bar. We currently support all major tax returns except for IR8 and IR9, but you can still prepare these type of returns in MYOB Tax on the desktop if they're for the 2020 tax year or earlier. For the 2021 tax year onwards, you need to prepare them in myIR. Adding a tax return| UI Text Box |
|---|
| If you've changed the GST taxable period, Balance date or Extension in your client's Compliance settings, this won't update existing tax notices and may also affect the tax statement payment summary. To fix this issue, follow these steps and contact support. |
You'll need to add a tax return for each client, but you must configured their Compliance settings first, to ensure the tax return is created with the right client details. When you add a tax return, we'll pre-fill some of the fields in the tax return with provisional tax data from tax notices and transactions from Data reconciliation. If you make a mistake when adding a new tax return, you can always delete and re-create it. When you delete a tax return, the amount to be paid in the tax notice is reset to zero - tax notices won't be deleted. If the tax notice has a status of Sent or Paid, then no changes will be made to the tax notice. Only MYOB transactions for the compliance period are deleted. | UI Expand |
|---|
| title | To add a new tax return |
|---|
| To add a new tax return| Checklist |
|---|
| Make sure you have: |
- Go to Compliance and click Add new. The Add new dialog box appears.
Select a client from the Client drop-down. | UI Text Box |
|---|
| If you haven't finished setting up the compliance settings for your client, you might receive the following message: 
Click configure the compliance settings to finish setting up your client's compliance settings. |
- Select the type of tax return you want to add from the Type drop-down
- Select the period you want to create the tax return for, from the Period drop-down.
- Click Add. The tax return appears in the Compliance list.
- Click the tax return in the Compliance list to open.
|
| UI Expand |
|---|
| title | To open a tax return |
|---|
| To open a tax return- Go to Compliance > Compliance list.
- Click on the compliance period for the client.
 - Click Tax return.
|
| UI Expand |
|---|
| title | To delete a tax return or IR526 |
|---|
| To delete a tax return or IR526| UI Text Box |
|---|
| You can only delete tax returns with a status of In progress. If the tax return has a status of In review, Ready for client or Pending signature, click Send for Rework within in the Tax return page to update the status back to In progress. |
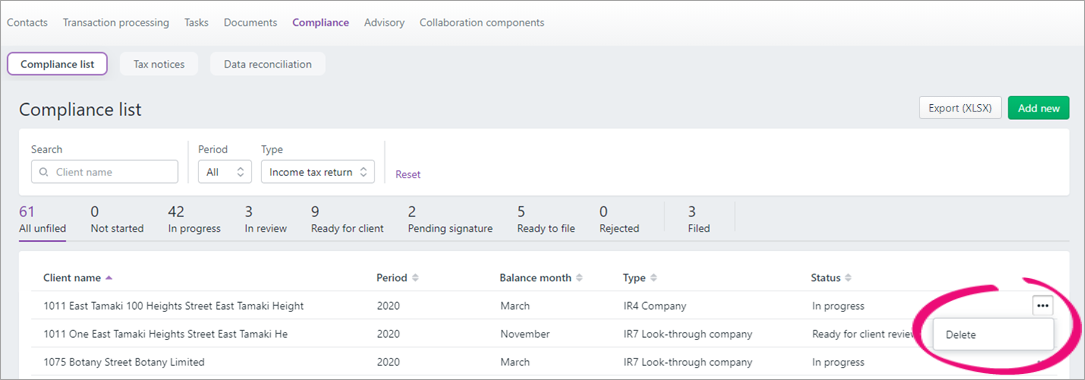
- Go to Compliance > Compliance list.
- Click the
 button next to the return you want to delete. button next to the return you want to delete. - Click Delete.
|
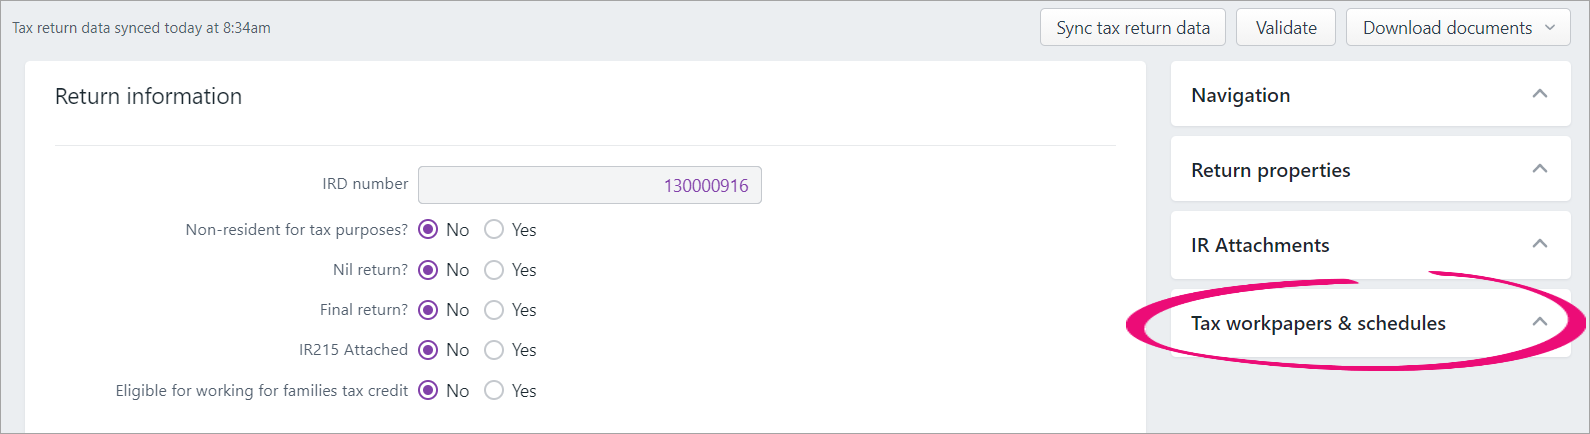
Entering data into a tax returnUse the Navigation options on the tax return page to jump straight to the section you want to view or update. A note about IR7 returns| UI Text Box |
|---|
| If you created a 2021 IR7 tax return for a Partnership or LTC on or before 19 July 2021, you'll experience an issue with the partnership attribution of income percentage. To identify and fix affected returns, see our help page.
|
If you’ve added an IR7 return, the Attribution of income/(loss) value is displayed to 4 decimal places in the tax return. For example, 50.3334%. This allows for a more precise calculation for practices that distribute large amounts of income between partners. The percentage allocated must add up to 100%. IR only allows for 2 decimal places to be reported, but the actual amount distributed will use the percentage to 4 decimal places in the MYOB Practice tax return. To see the amount that will be sent to IR, you can check the Percentage filed with IR field. This field displays the Attribution of income/(loss) value, but to 2 decimal places. For example, 50.33%. The equivalent amount on the tax statement will also only display to 2 decimal places. You can only use the percentage for distributing from a partnership and you cannot manually override the fields. Where some of the distributions aren't aligned to the percentage split for the partners, you'll need to prepare the return in myIR. The percentage used will need to be official partnership percentage. This is only used for the distribution calculation. Checking for errorsAs you complete certain fields in the tax return, we'll check it for errors. If we detect an error, the field displays red and a message appears below the field so that you can fix it straight away. 
Adding attachments, workpapers and schedulesYou can add attachments to send to the Inland Revenue, or use tax workpapers and schedules to help you calculate amounts. The data in the following fields is populated with data synchronised from Data reconciliation transactions, and can’t be edited: Working for families schedule—Working for families tax credits paid by Inland Revenue field. Learn more about the Working for families schedule. Student loan schedule—Total repayments made to IR and 20xx Total interim repayments made to IR fields. Learn more about the Student loan schedule.
| UI Text Box |
|---|
| If you have in-progress tax notices where you've added voluntary adjustments for student loan repayments, check the amounts in these tax notices. The voluntary amounts may already be taken into account by the fields automatically synchronised from Data reconciliation. If this is the case, you'll have a duplicated amount from the manual and automatic adjustment. To easily fix any affected tax notices, filter the Tax notices list by voluntary adjustments, open the tax notice and click remove to the right of the Voluntary adjustment section in the tax notice. See detailed instructions on removing voluntary adjustments, or learn more about the Student loan schedule. |
| UI Expand |
|---|
| title | To add an IR attachment |
|---|
| To add an IR attachment to a tax return- In the Tax return page, click the IR attachments drop-down.
 Select the document you want to add to the return. | UI Text Box |
|---|
| IR attachments are filed to Inland Revenue, along with the tax return. |
|
| UI Expand |
|---|
| title | To add a tax workpaper or schedule |
|---|
| To add a tax workpaper or schedule to a tax return| UI Text Box |
|---|
| Tax workpapers and schedules are available to help you with your calculations only. They're not filed to Inland Revenue. |
- Go to the Compliance > Compliance list page and open the tax return.
- On the Tax return page, on the panel next to the return, click Tax workpapers & schedules to expand the options.
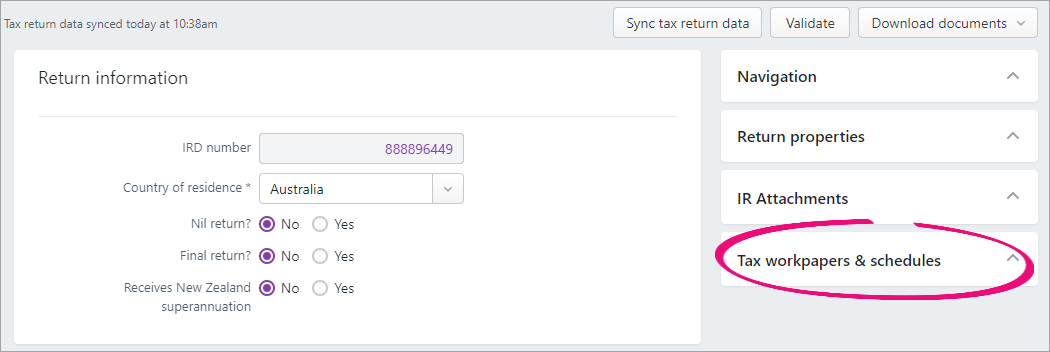 Click the Add workpaper or schedule drop-down and select the tax workpaper or schedule you want to add. 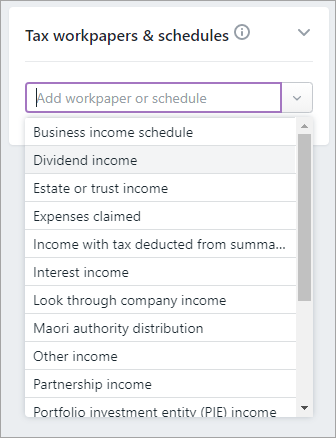
|
| UI Expand |
|---|
| title | To delete a tax workpaper or schedule |
|---|
| To delete a tax workpaper or schedule to a tax return- Go to the Compliance > Compliance list page and open the IR3 tax return.
- On the Tax return page, on the panel next to the return, click Tax workpapers & schedules to expand the options.
 - Next to the Working for families schedule, click the delete (
 ) icon. ) icon.
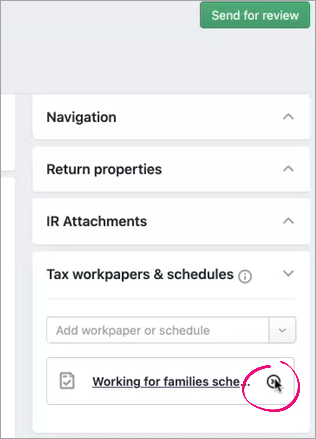 - Click the Delete in the confirmation dialogue.
|
Syncing dataAs you progress through the tax return workflow and statuses, some data will sync between the tax return, tax notices and data reconciliation. But you can sync this data at any time. | UI Expand |
|---|
| title | To sync tax return data |
|---|
| To sync data at any time, click the Sync tax return data button. This button sends information between the tax return, tax notice and data reconciliation to make sure all the data matches. 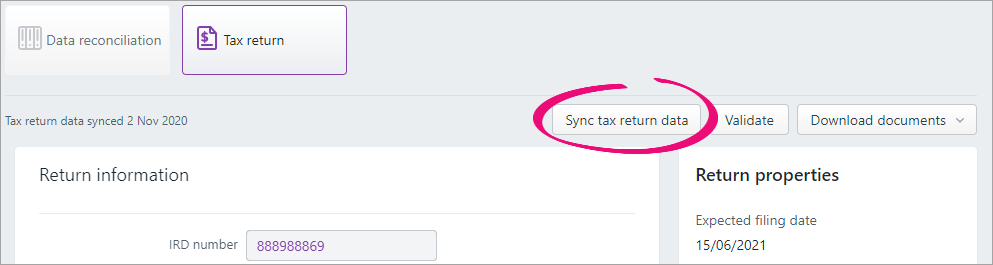
When you click Sync tax return data, the following information is synced from the source to the destination: | From source | Status | Status information | Information updated | To final destination |
|---|
Tax return
| Pending client signature | (Send to client button clicked). You can trigger this to happen sooner, while in draft, by clicking the Sync tax return data button. | - The transfer information, taxable income, RIT and other tax information from the current year tax return.
| Provisional tax return (must be in progress) | - Draft transactions are created. This happens in the background and is not shown.
| Data reconciliation | | Filed | File the tax return before completing the notice. | | Terminal tax notice | - The provisional tax notice will default to using the RIT from the latest filed return or reconciled assessment. If there's no assessment, the notice will use the unreconciled MYOB RIT transaction from the filed tax return.
- If there's no filed return or assessment in the current year, you can change the basis year, and then manually enter the figures.
| Provisional tax notice | | Data reconciliation | Not applicable | Not applicable | If you add an MYOB transaction, this will be considered expected until it's reconciled.
To update the tax return, you must click the Sync tax return data button in the tax return. Otherwise no data will be shared from the tax notice to the tax return.
| Tax return | | - All IRD payments, transfers and refunds until the provisional tax notice due date. Summed up and shown as payments and transfers.
Unreconciled and reconciled IR transactions are included. If any changes are required, we recommend correcting these with IR. Where this isn't possible, you can adjust the tax notice amount using the voluntary adjustment, which allows a negative amount to reduce the tax payment.
| Tax notice (must be in progress) | - IRD assessment transactions only flow through to the tax notice where the assessment transactions are reconciled. The latest reconciled assessment is used in the tax notice calculation.
| | Provisional tax notices | Any status | To update the tax return, you must click the Sync tax return data button in the tax return. Otherwise no data will be shared from the tax notice to the tax return. | - Provisional tax amounts and due dates.
- Provisional tax method.
- Use of Money Interest (UOMI).
| Tax return |
It's a good idea to click Sync tax return data if you've made changes to the tax return, tax notice, or have new transactions to reconcile, that could change your client's terminal tax payable or refundable. You can also click Sync tax return data for transferring credits between returns. For example, if you want to transfer credits from an IR526 to IR3. |
Validating a tax returnAlthough we check for errors at an individual field level as you complete the tax return, there are errors that we can't detect until you've finished filling in the tax return. So before sending it to your client, click the Validate button as a final check to ensure the tax return has been completed according to the Inland Revenue rules and legislation. This check looks at the tax return and attachments as a whole and takes into consideration the overall business logic. | UI Text Box |
|---|
| You can see a list of validation errors and warnings here. |
| UI Expand |
|---|
| title | To validate a tax return |
|---|
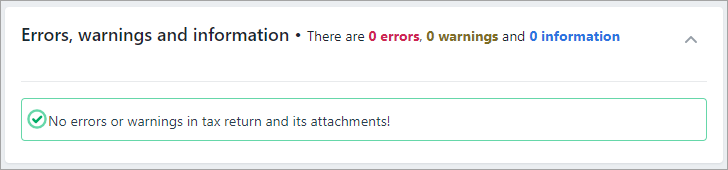
| In the Tax return page, click Validate. The message "Validating... This may take a few minutes" appears. - If there are no warnings or errors, you'll receive the following message at the top of the tax return:
 - If there are errors in the tax return, you'll receive a red alert message instead. For example:

- To resolve these errors, click on the error message and you'll be taken to the relevant field, which will be highlighted in red.
 Resolve the error and validate again to ensure there are no further errors in the tax return. | UI Text Box |
|---|
Warning messages (displayed in yellow) serve as a precaution only. You can still a file return if there are warnings present, but it's a good idea to double-check the return first. |
|
What's next?Once you've completed and validated the tax return, it's time to send the tax return for internal review and approval. This is the final check before you send the tax statement to your client for signing. Even if you don't have a co-worker review your work, you must go through the review and approval steps in order to file a tax return online. See Sending a tax return to a client - NZ for information. |


 Yes
Yes
 No
No
 Thanks for your feedback.