
- Created by KimP, last modified by MiriamA on Sep 03, 2021
You are viewing an old version of this page. View the current version.
Compare with Current View Page History
« Previous Version 54 Next »
https://help.myob.com/wiki/x/2Y8YB
How satisfied are you with our online help?*
Just these help pages, not phone support or the product itself
Why did you give this rating?
Anything else you want to tell us about the help?
Do not delete this page - MYOB Practice navigates to it from within the product
New Zealand only
Before you can prepare a tax return, tax notice or reconcile data for a client, you need to configure their compliance settings.
If you've upgraded Tax on the desktop, then we've imported your client's tax settings into MYOB Practice.
A client must be a Tax client to prepare tax notices and retrieve Inland Revenue data for them.
Settings you change here will apply to MYOB Practice only.
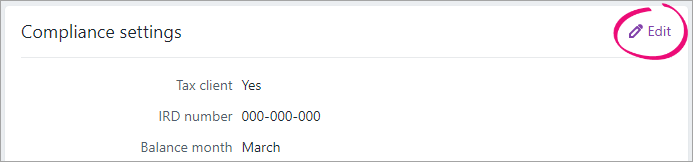
You can also use the Compliance settings to check a client's IRD number. To view the IRD number in the Compliance settings page, select a client on your client sidebar, and click the Settings icon ( ) on the top right of the page.

There are also a couple of other ways that you can check IRD numbers.
If you've changed the GST taxable period, Balance date or Extension in your client's Compliance settings, this won't update existing tax notices and may also affect the tax statement payment summary. To fix this issue, follow these steps and contact support.
To edit Compliance settings
Select a client on your client sidebar, and click the Settings icon (
) on the top right of the page.- Under Compliance settings, click Edit. The fields in the Compliance settings become editable.
Edit the required fields:
- Compliance settings:
- Tax client—Answer Yes if you'll be filing this client's tax return and/or you want to receive IR data for this client.
- IRD number—The client's 8 or 9-digit IRD number.
- Balance month—The last month in your client's accounting year.
GST details:
GST details are imported from AE/AO when you migrate to MYOB Practice. You can edit the details here, but they won't sync back to AE/AO.- GST Registered—Lets you identify which clients are registered for GST.
- Agent prepares GST—Lets you identify if the agent prepares GST for the client.
- GST taxable period—How often you file your GST returns. This value isn't automated or updated from IR.
- Last month of GST period—Use in combination with GST taxable period to help you keep track of when GST returns are due. This value isn't automated or updated from IR.
Entity details—Entity-specific settings.
- Compliance settings:
For Year-based compliance settings, select the year you want to view the client's tax settings.

- Edit the required fields:
- Expected filing date—Any transactions dated after this date won’t be included in the tax return and tax statement.
- Initial provisional tax liability—Answer Yes if this is the first year the taxpayer started to derive assessable income from a taxable activity. Enter the start date of taxable activity.
- Agency—select the tax agent you want to use to file the tax return.
- Return required—answer No if a tax return is not required to be filed this year.
- Extension—answer Yes if your client's due dates for filing returns and paying terminal tax have been extended.
- L letter—answer Yes if this client has been issued an L letter.
- D letter—answer Yes if this client has been issued a D letter.
When finished, click Save.
To update the provisional tax option
We'll create tax notices using the settings you specify here.
If you want to change the settings for tax notice in the current period, you'll need to do so from within the tax notice itself.
Select a client on your client sidebar, and click the Settings icon (
 ) on the top right of the page.
- Scroll until you see the Tax notice settings, then click Edit.
- To change the provisional tax option for the current year, click Edit to open the tax notice.

- To change the provisional tax option for the following year, select the provisional tax option from the drop-down. Tax notices created for the following year will have this option selected by default.
- If you want to pool instalments, select Tax pooling.
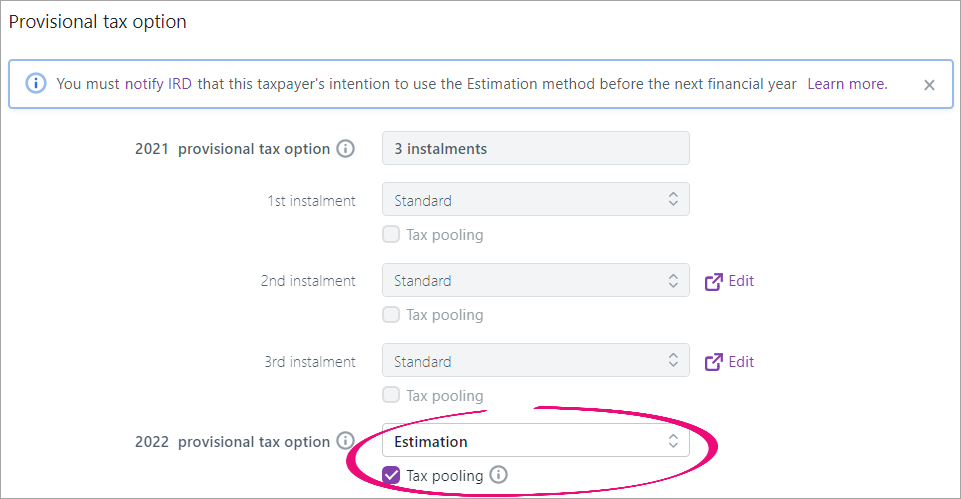
- Click Save to save your changes.
To update the tax notice delivery preference
The Delivery preference is how you'll send tax notices to your client. If you choose portal, when you click Send to client from within a tax notice, you'll have the option to create a task for your client. If you choose Send manually, then you'll need to send the tax notice yourself via email, or other means.
Select a client on your client sidebar, and click the Settings icon (
) on the top right of the page.- Scroll until you see the Tax notice settings, then click Edit.
- Under Delivery preferences, select either:
Send manually if you want to manually download tax notices to provide to your client via other means.
Send task to client to send tax notices to your client via the client portal.
A client must have a portal to select this option.
Send email to client and select the email address you want to send tax notices to.
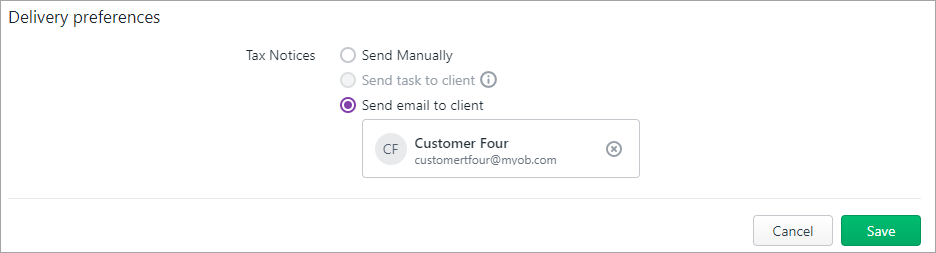
Don't see the email address you want use? You can add or update your client's email addresses in AE/AO.
- Click Save to save your changes.
To change a client's email address
In MYOB AE/AO on the desktop, select the relevant client and open the Address tab.
- Under Phone and Other Details, select the row of the email you want to change.
- Press Delete and select Yes in the pop-up window.
- Under the Description cell, click the blank cell and a drop-down arrow will appear.
- Click the drop-down arrow and select the relevant option.
- Under the Detail cell, enter the new email address. Check that the email address is correct.
- Press Enter to save the new email address.


 Yes
Yes
 No
No
 Thanks for your feedback.