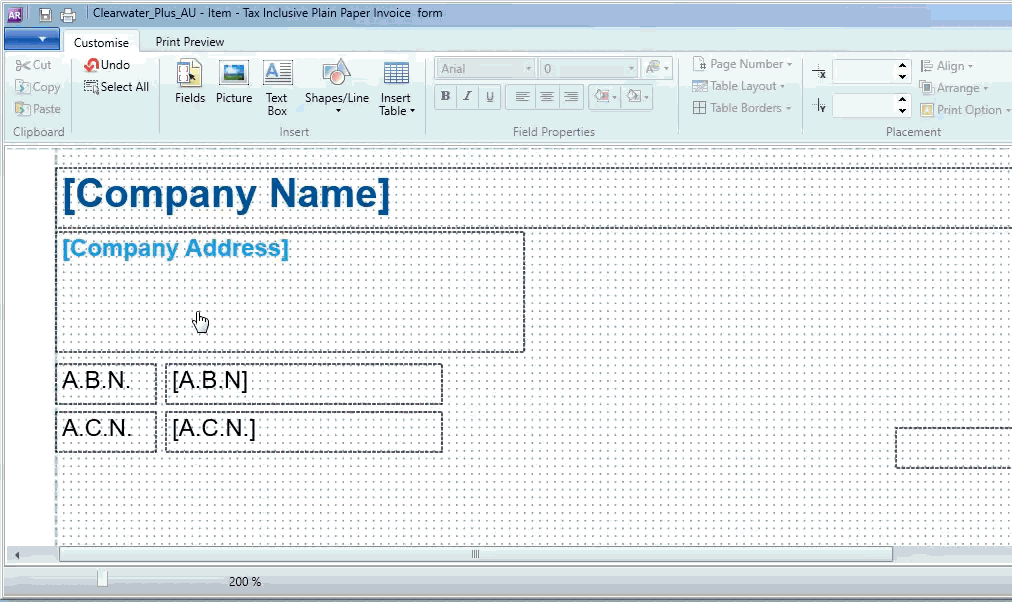
When personalising your forms, use the Customisation tab in the Form window to add text and data fields and change field properties (such as font and colour). 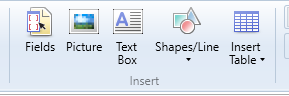
Data fields automatically fill in for you when printed or emailed, such as the name of the customer you're invoicing or the invoice due date. Data field content is drawn from information stored in your company file such as transaction or card details, or details from the Company Information window. When you're customising a form, data fields are identified with square brackets, such as [Company Name]. Text boxes are free-form fields that you type directly into, and will appear exactly the same, every time you print or email the form. For example, you might add a text field to the footer of an invoice that has your refund and returns conditions. | UI Expand |
|---|
| title | To add text to a form |
|---|
| To add text to a form- Open the form you want to add text to.
- In the Customise tab, click Text Box.
- Click and drag the mouse cursor over the area of the form where you want the text field to appear.
- Double-click in the text field and type the text you want to appear.

|
| UI Expand |
|---|
| title | To add a data field to a form |
|---|
| To add a data field to a form- Open the form you want to add data fields to.
- In the Customise tab, click Fields. The Insert Fields window appears.
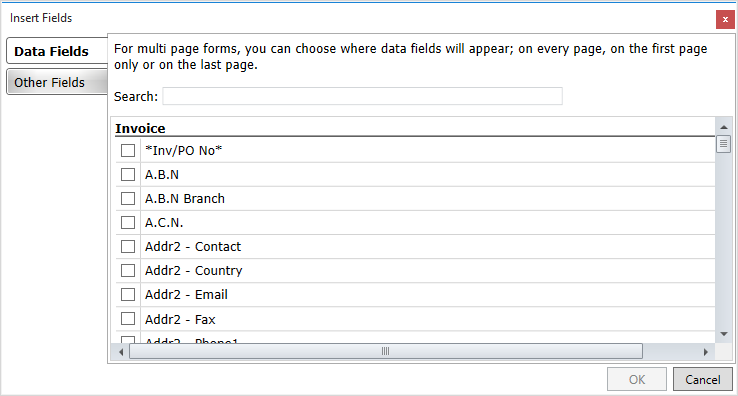 - Select the fields you require by clicking in the column next to them. For a description of each data field, see Fields and columns you can add to forms.
- For some fields you need to select where you want the field to appear when a form has multiple pages. You can choose to show the field on every page, or just at the start (first page) or end (last page).
- When you've finished making your selections, click OK. The selected data fields appear on the form.
- Move the field to the required position by clicking and dragging it, or entering placement coordinates in the Customise tab.
|
| UI Expand |
|---|
| To edit a field- Select the field you want to edit in the Form window.
- Edit the properties of the field using the options in the Customise tab.
- For text fields, you can edit the text by double-clicking in the text field.
- Move or resize the field as required.
|
| HTML |
|---|
<h2><i class="fa fa-comments"></i> Adding text to forms FAQs</h2><br> |
| UI Expand |
|---|
| title | How do I add my accepted payment methods to my invoices? |
|---|
| How do I add my accepted payment methods to my invoices?To display your accepted payment methods on your invoices, you can add a text field which contains this info. See To add text to a form above. Or, you can create a comment containing your accepted payment methods, then choose this comment when recording your sale. You can also modify your invoice form to ensure the comment field is sized and positioned according to its content, for example you can position the comment field at the bottom of the invoice and enlarge the field to span the page. Whichever method you use, make sure you select the modified form (containing your accepted payment methods) when you email or print your invoices. |
| 
 Yes
Yes
 No
No
 Thanks for your feedback.